Auto-Switching Cameras
Switcher Studio's auto-switching feature allows you to automatically rotate between live sources, including camera angles, screens shared with Switcher Cast, and Remote Guest cameras or shared screens. This feature is especially useful if you are running a production by yourself, or if you want to have continuous camera-switching.
Note: Auto-switching is not meant to be used on an iPhone in horizontal mode.
In this article:
Configuring and Using the Auto-Switch Feature
The video tutorial above and the steps below provide instructions for using Auto-switching without the Preview window.
Step 1: Add sources to your production
Before using auto-switching, connect your cameras and any other sources you plan to use during your production.
Note: Auto-switching will apply to all live sources. You cannot restrict it to only some.
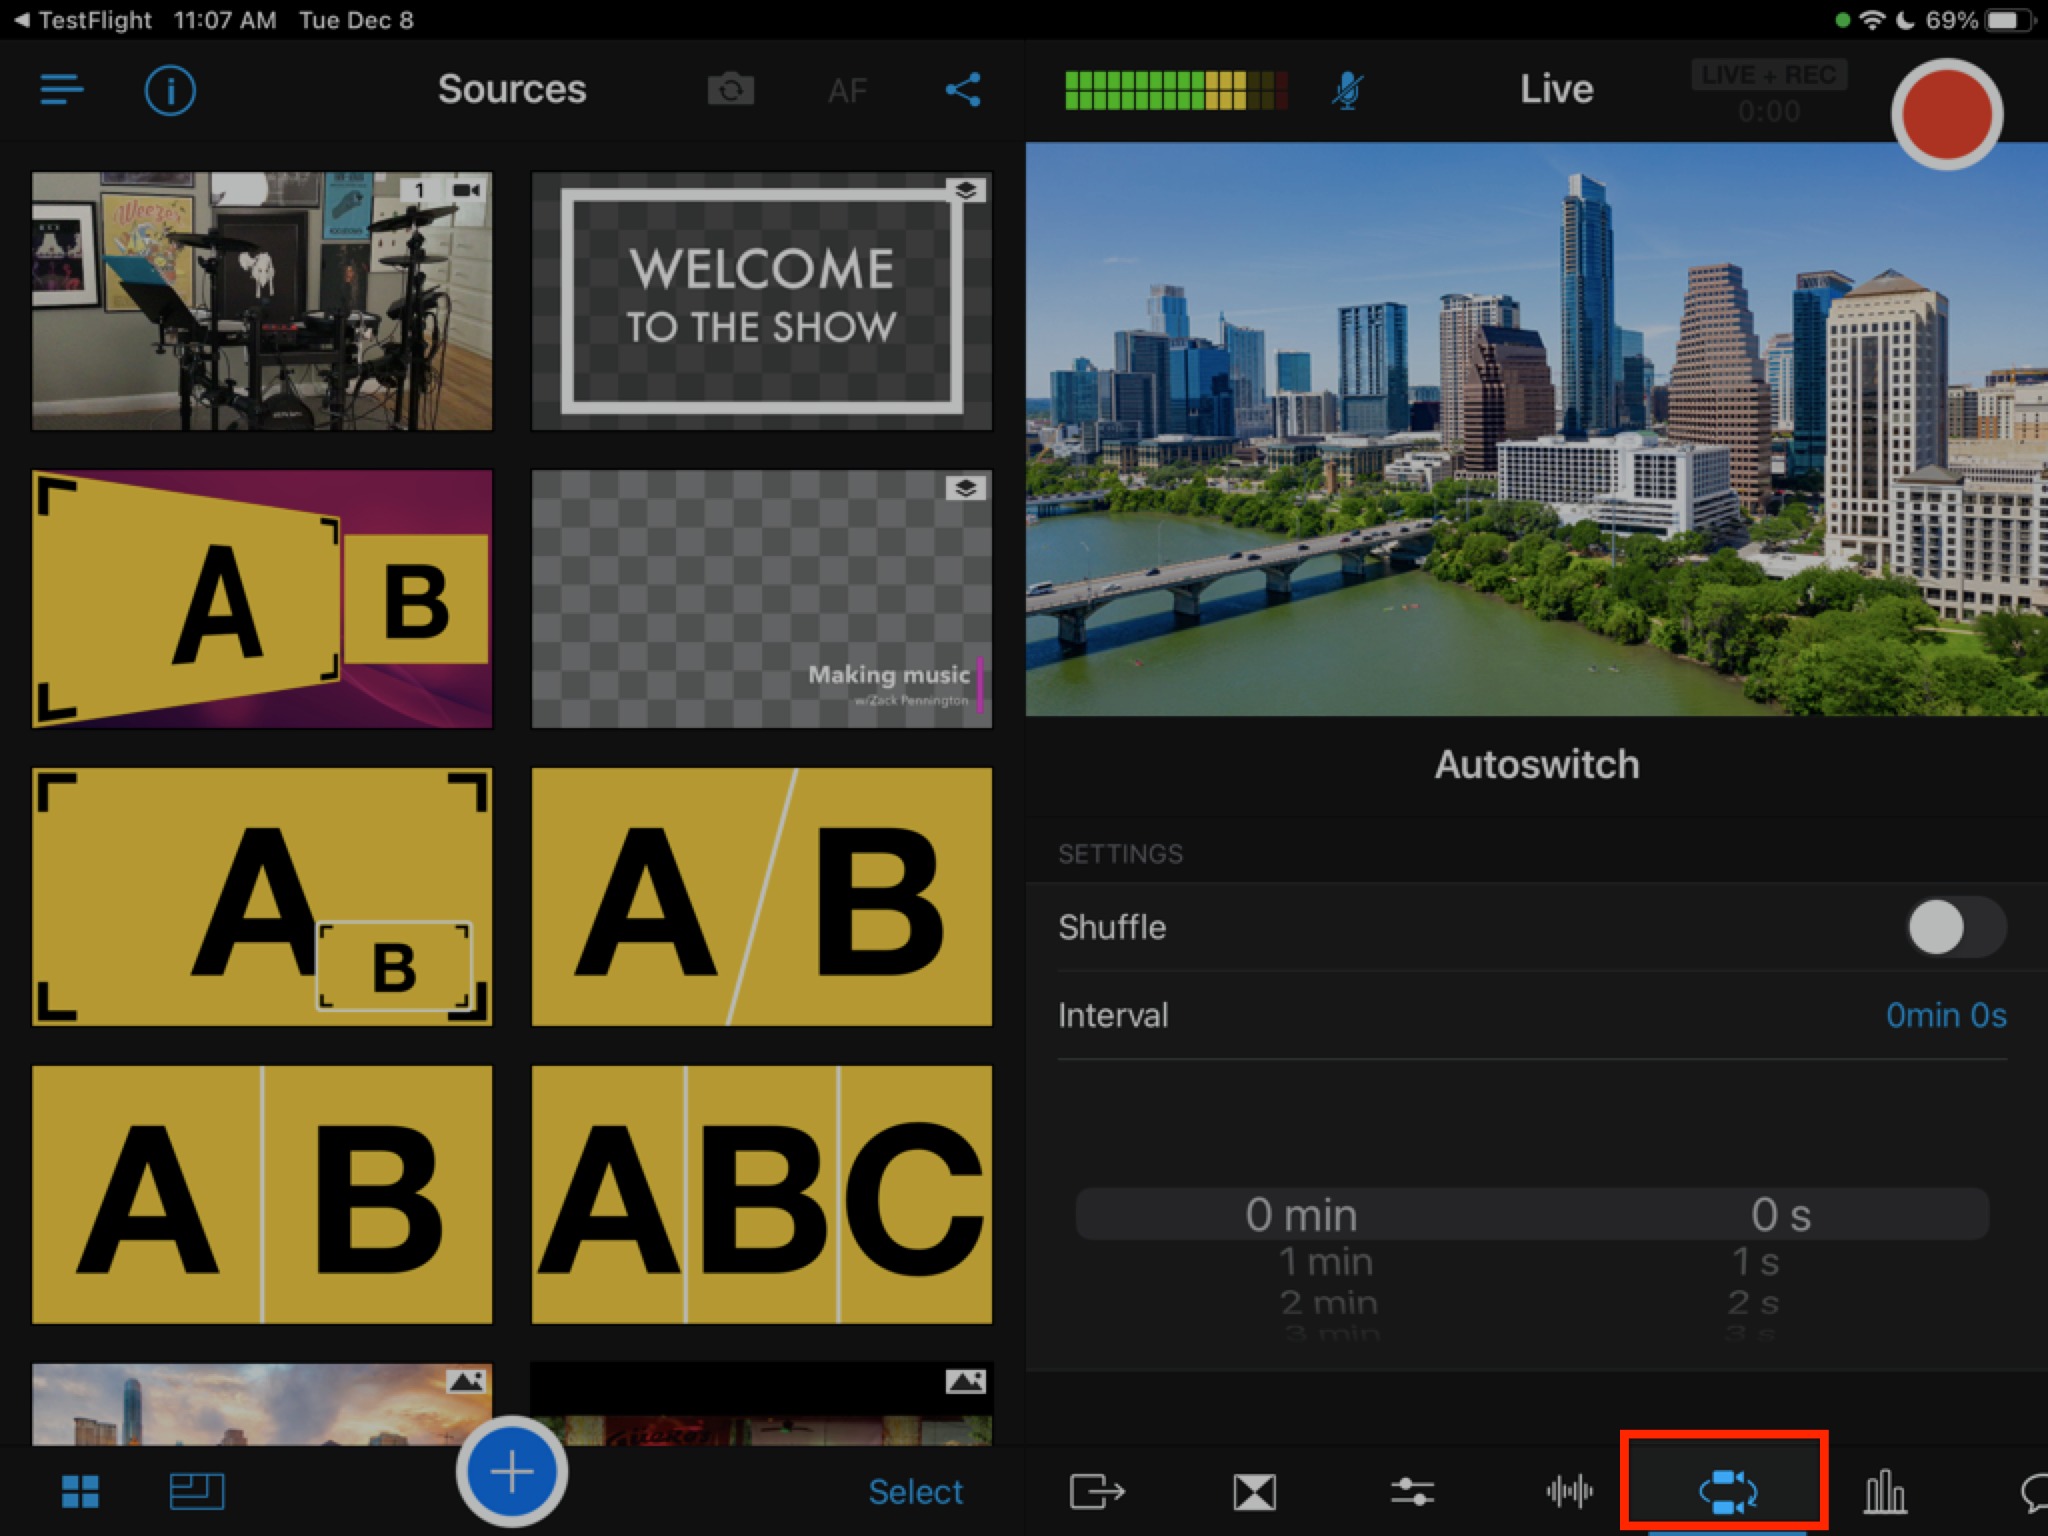
Step 2: Select your auto-switching settings
-
Go to the Auto-switch tab (icon that looks like two cameras in a circle) on your main switcher.
-
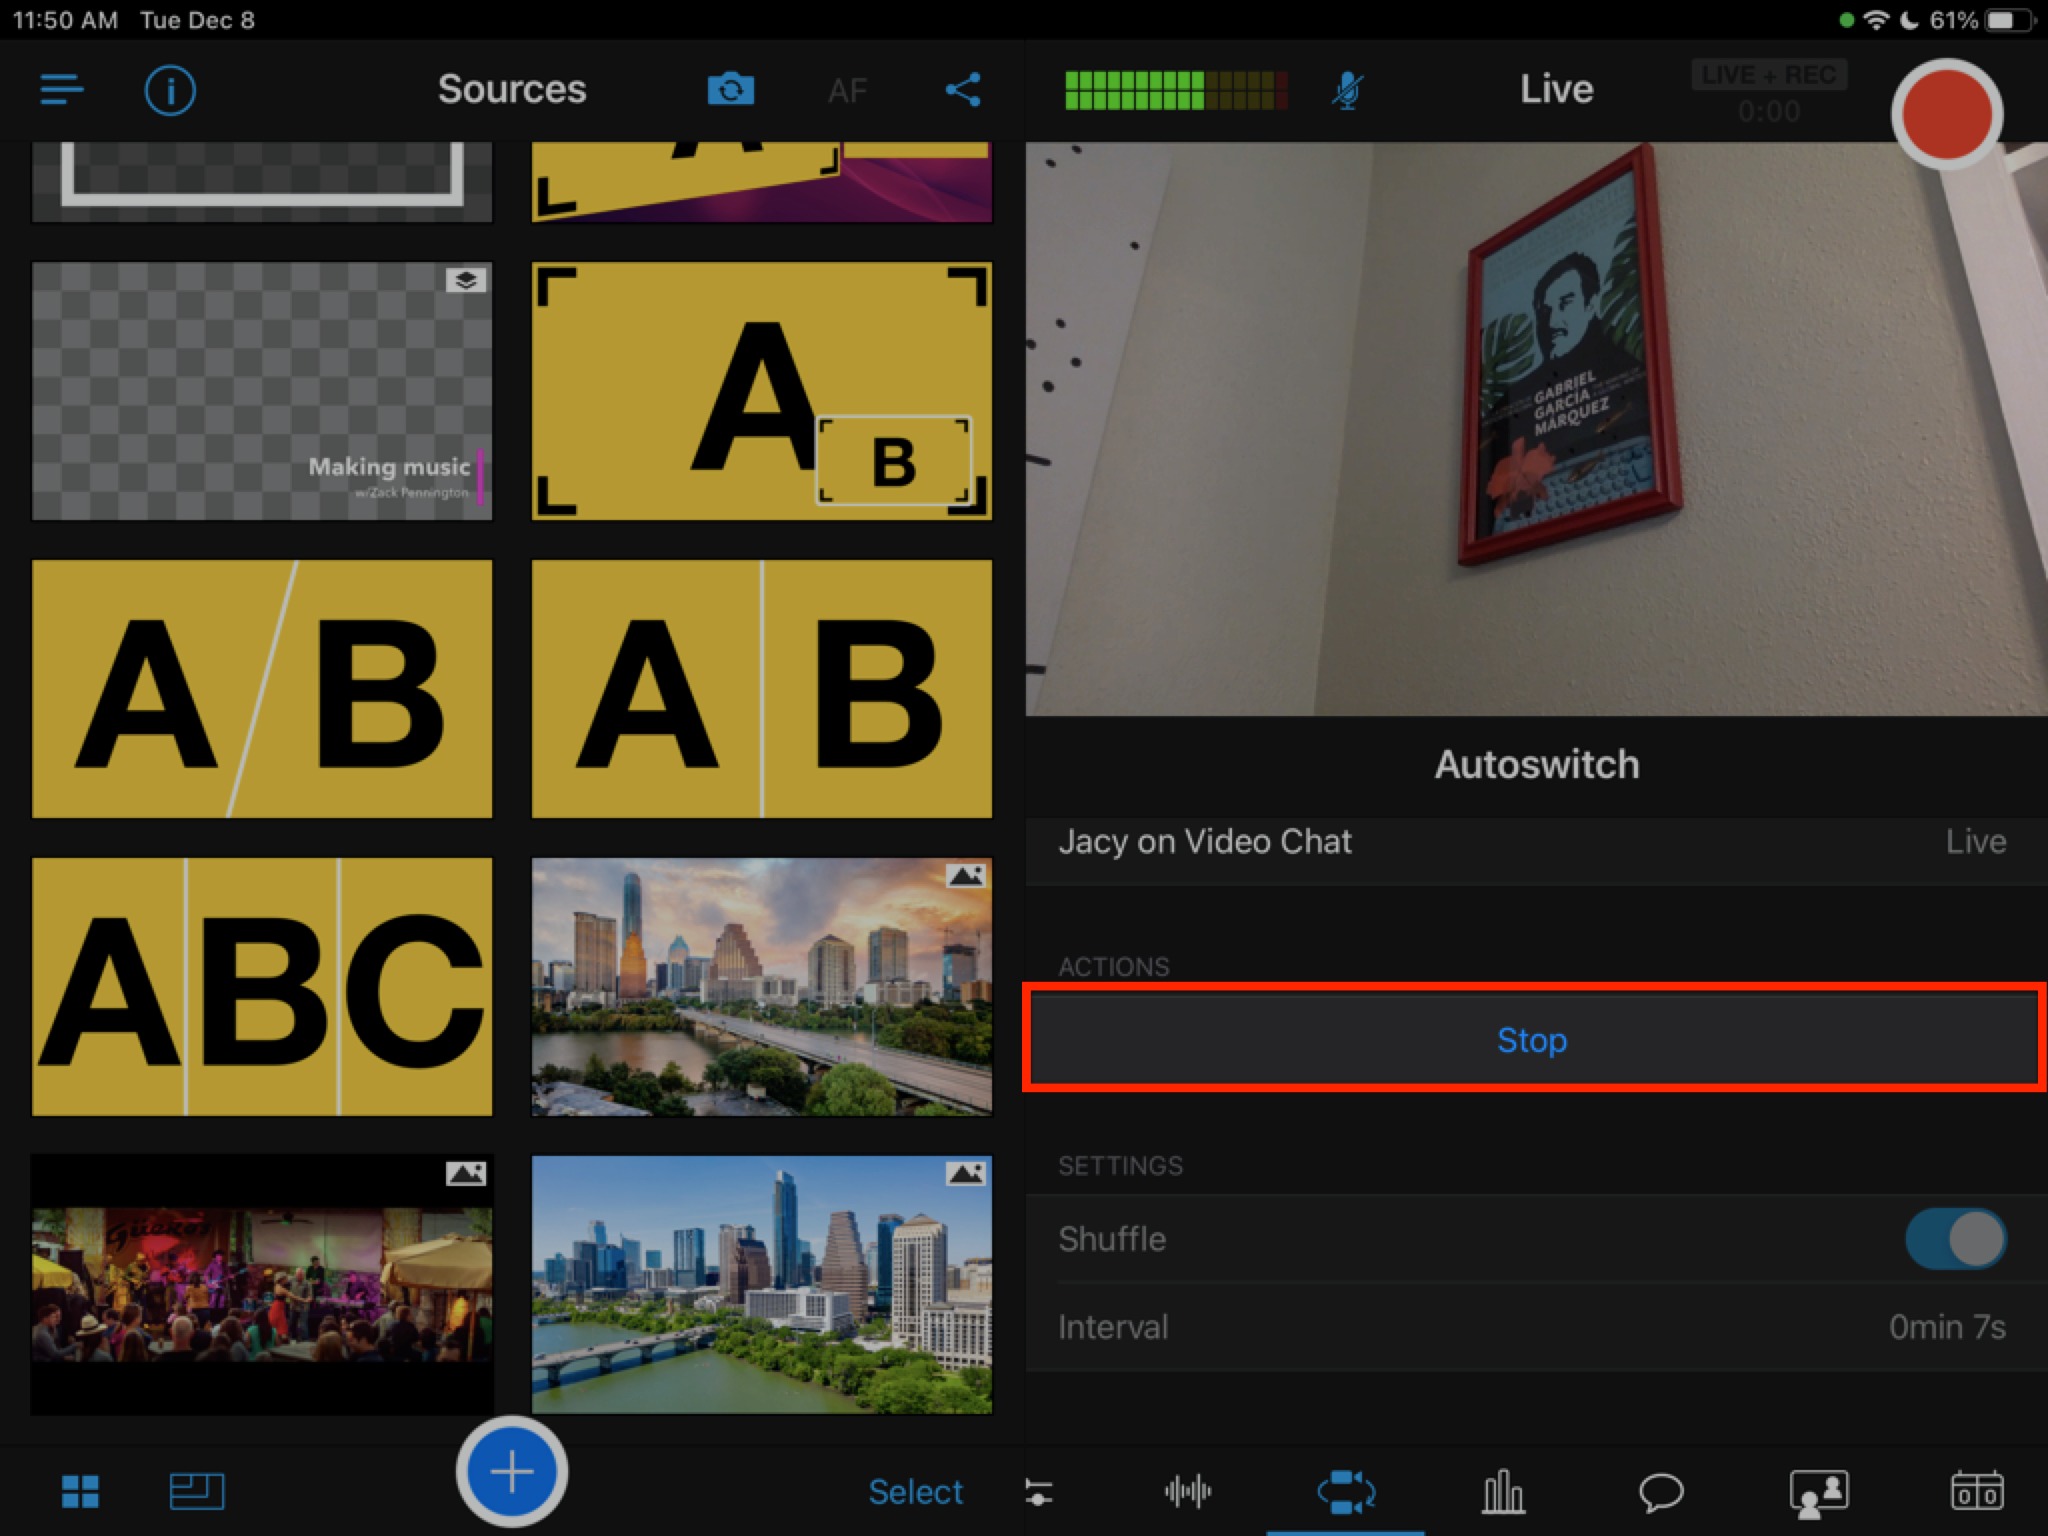
By default auto-switching will move through the sources in consecutive order (i.e. the order they were connected to Switcher Studio). Tap the toggle next to Shuffle if you want auto-switching to be random, instead of in consecutive order. When Shuffle is enabled, the button is to the right, and the toggle is blue.

-
Tap Interval to adjust how long each source will remain on screen before the auto-switching occurs. Use the wheel to set a minute and/or second interval.

Step 3: Start auto-switching
-
Tap Start to initiate the Auto-switching feature.

Note: You still need to tap the red button to start recording/streaming if you turn on auto-switching before you begin your production.
Step 4: Stop auto-switching
There are two ways to stop auto-switching:
-
Tap Stop to disable the Auto-switching feature.
-
OR, tap any full-screen asset or source to stop auto-switching and resume manual switching.
Using Auto-switching with the Preview Window
If you prefer to use the Preview window during your production, you can still use Auto-switching. Follow steps 1 and 2 above to choose your Auto-switching settings.
When you are ready to begin using the feature:
-
Go to the Auto-switching tab and tap Start.
Auto-switching will begin and continue, until you do one of the following:
-
Tap Stop in the Auto-switching tab.
-
Or push a full-screen asset or single camera view from the Preview window to the Live window.
Auto-Switching Alternatives
If you would like to remotely switch cameras, you can connect a bluetooth keyboard to your main switcher to switch between angles. For more information, check out the Bluetooth Keyboard Camera Control article.