Using Switcher Studio as a Webcam
Switcher as a Webcam is a feature that is powered by an integration with Camo, which makes it easy to push the Switcher Studio live view into third-party video conferencing tools like Zoom, Google Meet, Microsoft Teams, WebEx, and more.
In this article:
What is Camo?
Camo, an app created by the software company ReIncubate, makes it easy to use an iPhone or iPad as a webcam. The cameras on iOS devices are significantly better than webcams, so using Camo leads to higher quality video calls.
The Switcher Studio Camo integration uses Camo's technology to turn Switcher into a webcam, which means you can add Switcher Studio as an audio/video source for video call apps and browsers.
There is no additional cost for using the Camo integration with Switcher Studio, and you do not need to install the Camo iOS app. The Camo functionality exists inside of the Switcher Studio app.
Supported operating systems for Camo are MacOS and Windows 10.
Installing the Camo App on Your Computer
Follow the instructions below for the type of computer you will be using Switcher as a Webcam with.
Jump to:
Installing the Camo App on Your Mac
You should only have to install Camo on your Mac once. Before installing Camo, make sure you are running the latest versions of MacOS:
-
Go to System Preferences > Software Update
-
If there is an OS update available, click Upgrade Now and follow the prompts.
To download and install Camo:
-
Download and unzip Camo by clicking here. If the link doesn't work, go to https://reincubate.com/camo/ and click Download for MacOS.
-
Double-click the Camo Studio icon in your Downloads folder, and follow the prompts to install it.
Note: Camo Studio will prompt you for several permissions to install. You must allow the permissions in order for the Camo/Switcher Studio integration to work correctly. Camo will move itself to the Applications folder and install a plugin to let video conferencing apps see it.
Once Camo has been installed, it will open on your Mac. When Camo Studio runs for the first time, it will ask if you want it to automatically check for updates. We recommend that you allow it to check for updates. You can close Camo if you are not using it immediately.
Installing the Camo App on Your PC
You should only have to install Camo on your Windows 10 PC once. Before installing Camo, make sure you are running the latest versions of Windows 10:
To download and install Camo:
-
Request access to Camo by clicking here. If the link doesn't work, go to https://reincubate.com/camo/ and click Download for Windows.
-
Go to the email address that you entered for the download, and follow the prompts to complete the download.
-
Double-click the Camo Studio icon in your Downloads folder, and follow the prompts to install it.
Note: Camo Studio will prompt you for several permissions to install. You must allow the permissions in order for the Camo/Switcher Studio integration to work correctly.
Once Camo has been installed, it will open on your PC. When Camo Studio runs for the first time, it will ask if you want it to automatically check for updates. We recommend that you allow it to check for updates. You can close Camo if you are not using it immediately.
Connecting Switcher Studio to Camo
Plug the iPhone/iPad into your computer
Currently, the Camo integration requires a wired connection from the iOS device's charge port to the Mac/PC. The cable you use will depend on the charge port on the iOS device (lightning or USB-C) and the available ports on the computer (USB-A or USB-C).

Note: Using a USB hub can cause video lag and connection issues. Switcher as a Webcam requires connecting the iOS device directly to a computer port.
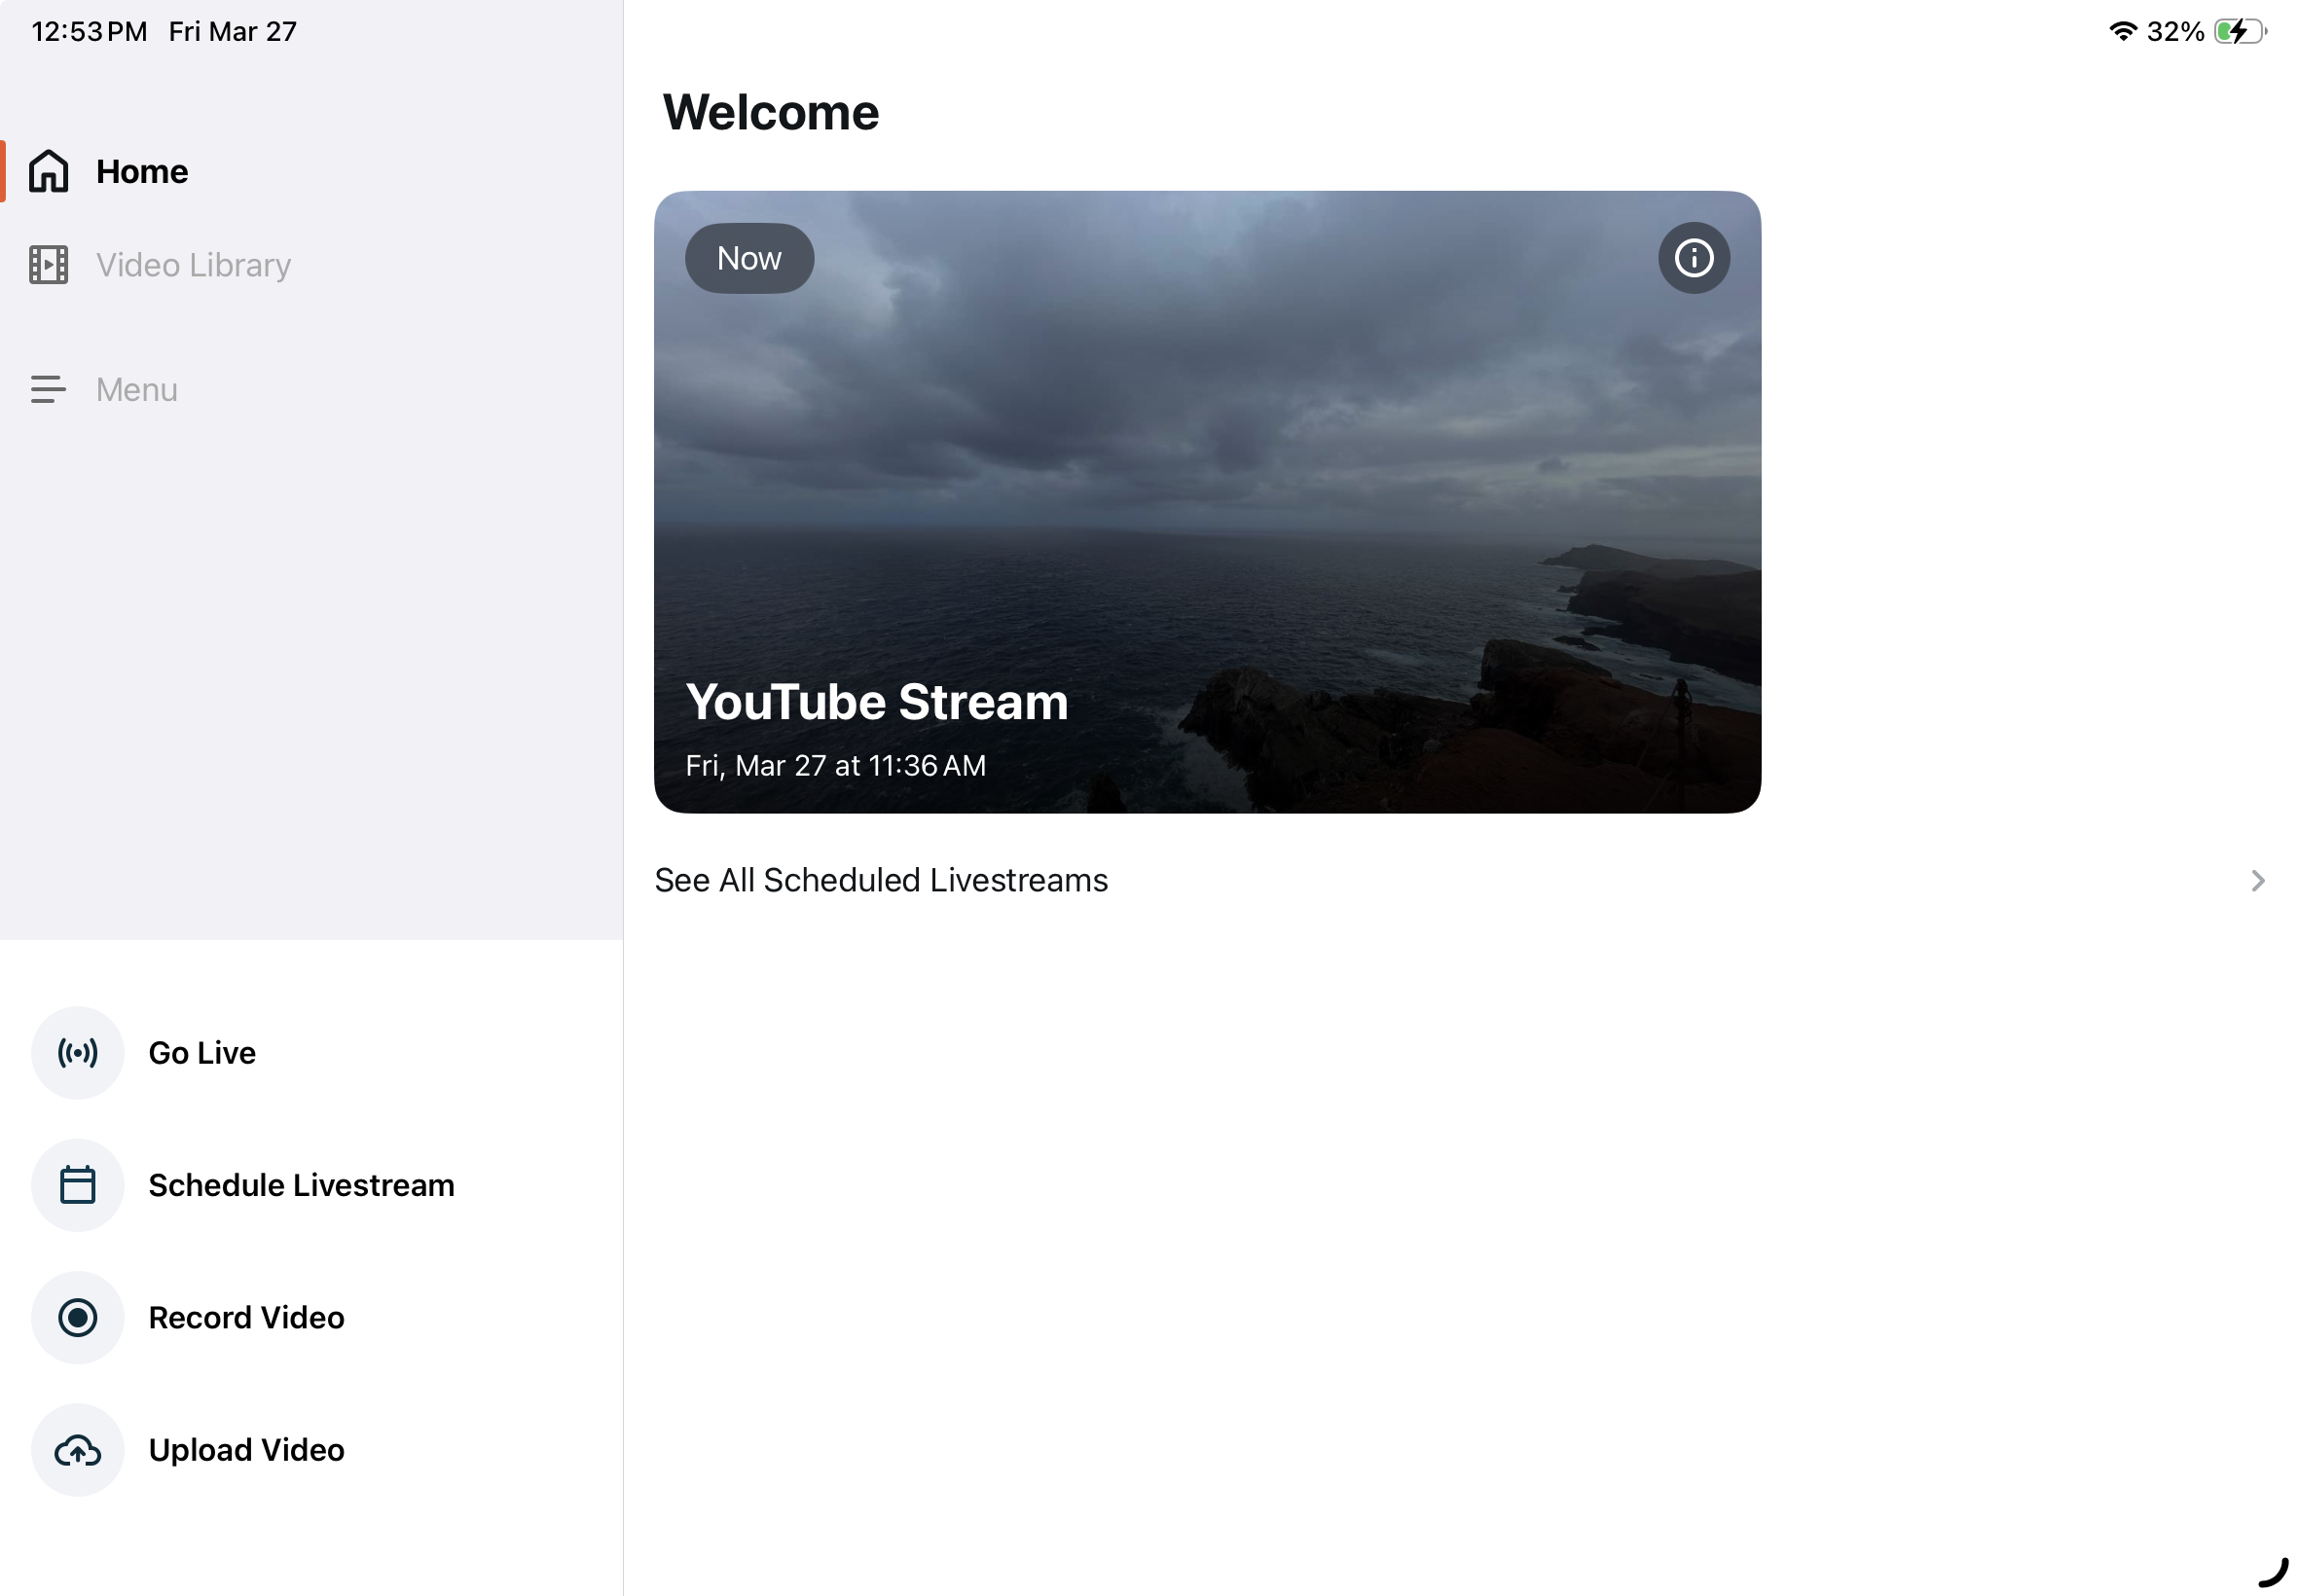
Launch Switcher Studio
- Tap the orange (+) button (iPhone only).
- Tap Go Live
- Tap Enter Studio.
Note: Switcher Studio will not show up in the device list in Camo until you are in the Studio.
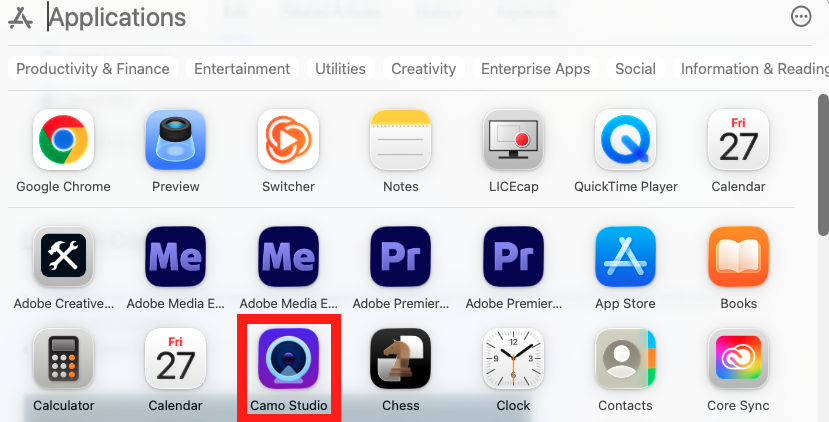
Launch Camo
-
Navigate to Camo Studio on your computer (you can use the search feature if you are not sure where it is located)
-
Open Camo Studio.
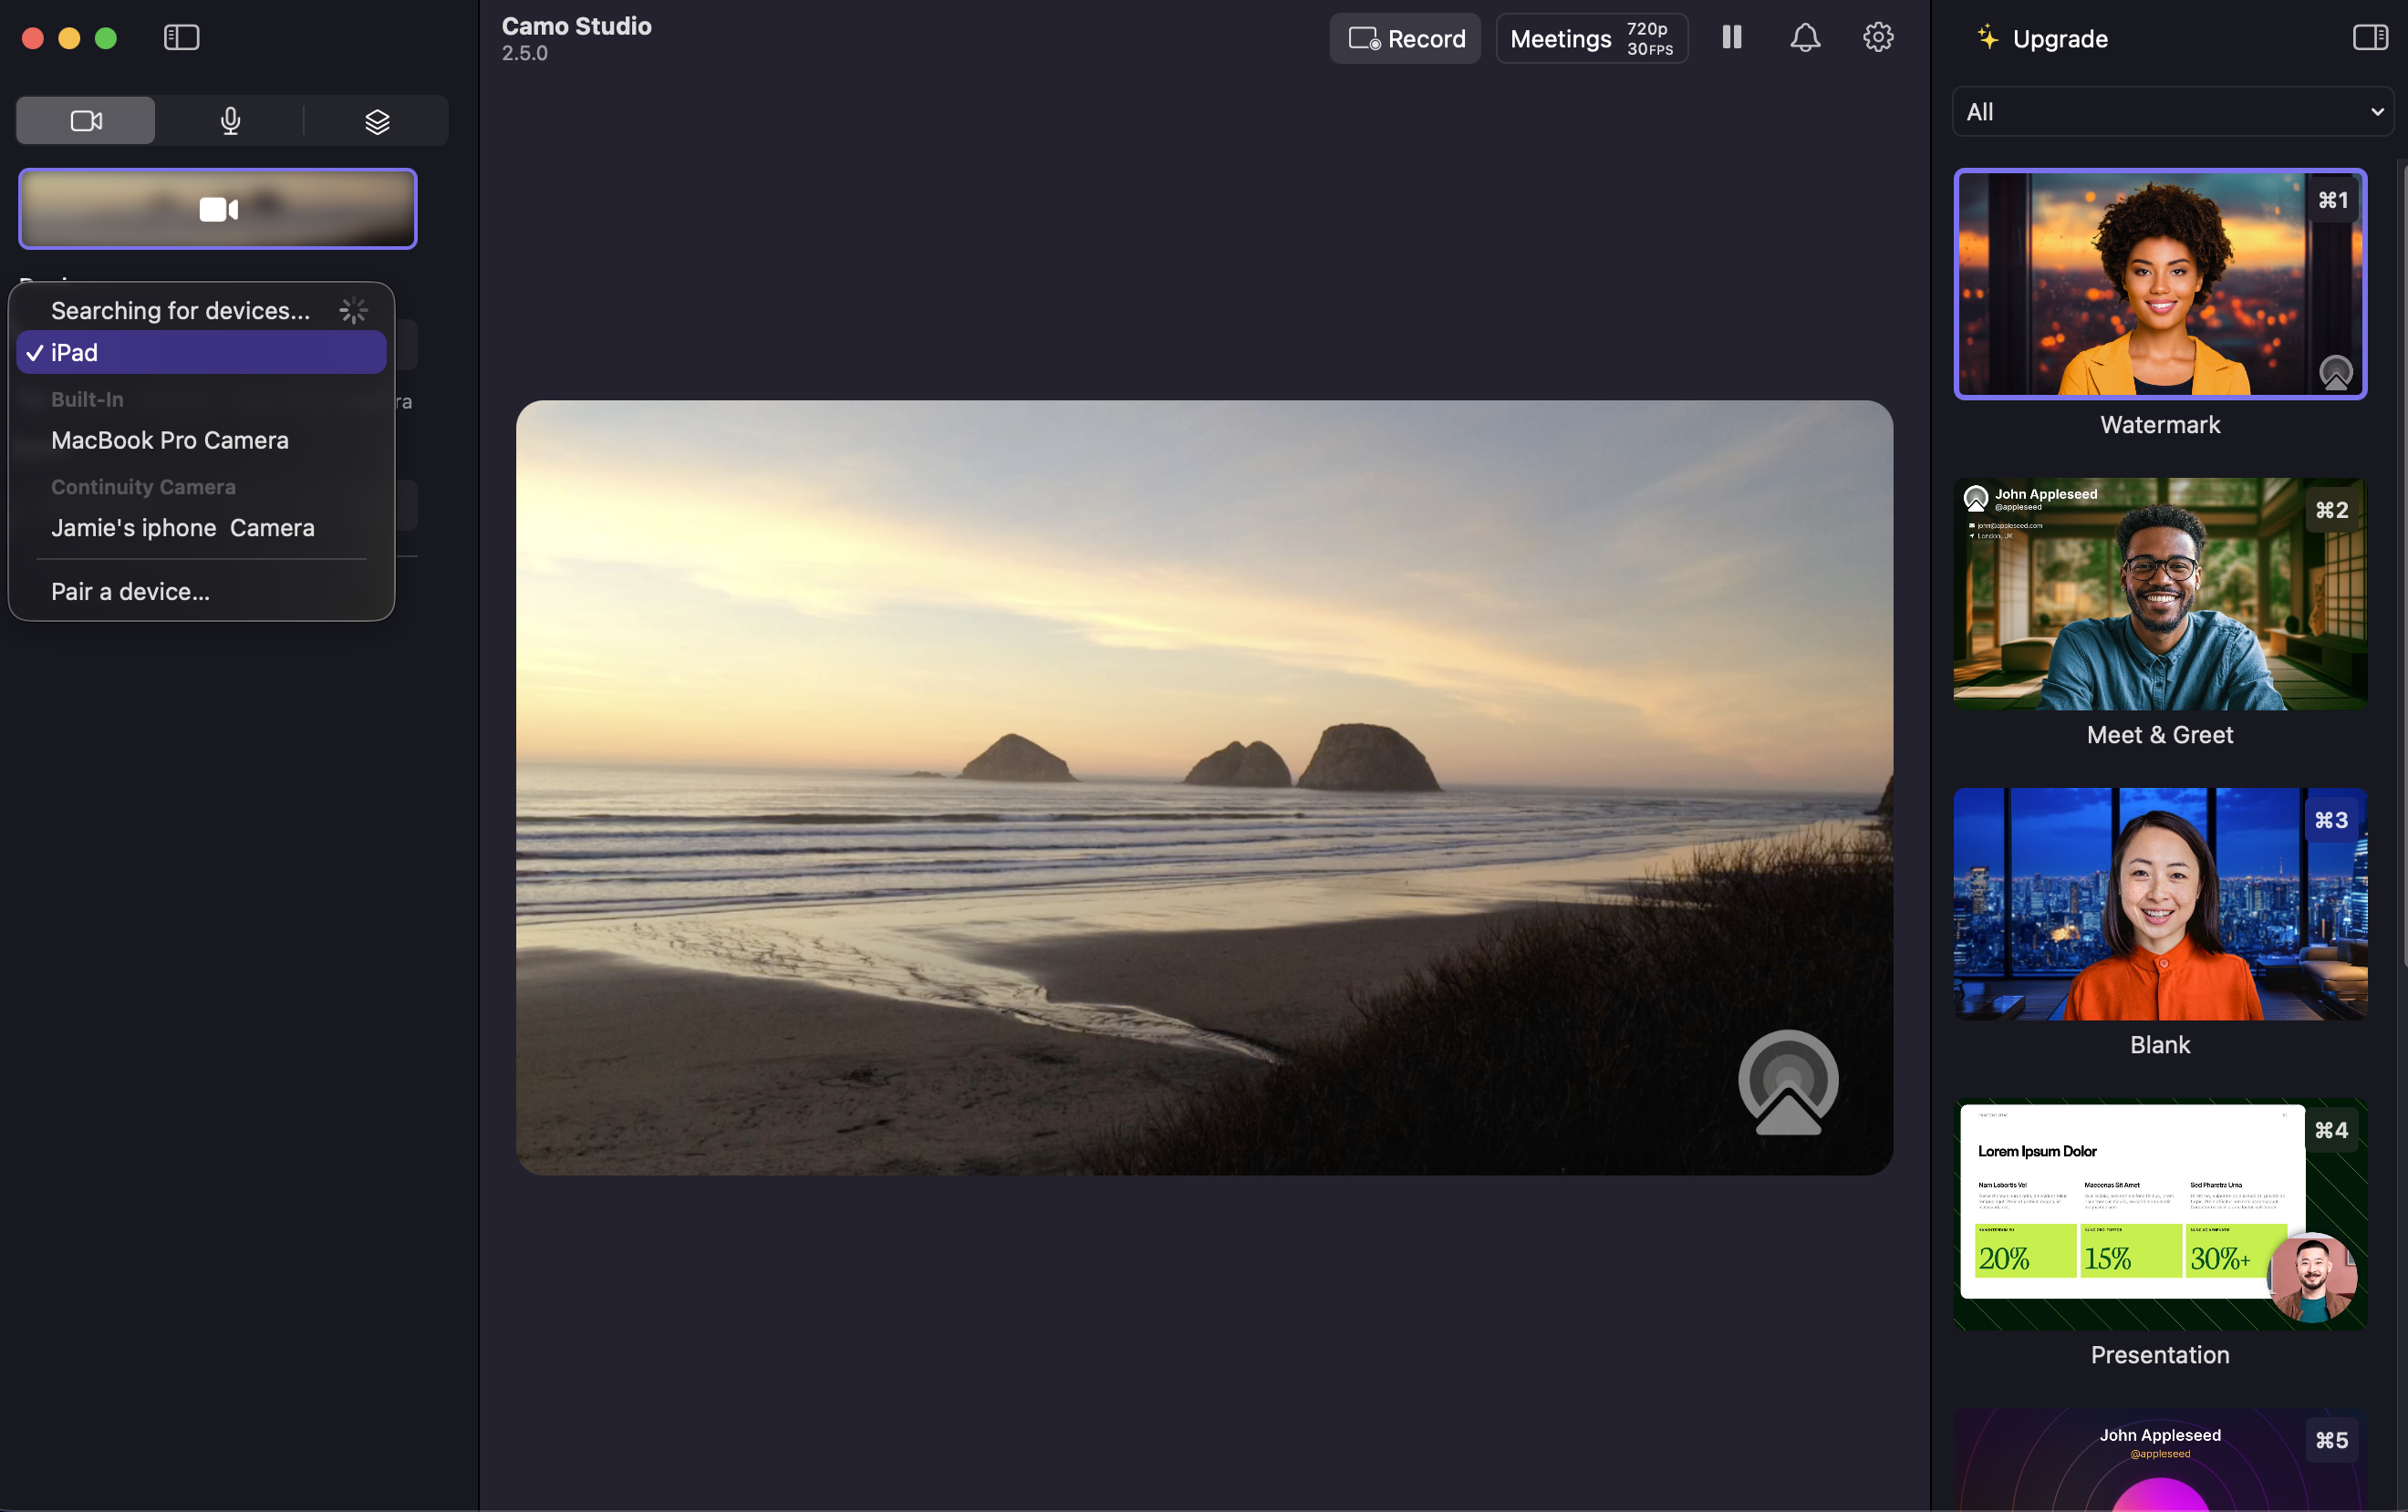
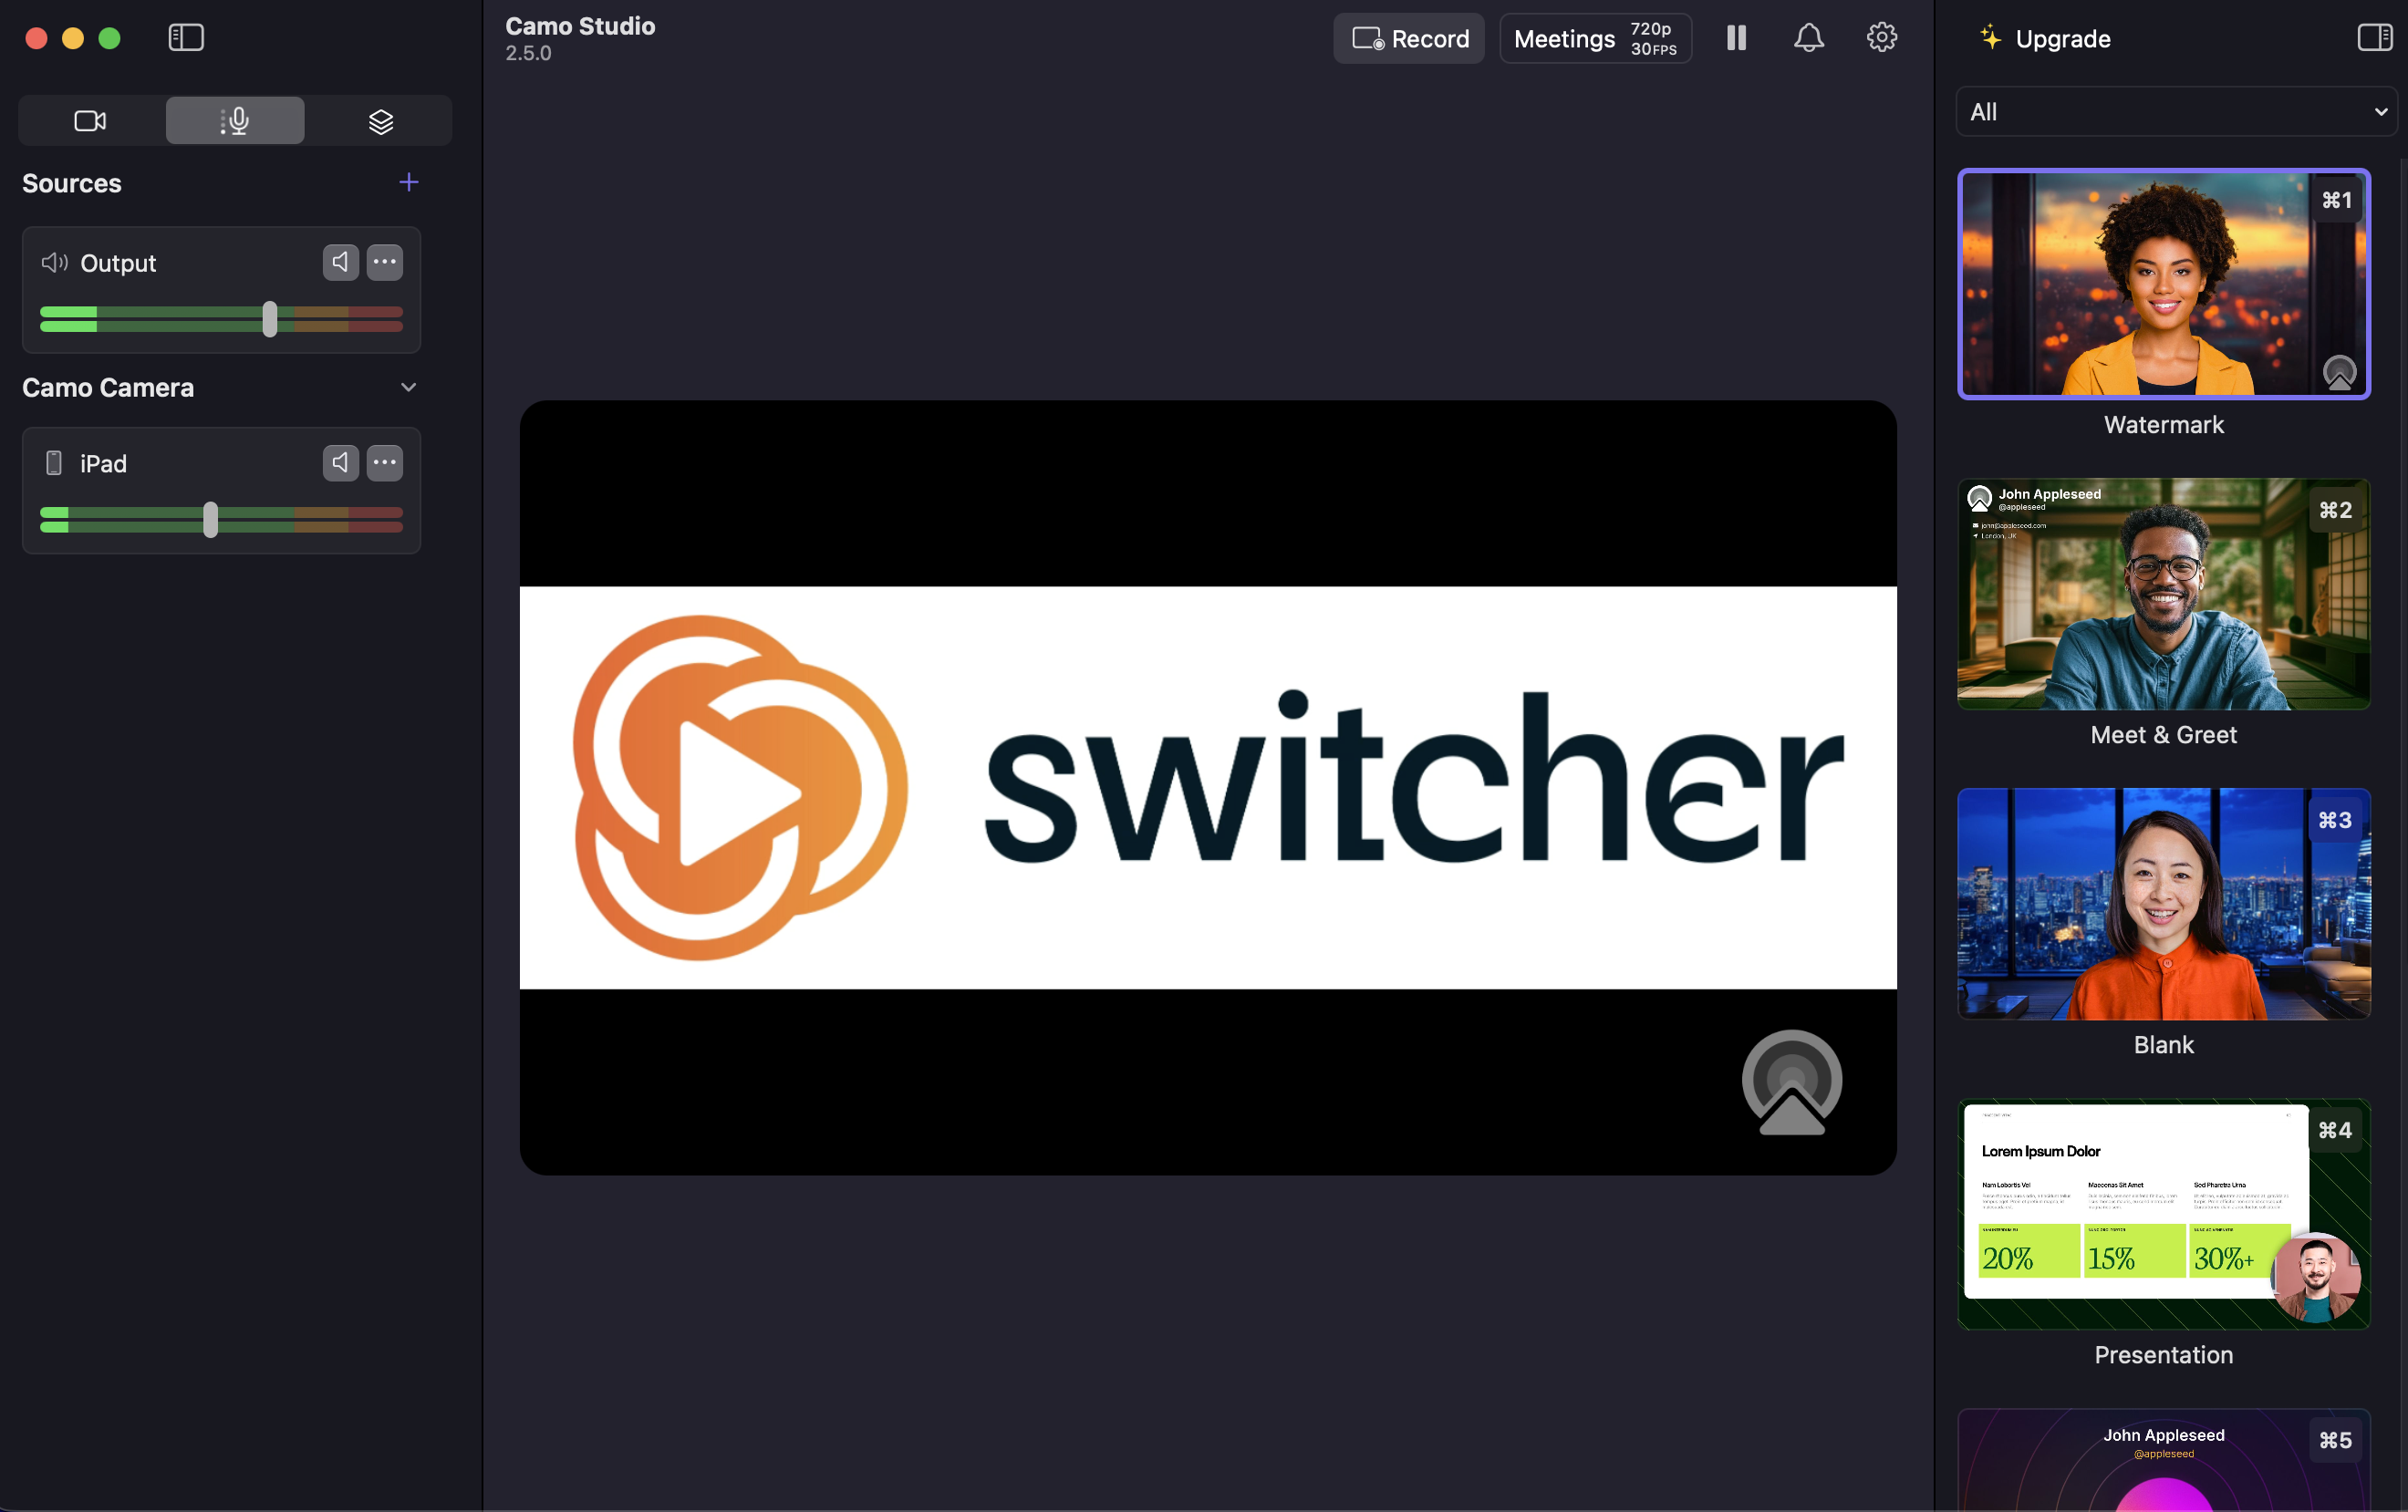
Select the Switcher Studio Device in Camo
-
Under Camera settings in Camo, choose the device running Switcher Studio that is connected to your computer.
-
The live output window of Switcher will now appear in Camo Studio.
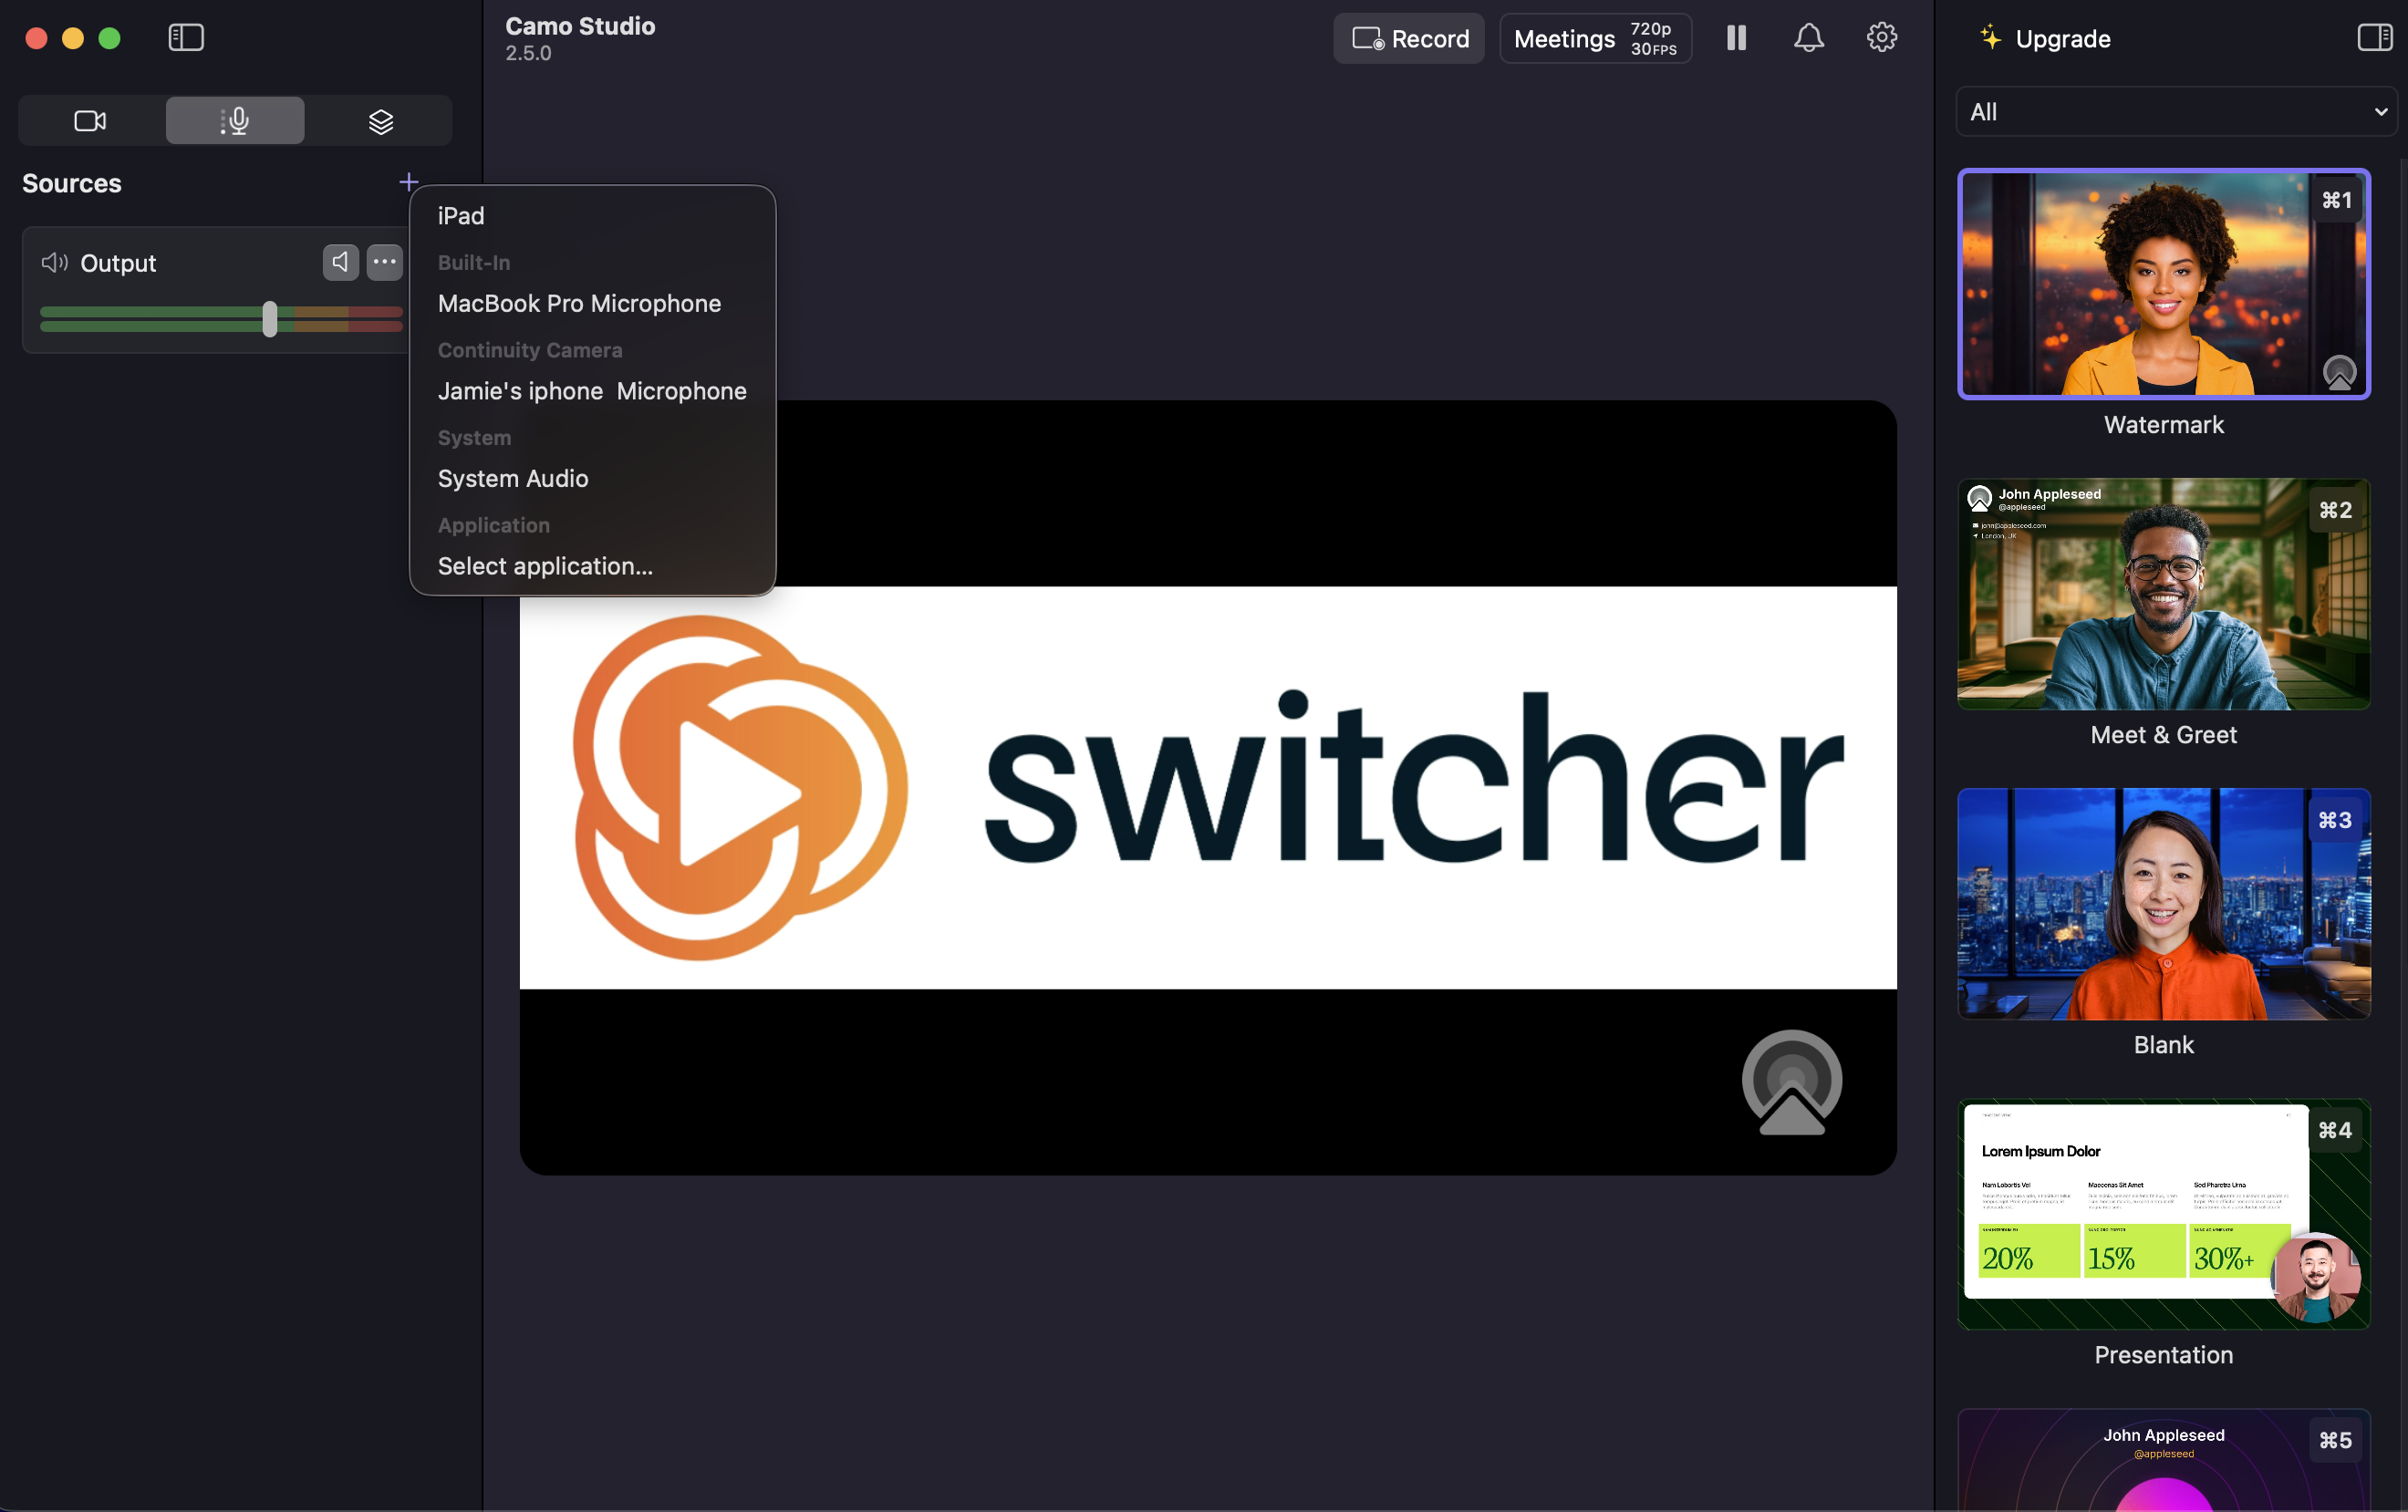
Selecting the Audio Source in Camo
If you would like to use the connected iOS device's built-in microphone, open the Audio Tab in Camo and then add the Switcher device as a source using the (+) button. If you have a computer running MacOS, you can select a USB audio device or built-in microphone as an alternative audio source.
Using Switcher as a Webcam with Video Conferencing Tools
You can use Switcher as a Webcam with any third-party program or browser that is compatible with Camo. You can see the full list of compatible options on Camo's website here.
To use Switcher as a Webcam with a video conferencing app, you'll simply connect Switcher to Camo, open a third-party program that uses a webcam, such as Zoom, Google Meet, Microsoft Teams, WebEx, etc. From there, the exact steps will vary by program, but the overall process is the same:
-
Select Camo Reincubate as the webcam video source.
-
Select Camo Reincubate as the audio source. When using the iOS using Switcher Studio as the audio source, all sound routed through Switcher will be shared (including video assets and sound effects).
-
Highly recommended:
-
Use headphones connected to your computer to hear what's happening on the call. Select the headphones as the speaker/audio output for the call. If you are not using headphones, turn off the computer speakers to avoid echo and audio feedback.
-
If the video conferencing tool mirrors the image, disable the feature.
-
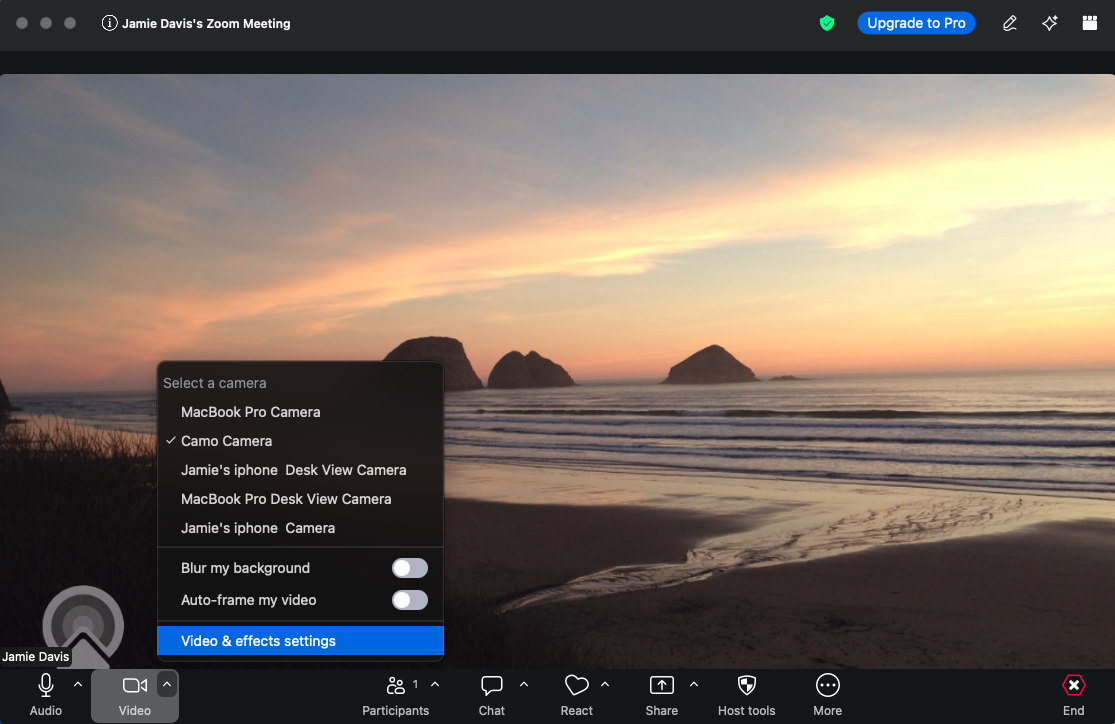
Using Switcher Studio as a Webcam with Zoom
Selecting Camo Camera as the webcam video source
-
Click ^ next to Video
-
Choose Camo Camera as the camera.

-
If there is a red diagonal line across the camera icon, it means the video is turned off. To turn on the video, click the camera icon that says Start Video.
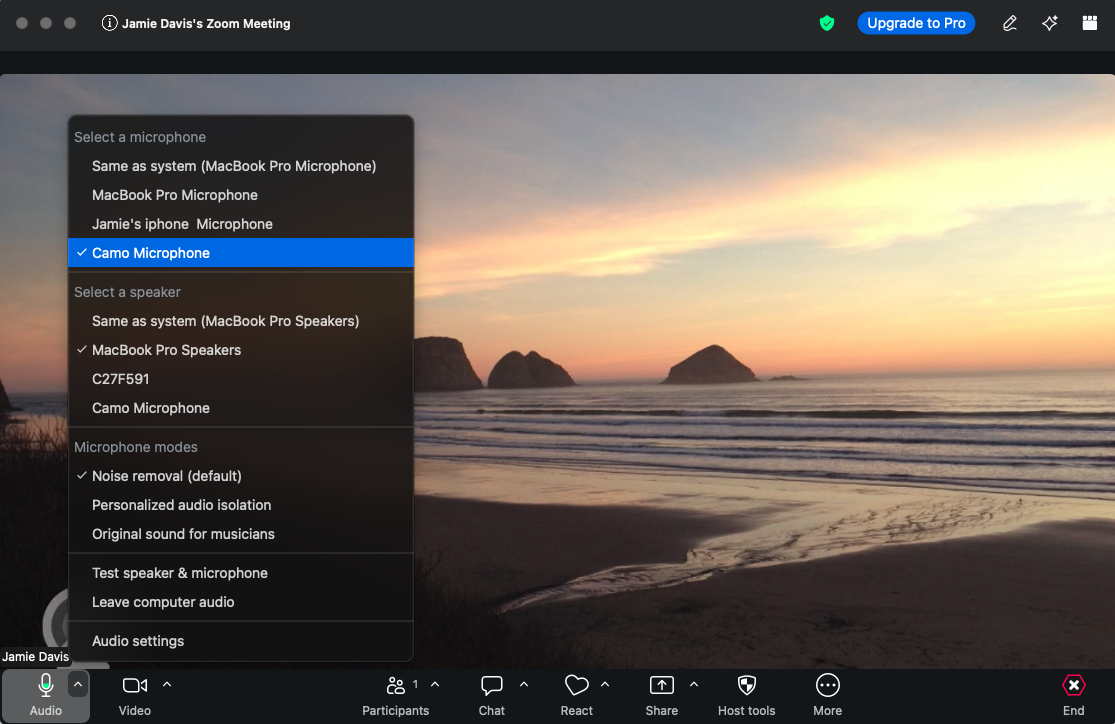
Selecting Camo Reincubate as the webcam audio source
-
Click ^ next to the microphone icon in the lower left.
-
Choose Camo Microphone as the microphone.
-
If there is a red diagonal line across the microphone icon and it says Unmute, it means the audio is muted. To turn on the audio, click the microphone icon. When audio is transmitting, the microphone will turn green.
Selecting headphones as the speaker
We highly recommend wearing wired or Bluetooth headphones connected to your Mac. To set the headphones as the speaker:
-
Click ^ next to the microphone icon in the lower left.
-
Under Select a Speaker, choose your headphones.
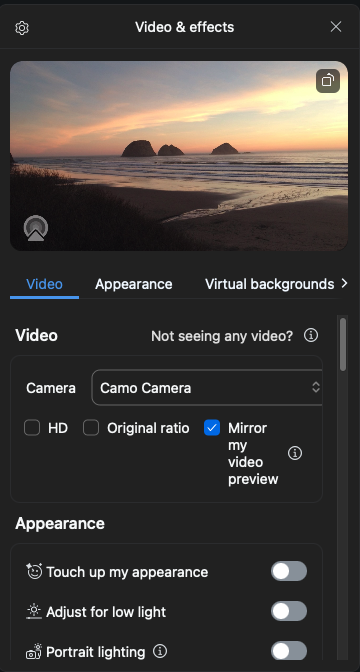
Disabling Mirror Image
By default, Zoom mirrors the source video image. Mirroring the image will cause issues when using Switcher Studio, especially if you are using text or graphics in your production. We recommend disabling mirroring as follows:
-
Click ^ next to Start Video
-
Select Video & Effects Settings.
-
Click the box next to "Mirror my video" to disable it.

Note: Switcher as a Webcam is the easiest way to output Switcher to Zoom. However, if you are unable to use this option due to the requirements, an alternative way to get Switcher into Zoom is by using Airplay. For more information, please go to the Help Center article: Using Switcher Studio with Zoom Video Conferencing
Using Switcher Studio as a Webcam with Google Meet
-
Click the icon with 3 vertical dots
-
Choose Settings

-
Go to Video.
-
Click the dropdown arrow next to Camera

-
Choose Reincubate Camo as the camera.

-
Go to Audio.
-
Click the dropdown arrow next to Microphone.
-
Select Camo Microphone (Virtual).

-
If you are using Headphones, select that option under Audio > Speakers.
-
If the video is off when you're on the main screen, click the camera icon to turn on the camera.
-
If the microphone is muted, click the microphone to turn on audio.
Note: Camo recommends against using Google Meet in Safari.
Audio Support for the Camo / Switcher Studio Integration
There are two primary ways to connect audio when using Switcher Studio with Camo. You can use the audio from the iPad or an audio source on the computer (MacOS only).
Audio from the iPad includes:
-
Built-in mic on the iPad/iPhone
-
Bluetooth mic, such as Airpods, connected to the Pad/iPhone
-
Analog headphone jack if it is available on the Pad/iPhone
Note: It is not possible to use the charge port to connect an external audio mixer.
Audio from the computer includes:
-
USB mixer
-
Internal microphone
-
External microphone
-
Bluetooth mic (i.e. AirPods)
Note: The audio from any assets in Switcher Studio will not play in the web conferencing tool when using a computer audio source. The exception is if you run the audio from the Switcher device into a mixer, and select the mixer as the audio source.
When configuring audio in Camo and the video conferencing tool, it is important to select the audio source in the following manner:
- First, in Camo, select the physical source of your audio, i.e. Tim's iPhone, USB audio, macbook built-in microphone.
- Then, in the video conferencing tool (Zoom, Meet, etc), select Camo as the audio source. This will allow Camo to sync the audio source with the camera feed coming from Switcher to avoid any latency issues when being sent to the video conferencing tool.
Setting the Resolution Output in Switcher Studio
Camo recommends matching the resolution output in Switcher Studio to the video conferencing service's capabilities. When using Switcher as a Webcam, you can set the resolution as follows:
-
Open Switcher Studio.
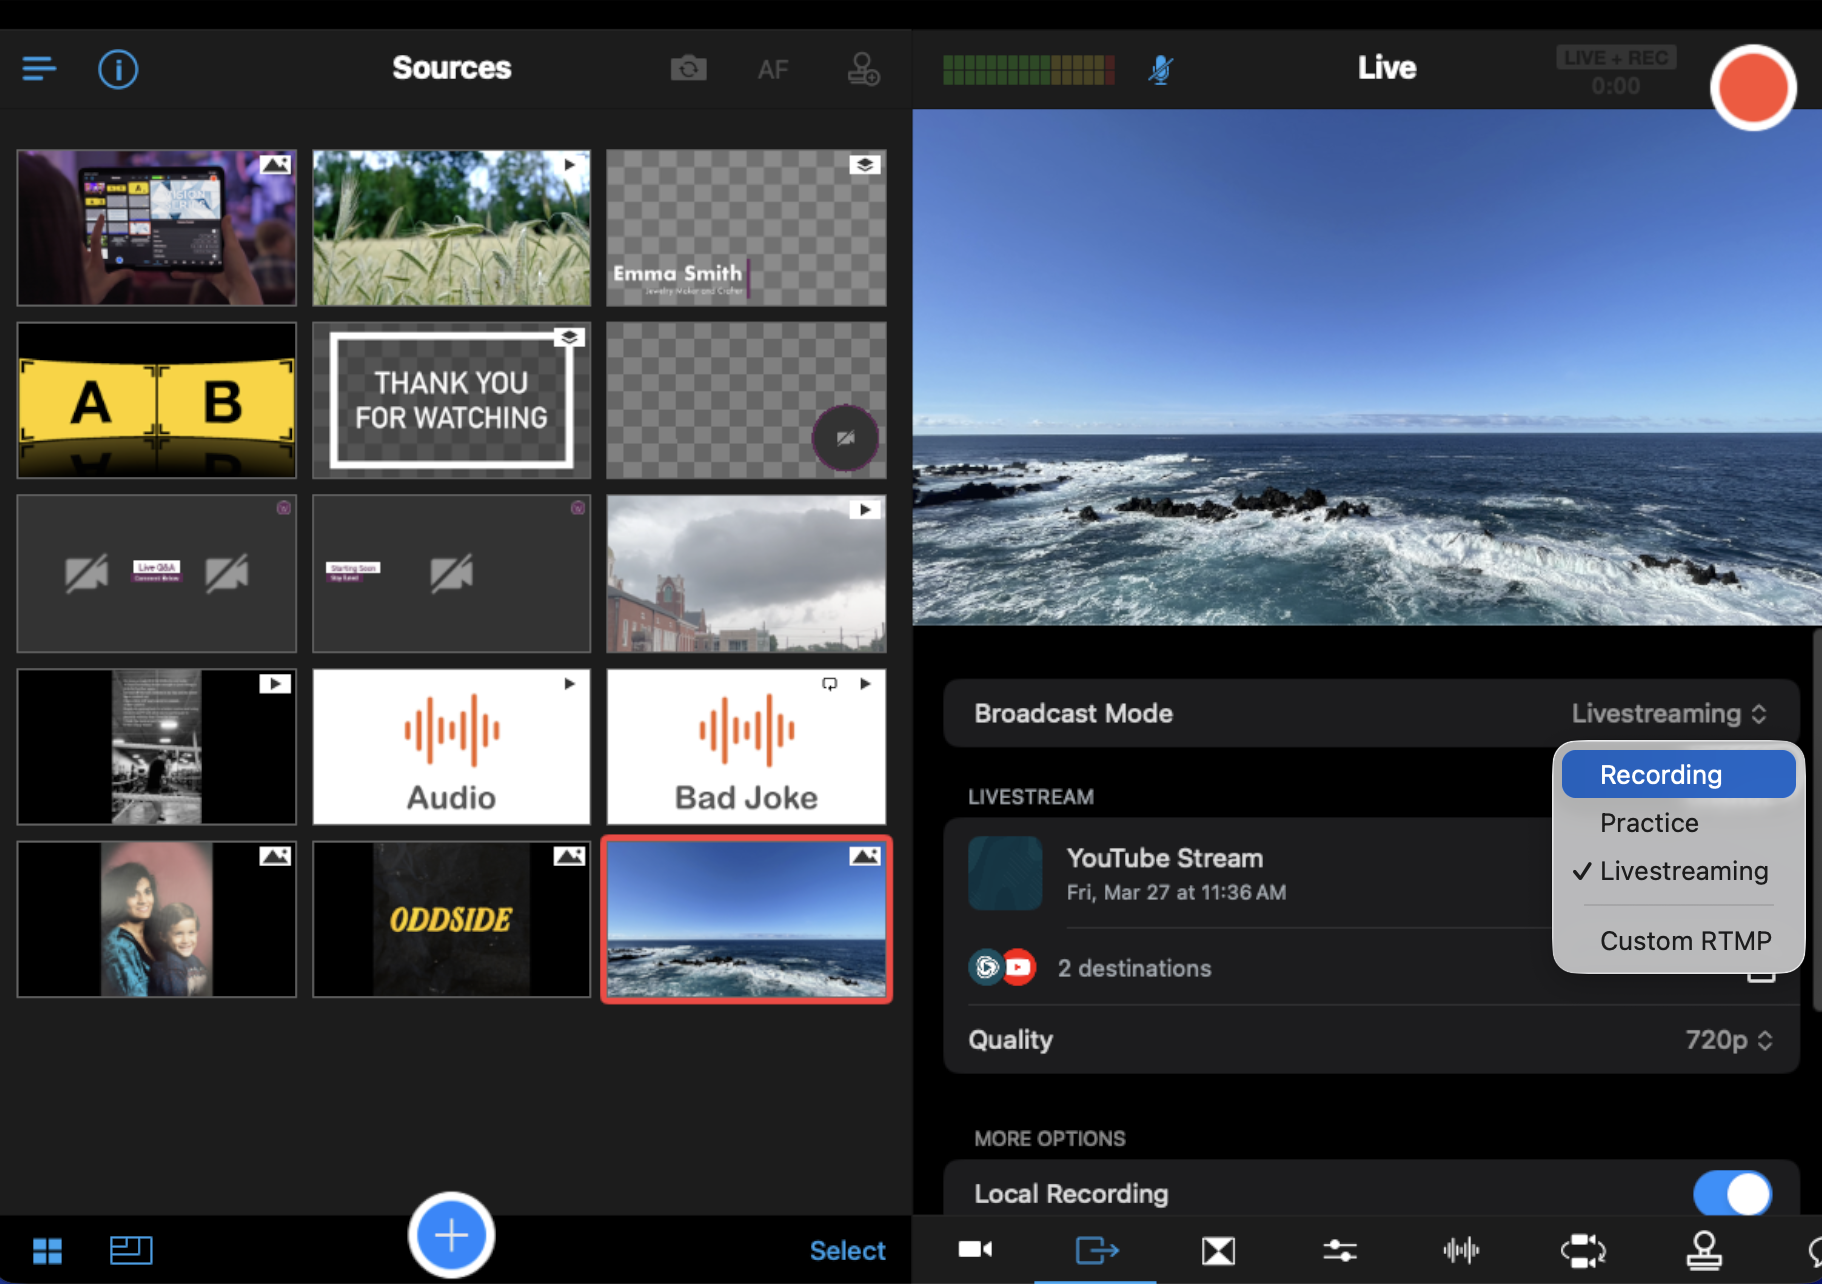
Go to the Outputs tab. (arrow and box icon)
- Change the Broadcast Mode to Recording.
- Use the dropdown menu to select the Quality.
- Adjust to the desired quality setting and choose the Broadcast Mode you would like to use for your next production.
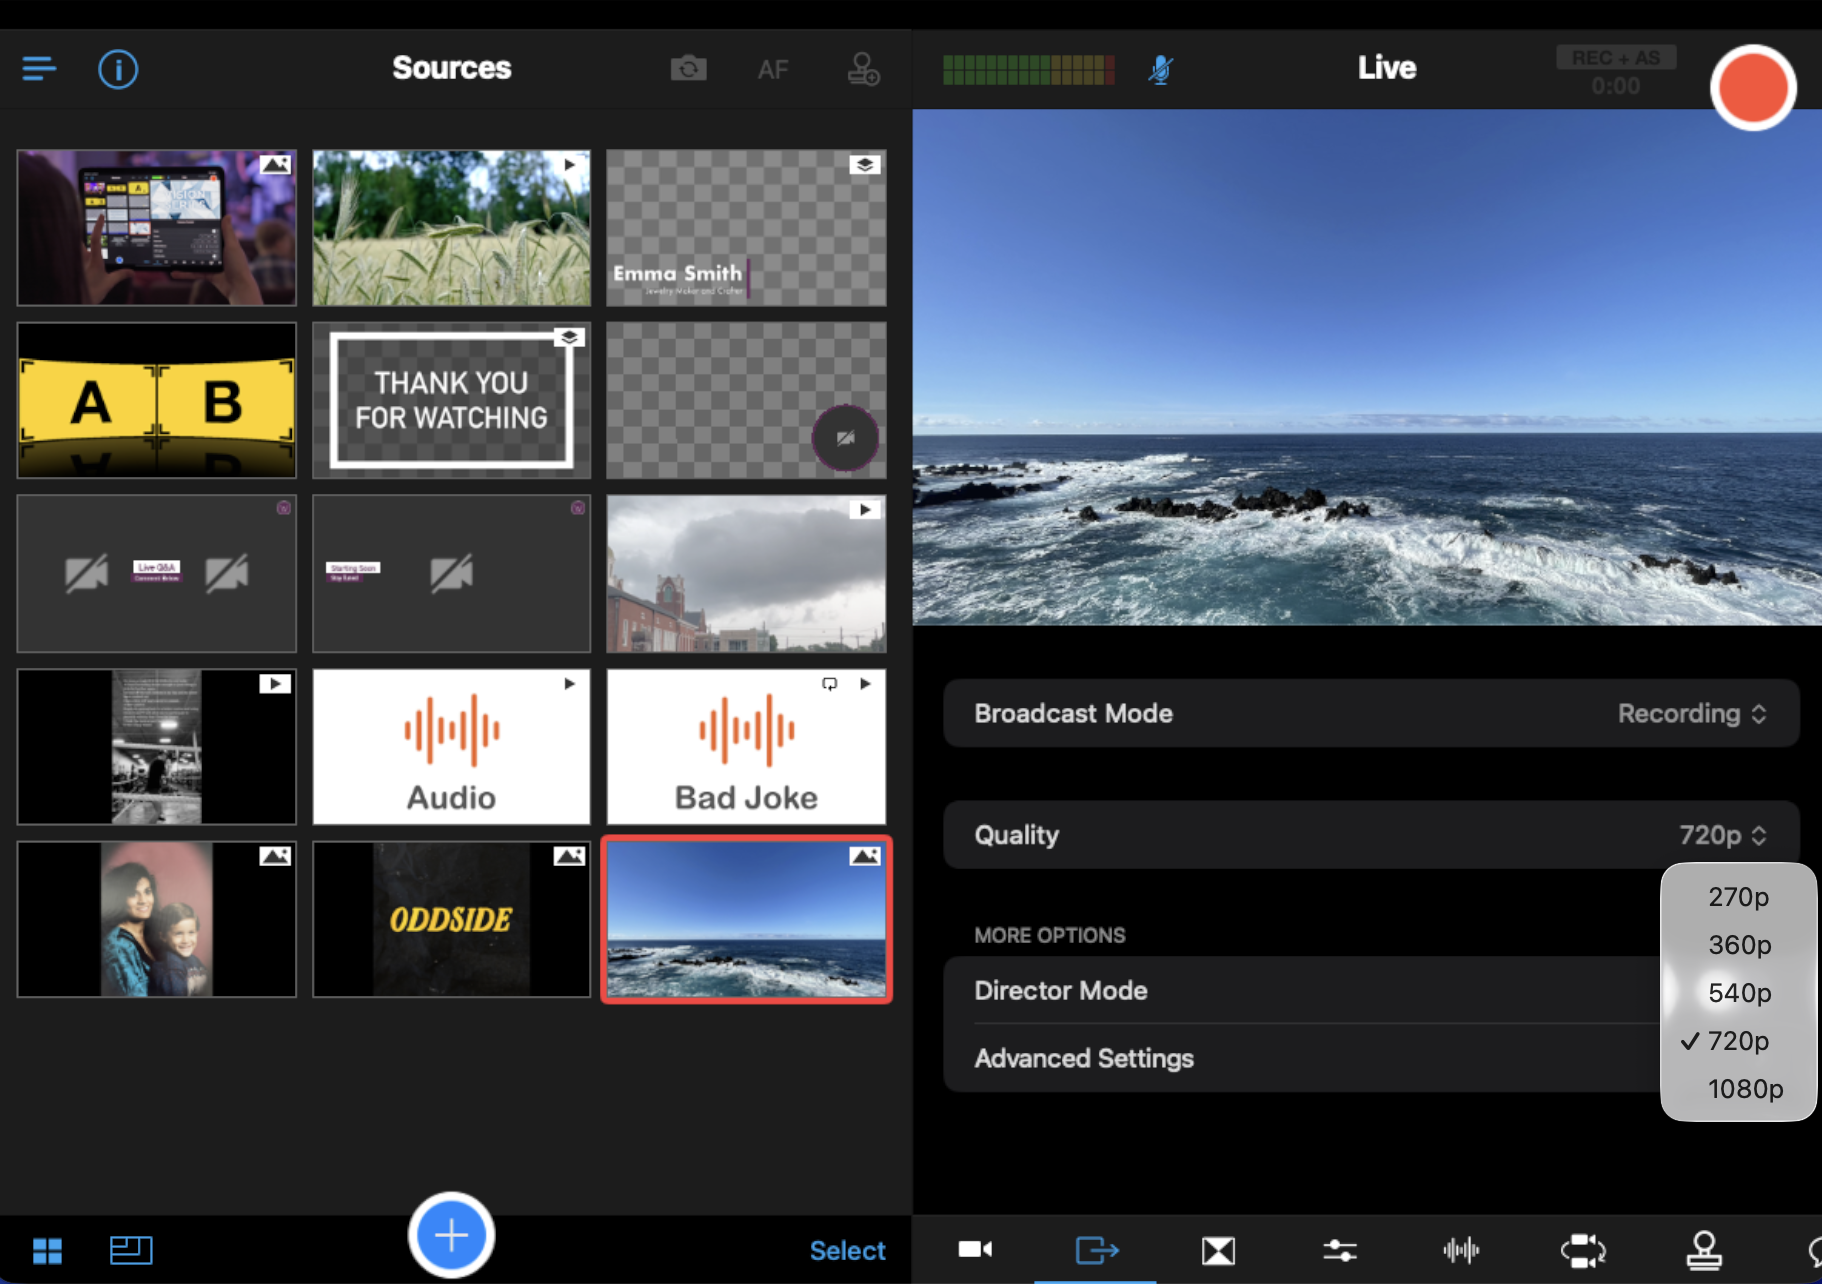
If you are using Zoom, there’s no need to set your video resolution higher than 720p, as that’s the maximum Zoom output. Using a higher resolution will lead to your video service downscaling the picture quality by itself, and this can cause your video to look worse than it otherwise would, and cause your picture to lag.
Some conferencing apps — like Google Meet — have a high upper bound on the resolution they'll use. That means that if you can get great resolution, they'll likely use it. That means that using 1080p is usually worthwhile with Meet.
Video Tutorial
