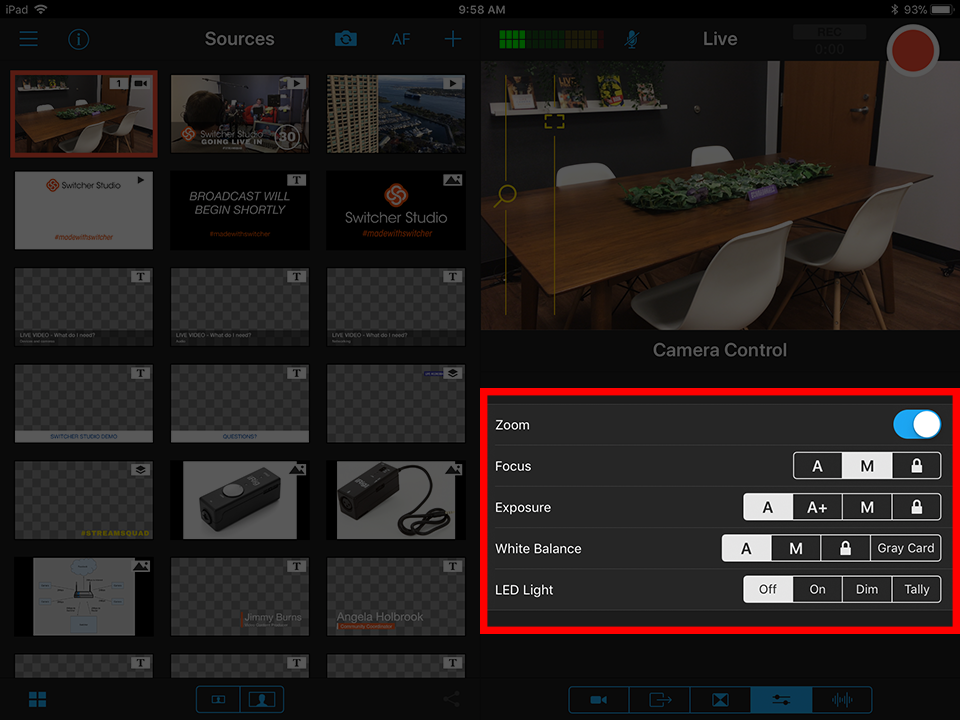
Camera Control Tab
The Camera Control tab allows you to control the settings for connected camera sources from the main switcher. You can control Zoom, Focus, Exposure, White Balance, and Stabilization.
In this article:
Adjusting Camera Settings
To access and adjust camera settings:
-
Ensure the camera source you want to adjust is currently selected in the Sources panel.
-
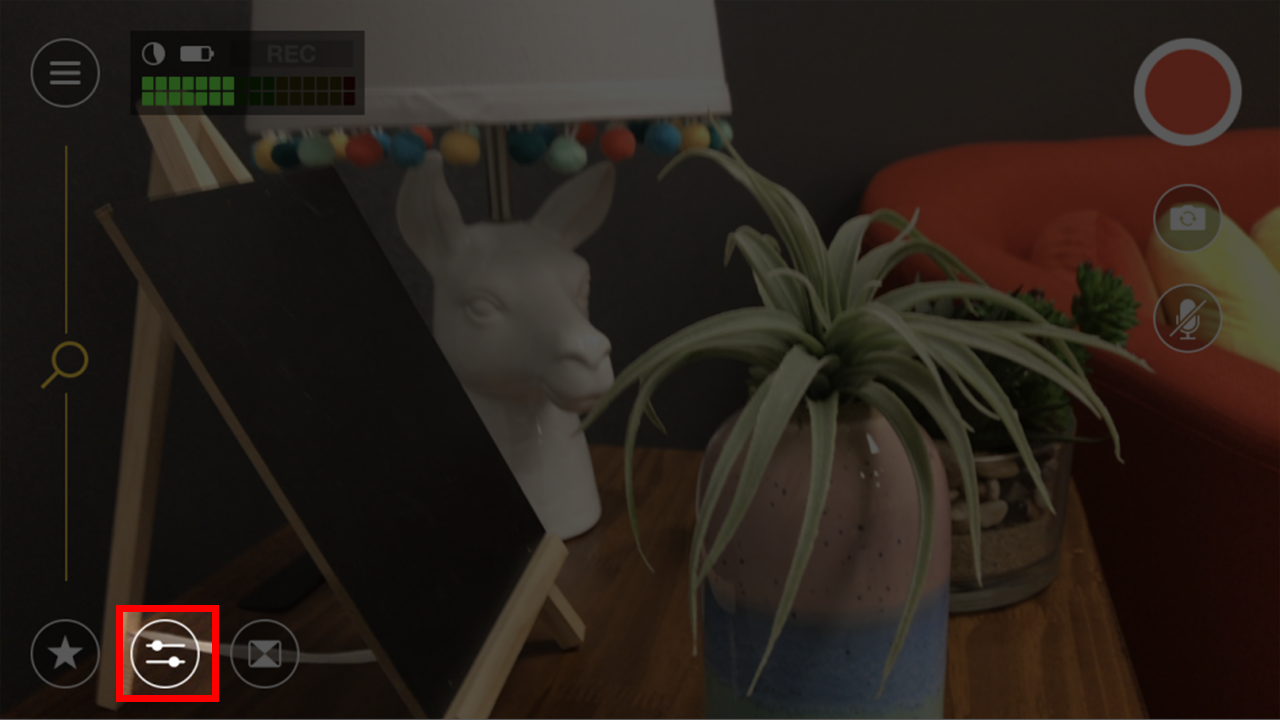
Tap the Camera Control tab (slider icon).
-
Select any desired settings for the camera (i.e. zoom, focus, exposure)
Note: If you are using the Preview Window for your production, the Camera Control settings are for the currently previewed source. If you are not using the Preview Window for your production (using Live only), the Camera Control menu will be for the camera source that is live.
Saving Camera Settings
To save camera settings:
-
Select the camera in the Sources panel.
-
Tap the Camera Control tab (slider icon).
-
Tap to enable Save Camera Settings.
-
Once enabled, any settings for this camera angle will be automatically saved.
-
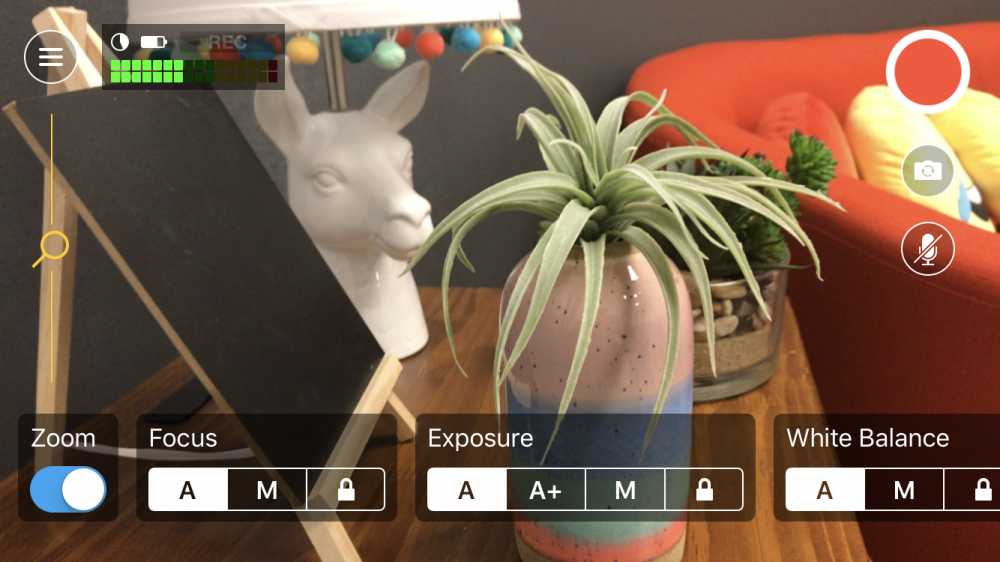
Zoom
By default, the Zoom option is enabled for each camera source. You can tell it's enabled because the toggle button is blue, and the button is on the right. To use Zoom when it's enabled:
-
Select a camera source.
-
There will be a slider with a magnifying glass on the left side of the view.
-
Slide up to zoom in. Slide down to zoom out.
The Zoom is responsive, meaning the speed will depend on how you fast you slide up or down on the slider.
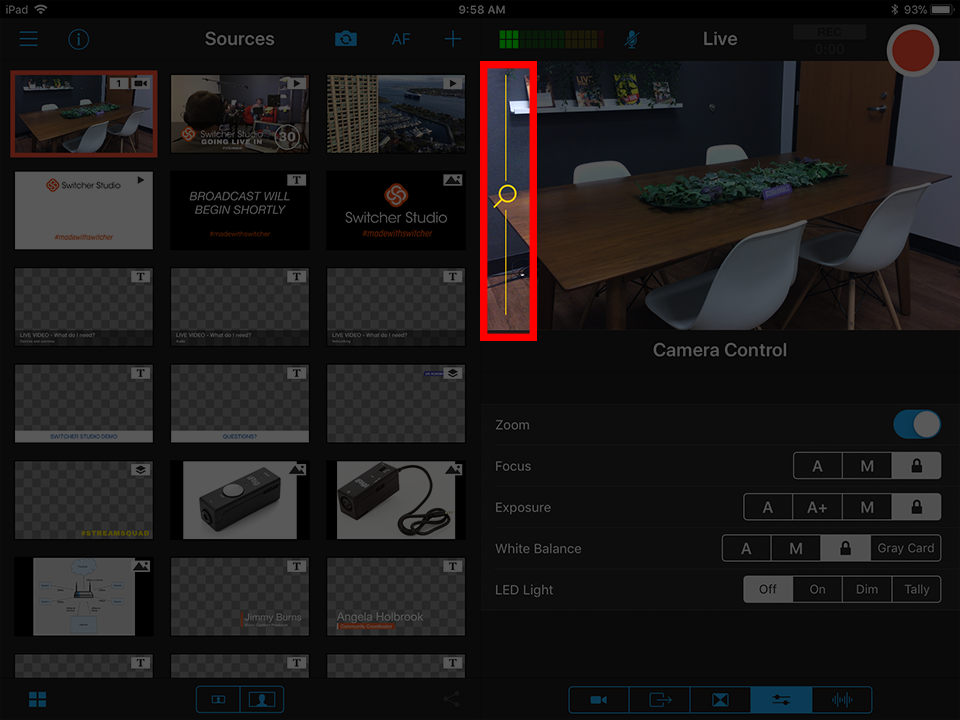
If you want to disable the Zoom setting on a camera, tap the toggle button next to Zoom. Once disabled, the button will no longer be blue, and the button will be on the left. You will no longer see the slider on your camera view.
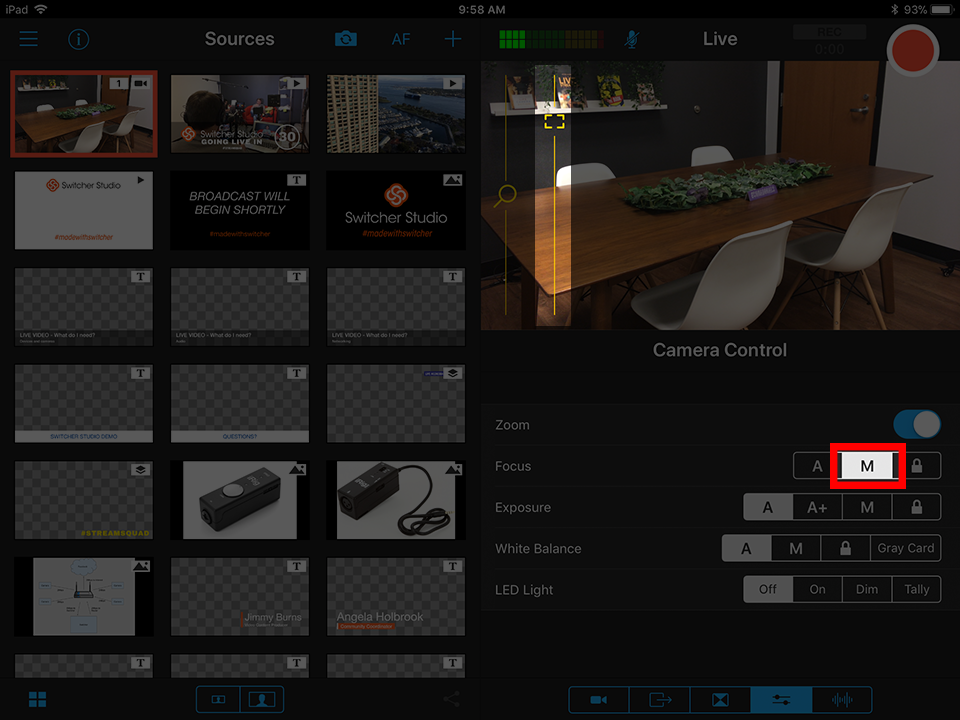
Focus
To manually control the focus and depth of field for a camera view:
-
Tap M next to Focus.
-
A new slider with a rectangle icon will appear on the camera view. \
-
Slide up or down to adjust the focus.
If you want to lock the focus in that position, tap the lock icon next to Focus. Locking the setting will make the slider disappear from the camera view.
To change the setting back to Automatic, tap the A again.
Exposure
Adjusting the Exposure setting allows you to have more control over how bright or dark your subjects are during your production. There are a couple of options that let you manually adjust the exposure:
A+ Exposure
The A+ option is recommended if you want to have some control over the exposure without the risk of dropping frames. To use this option:
-
Tap A+ next to Exposure.
-
A new slider with a sun icon will appear on the camera view.
-
Slide up or down to adjust the brightness.

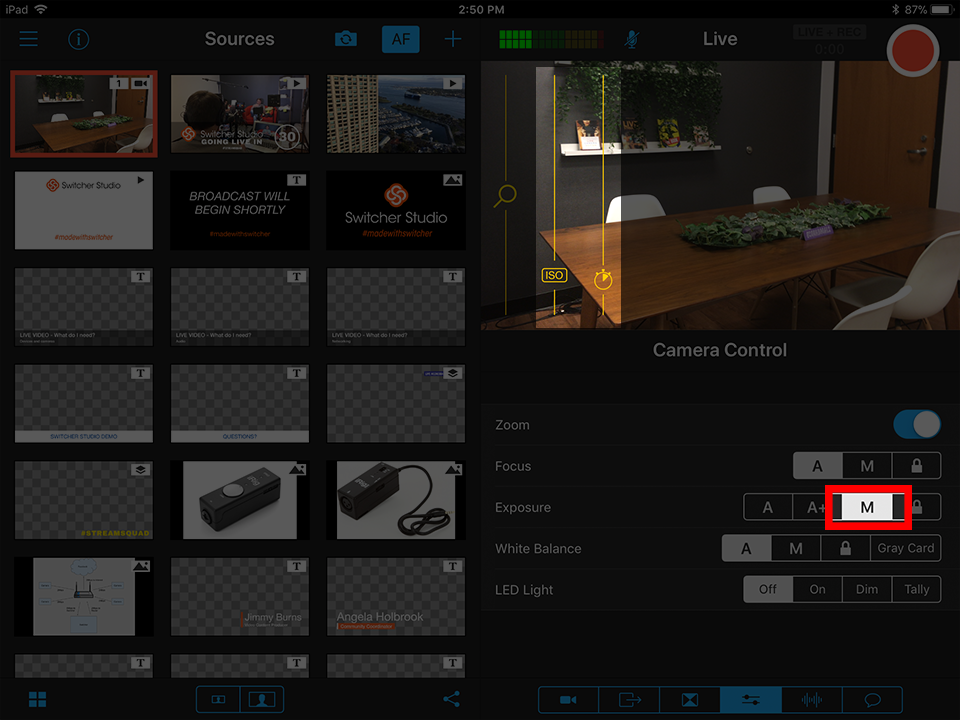
Manual Exposure
The Manual option allows you to have more control over brightness and introduce a new slider for adjusting shutter speed. To use this option:
-
Tap M next to Exposure.
-
Two new sliders will appear, one with ISO and the other with a stopwatch, on the camera view.
-
Slide up or down on the ISO slider to adjust the brightness.
-
Slide up or down on the stopwatch slider to adjust shutter speed..
Note: Adjusting the shutter speed too much can cause dropped frames.
If you want to lock the sliders, tap the lock icon next to Exposure. Locking the setting will make the sliders disappear from the camera view.
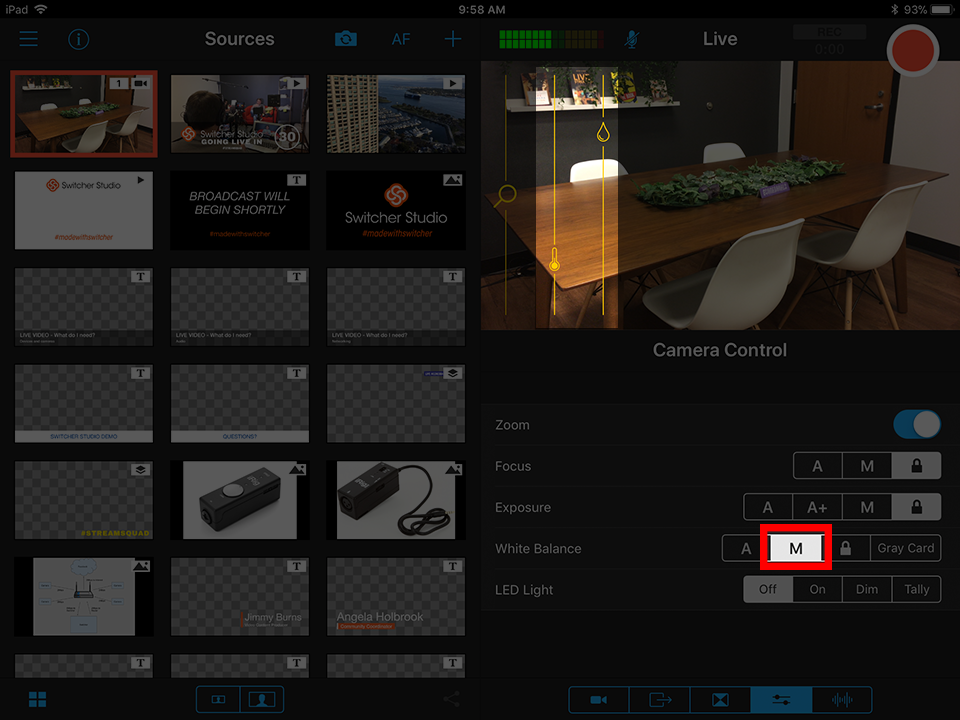
White Balance
Adjusting the White Balance allows you to control the color temperature and tone. To manually change this setting:
-
Tap M next to White Balance.
-
Two new sliders will appear, one with a thermometer and the other with a droplet, on the camera view.
-
Slide up or down to adjust the white and color balance .
If you want to lock the sliders, tap the lock icon next to White Balance. Locking the setting will make the sliders disappear from the camera view.
To change the setting back to Automatic, tap the A again.
Gray Card
If you are used to defining white/natural light by using gray cards, Switcher Studio has a built-in option. Point your camera at a gray color, and tap the Gray Card button. It will balance all your cameras.
LED Light
The LED Light options control the built-in LED light (i.e. flashlight) on your selected device. Here are the options:
-
Off: LED light is turned off (default).
-
On: LED light is on, at full brightness
-
Dim: Enables a slider on your live camera view that lets you adjust the brightness of the LED light.
-
Tally: LED light is on only when the camera view is being used, at low brightness. This is a good option to use if you are using multiple cameras in a production, as it helps the people on screen know which camera to look at when talking.
Stabilization
Image stabilization helps reduce camera shake, which can be especially helpful if you are not using a tripod or gimbal. By default Stabilization is enabled for all camera sources.
To disable, tap the toggle button next to Stabilization. Once disabled, the button will no longer be blue, and the button will be on the left.
Note: When Stabilization is enabled, you cannot use the Low-Latency Wi-Fi Optimization Mode. The Wi-Fi Optimization Mode controls the delay between your cameras and the switcher. For more information, check out the Help Center article: Wi-Fi Optimization Mode.
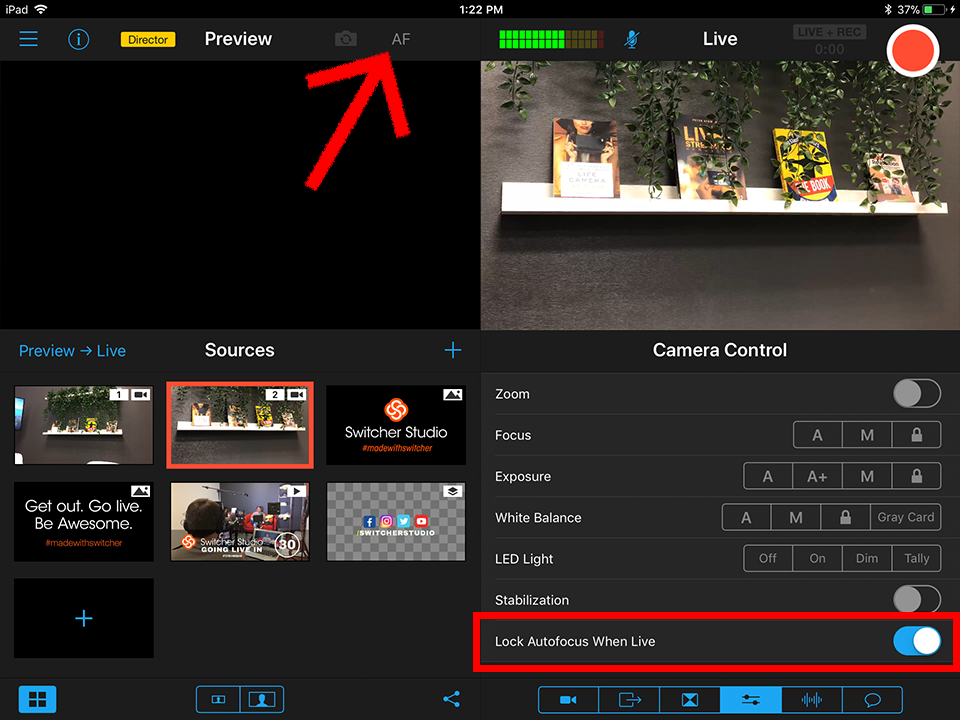
Lock Autofocus When Live
This setting disables Autofocus during your production. By default, Autofocus is turned on in Switcher Studio. You can see the status by looking at the AF icon in the main Sources / Production panel. If there's a blue rectangle around it, Autofocus is on (shown here).
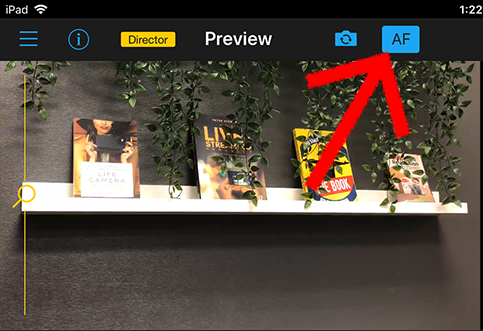
If your video appears to be "popping" it could be due to your focus going in and out. An easy fix is to Lock Autofocus as follows:
-
Go to the Camera Control tab.
-
Tap the toggle button next to Lock Autofocus When Live.
This will negate the AF setting for the camera angle that is live. Now, when you send a source live, you will notice that the "AF" in the top-middle will be turned off. With this disabled, your camera will no longer "pop" in and out.
Adjusting Camera Controls on an iPhone in Horizontal View
If you are using an iPhone with the horizontal UI, the process is very similar.
-
Tap the Camera Control icon in the lower left.
-
Swipe sideways to find and adjust a setting.
-
Swipe down and the menu will disappear.