Scheduling A YouTube Stream With Switcher
Scheduling a livestream allows you to better promote it, and your subscribers can get reminders for the stream. You can schedule a stream directly in Switcher Studio, using the YouTube integration.
Prior to setting up a scheduled stream, you'll need to be sure you've enabled livestreaming on YouTube and that you've linked your YouTube account to Switcher. If you haven't, follow these links for step-by-step instructions:
Jump to:
Scheduling Your YouTube Stream
NOTE: As of October 2024, YouTube mandates that Channels have at least 50 subscribers to live stream via mobile apps, including the Switcher app. If your Channel does not show as an available destination, check to see if your subscriber count has not met this threshold yet!
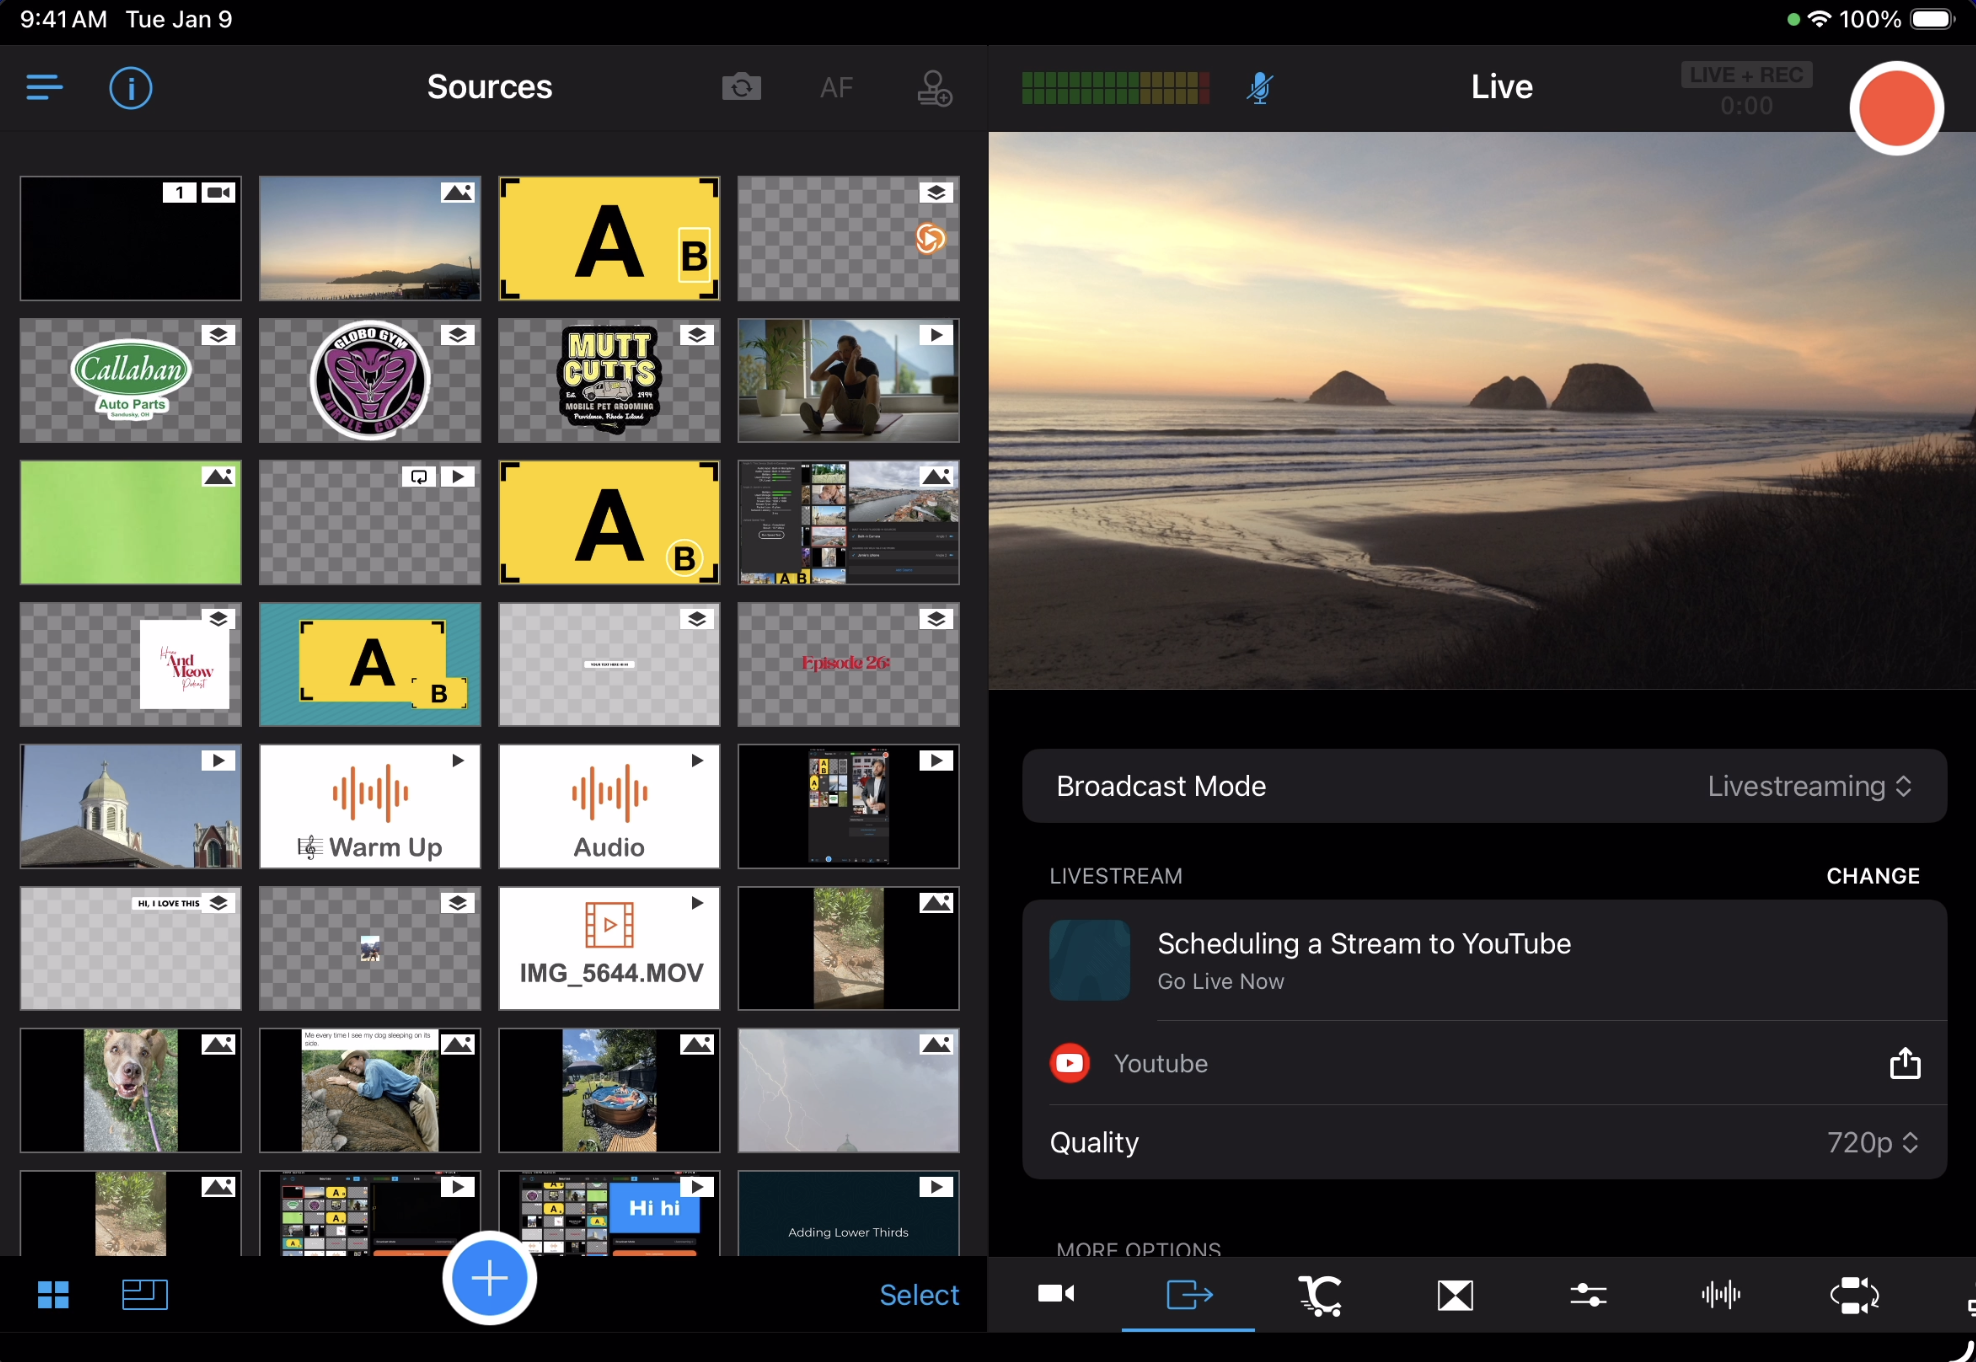
You can set up a scheduled stream in the Switcher Dashboard or directly in the Switcher iOS app. These instructions are for the app, but the instructions for the Dashboard are similar.
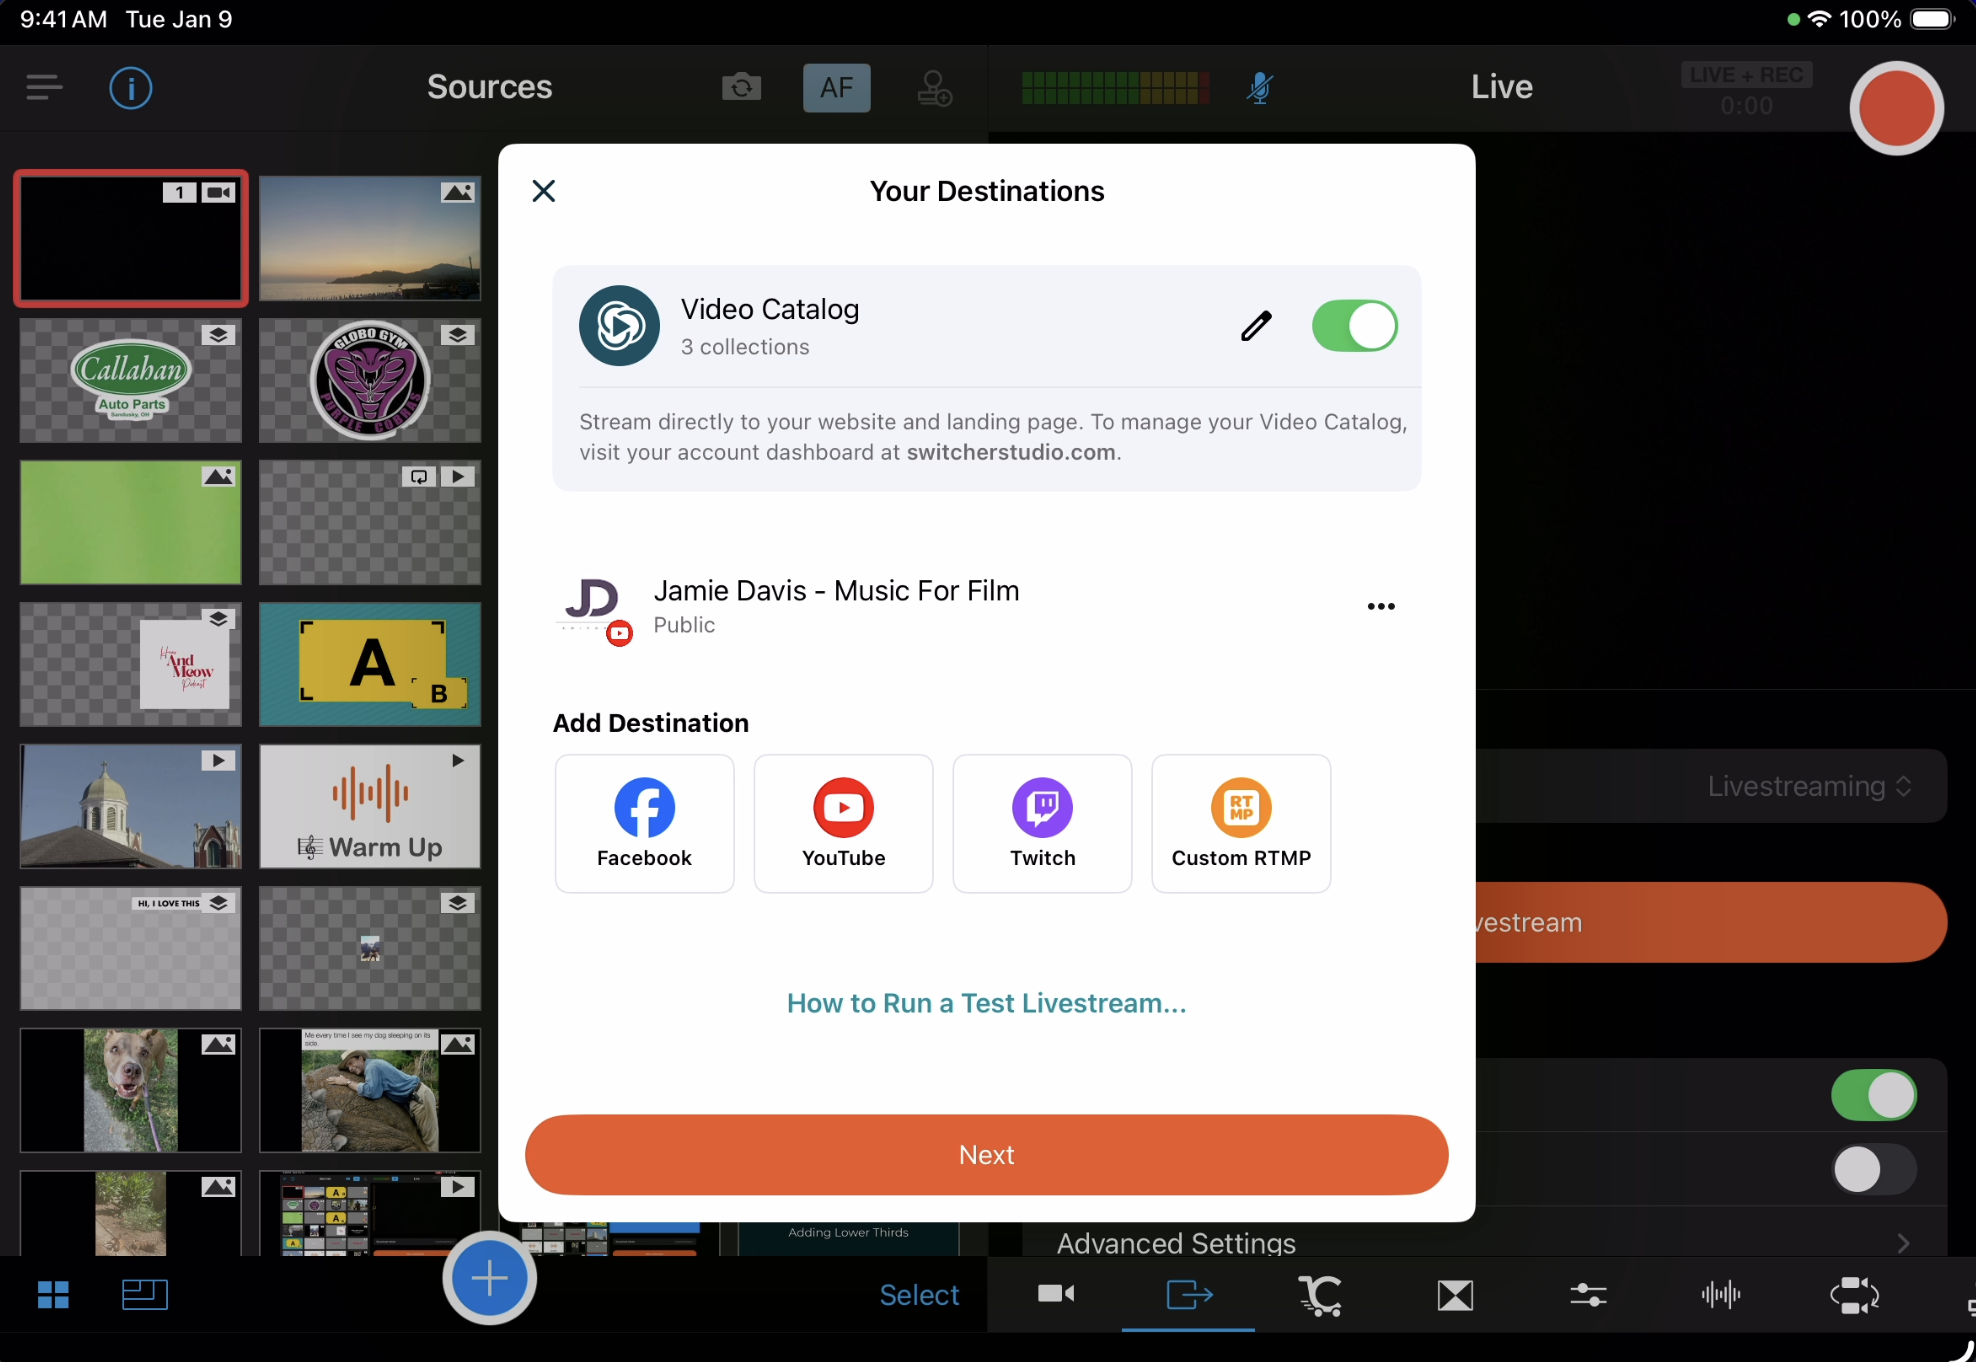
- In the Outputs tab, tap New Livestream>Create New Livestream. If there is already a previously scheduled livestream in the Outputs tab, tap Change>Schedule.
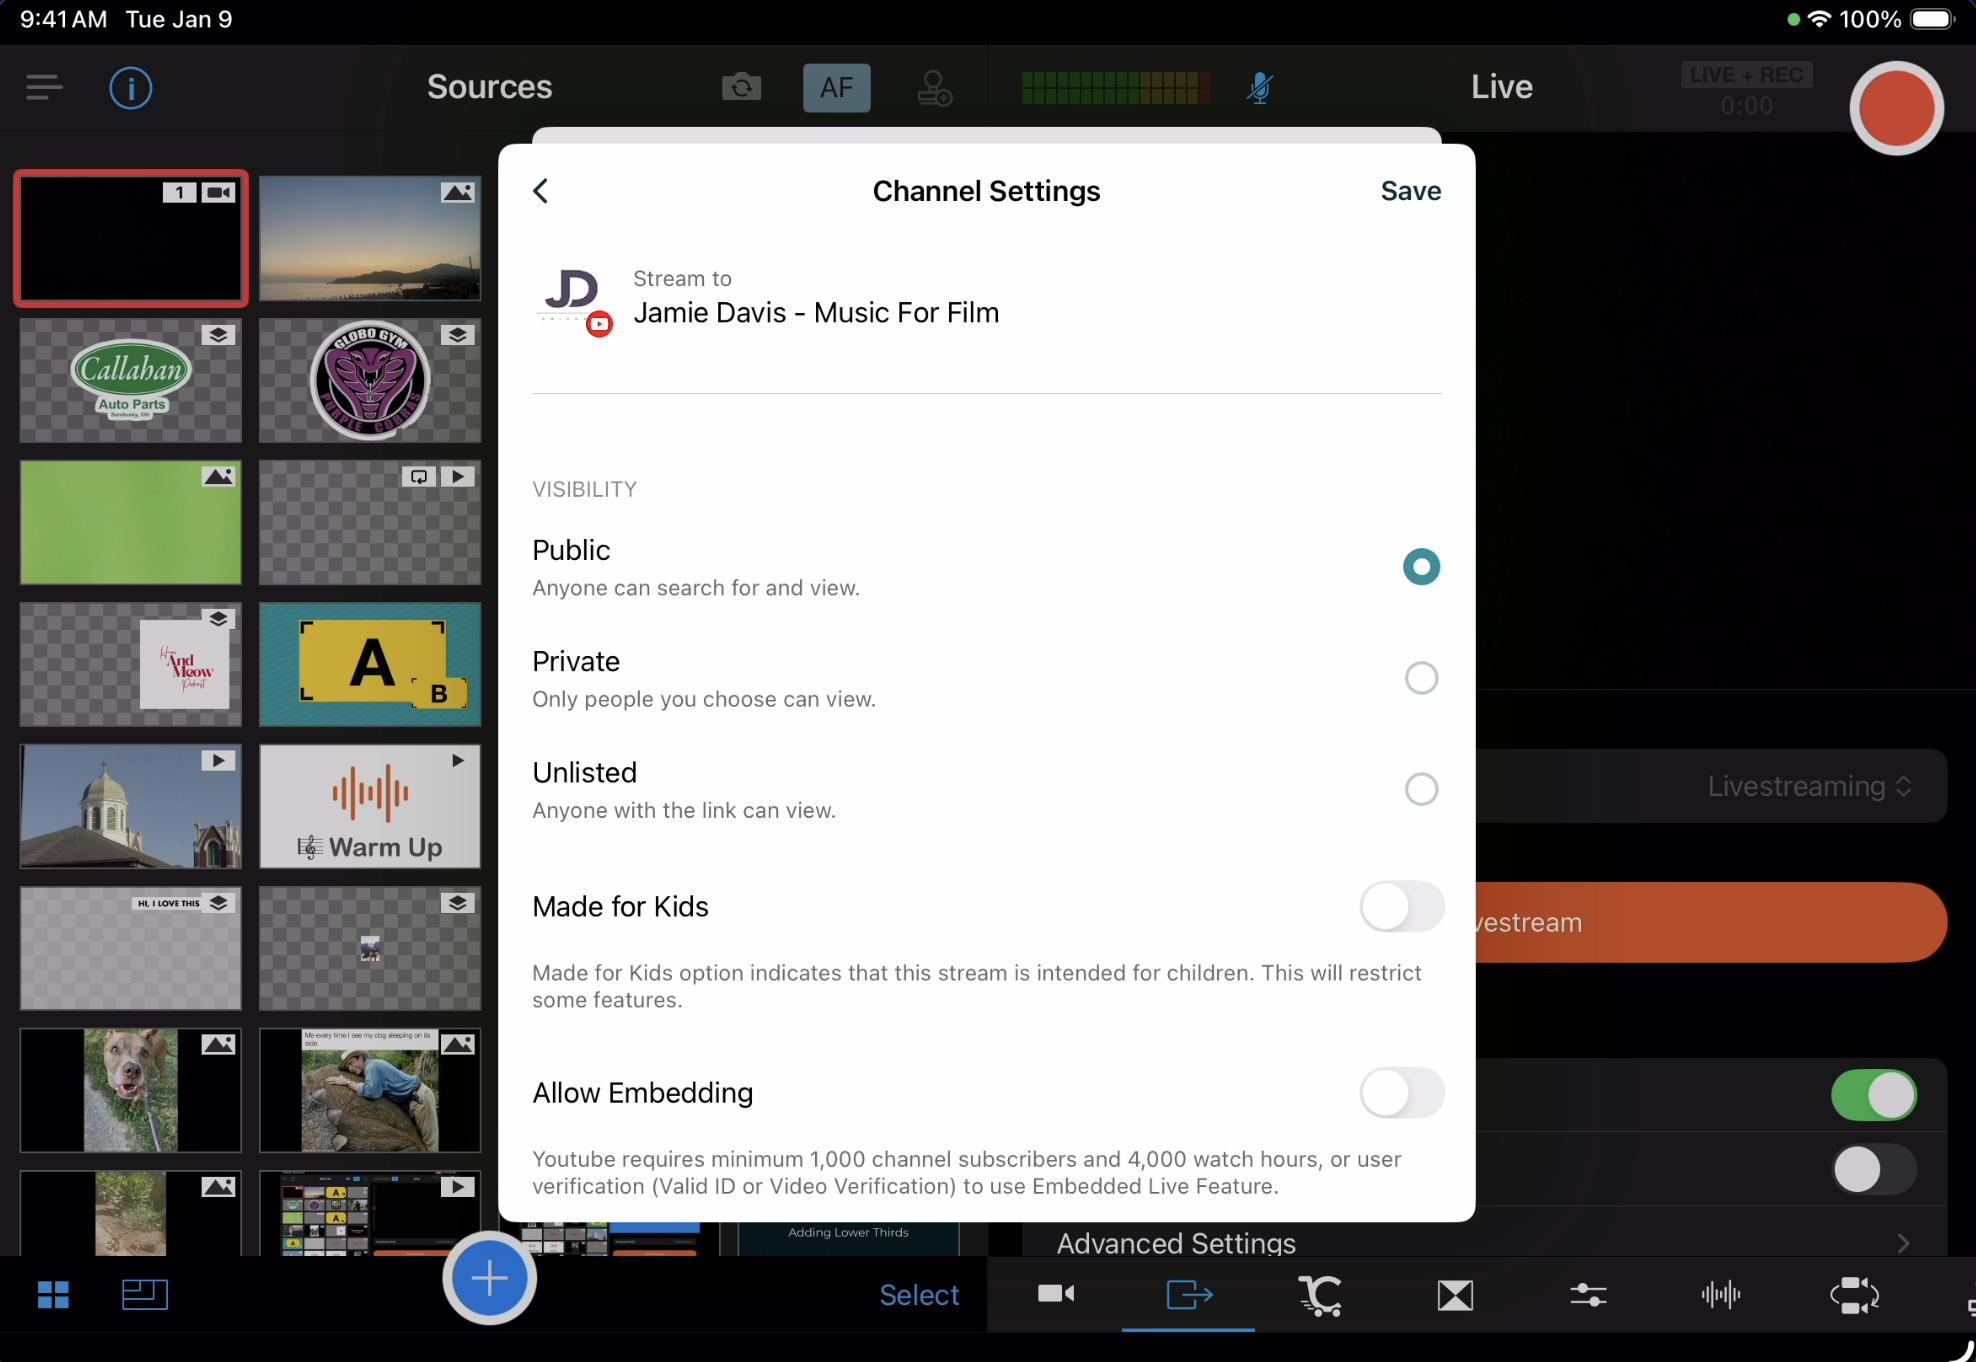
- Tap YouTube>Name of your channel to add it as a destination.
- Choose your preferred Channel Settings and tap Save.
- If Multistreaming, add your other destinations and tap Next.
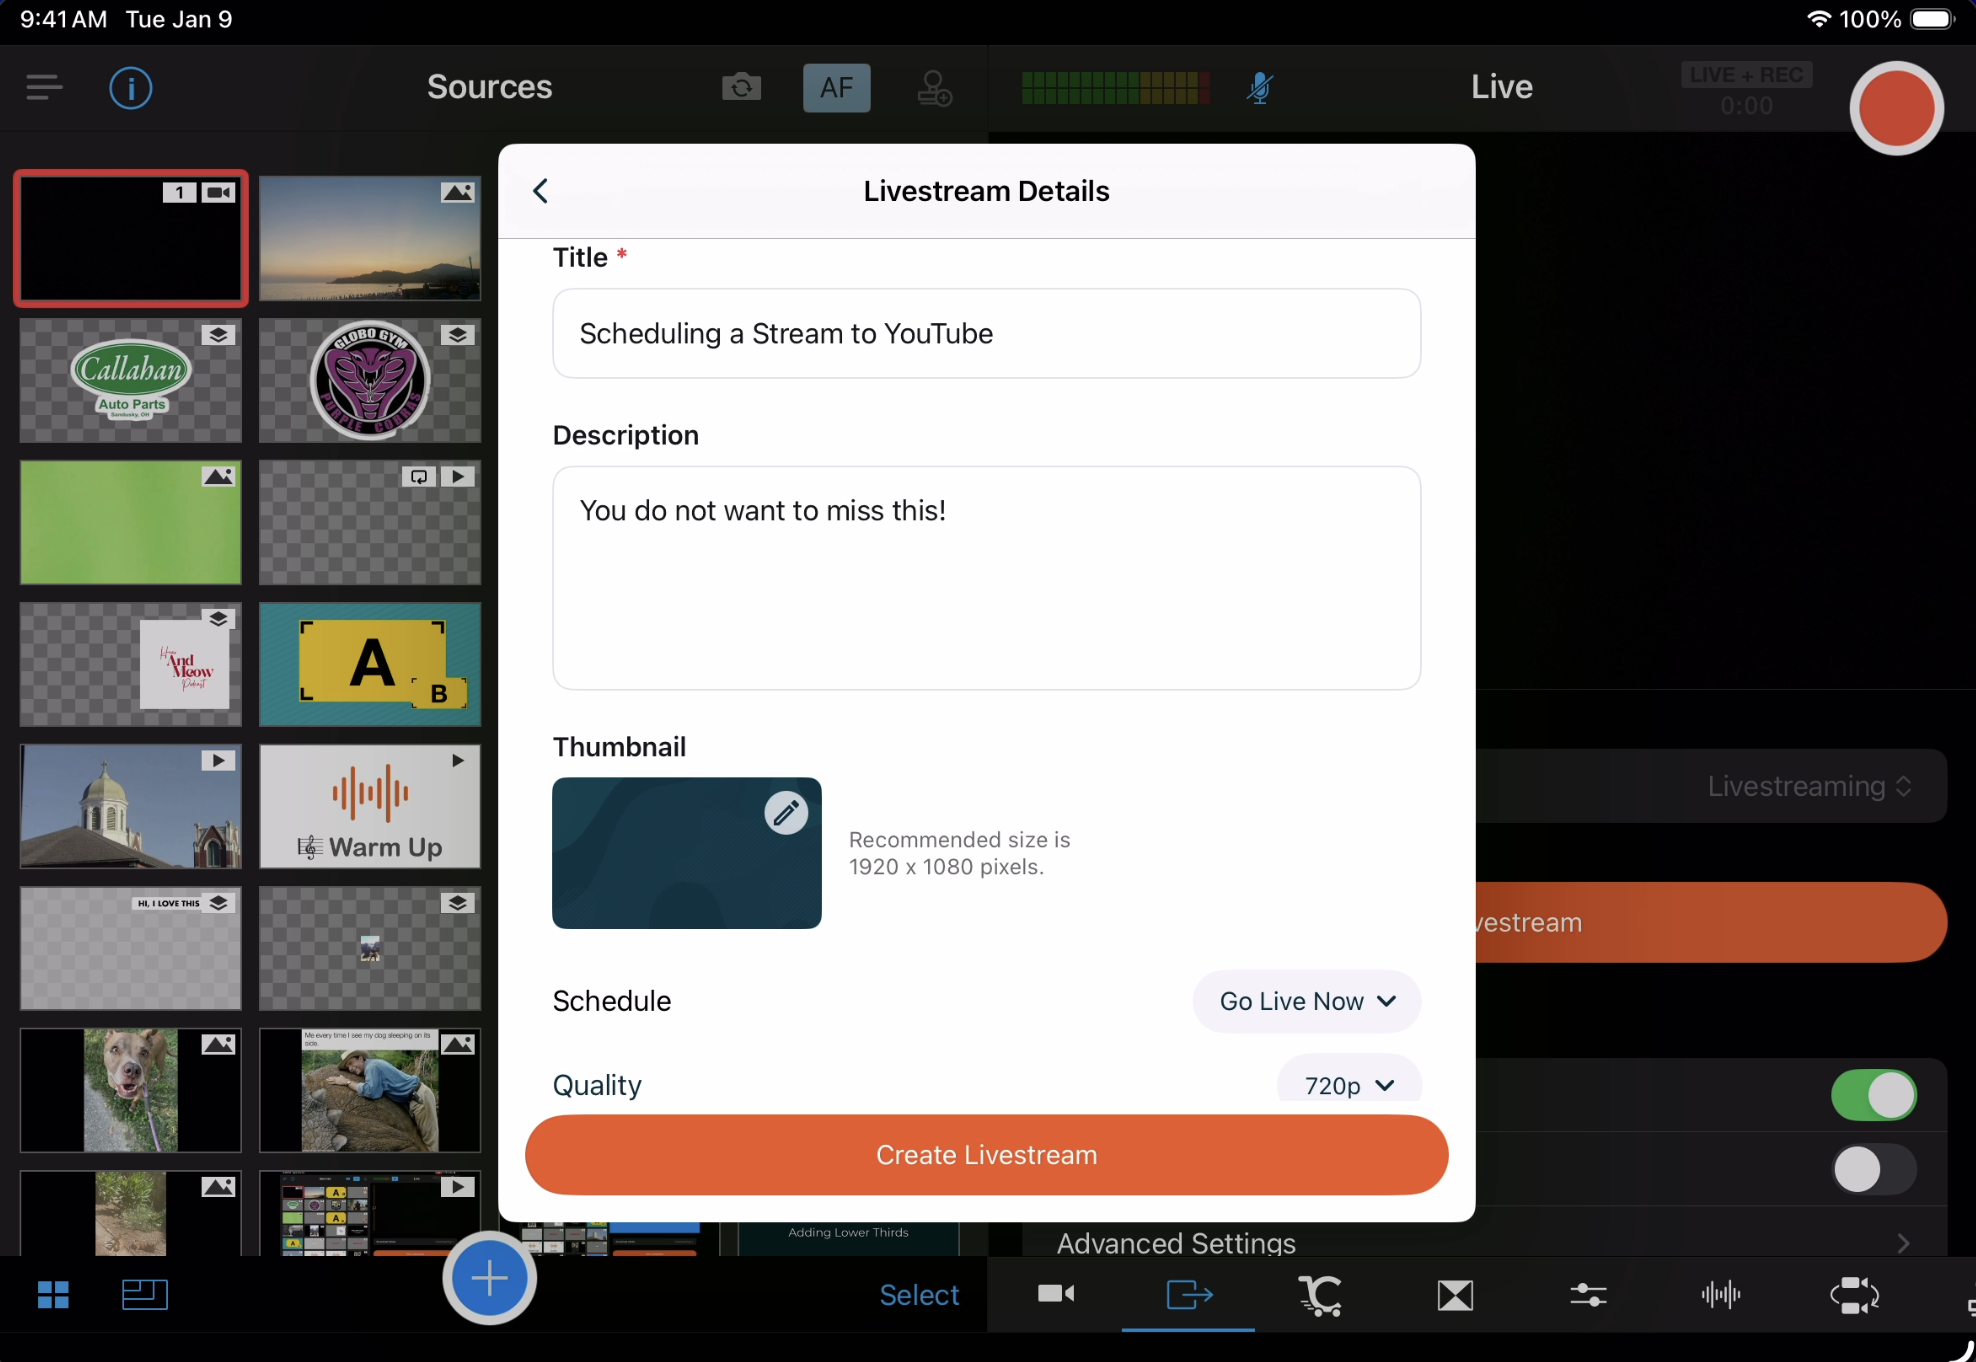
- Enter your Livestream Details and choose your Video Quality.
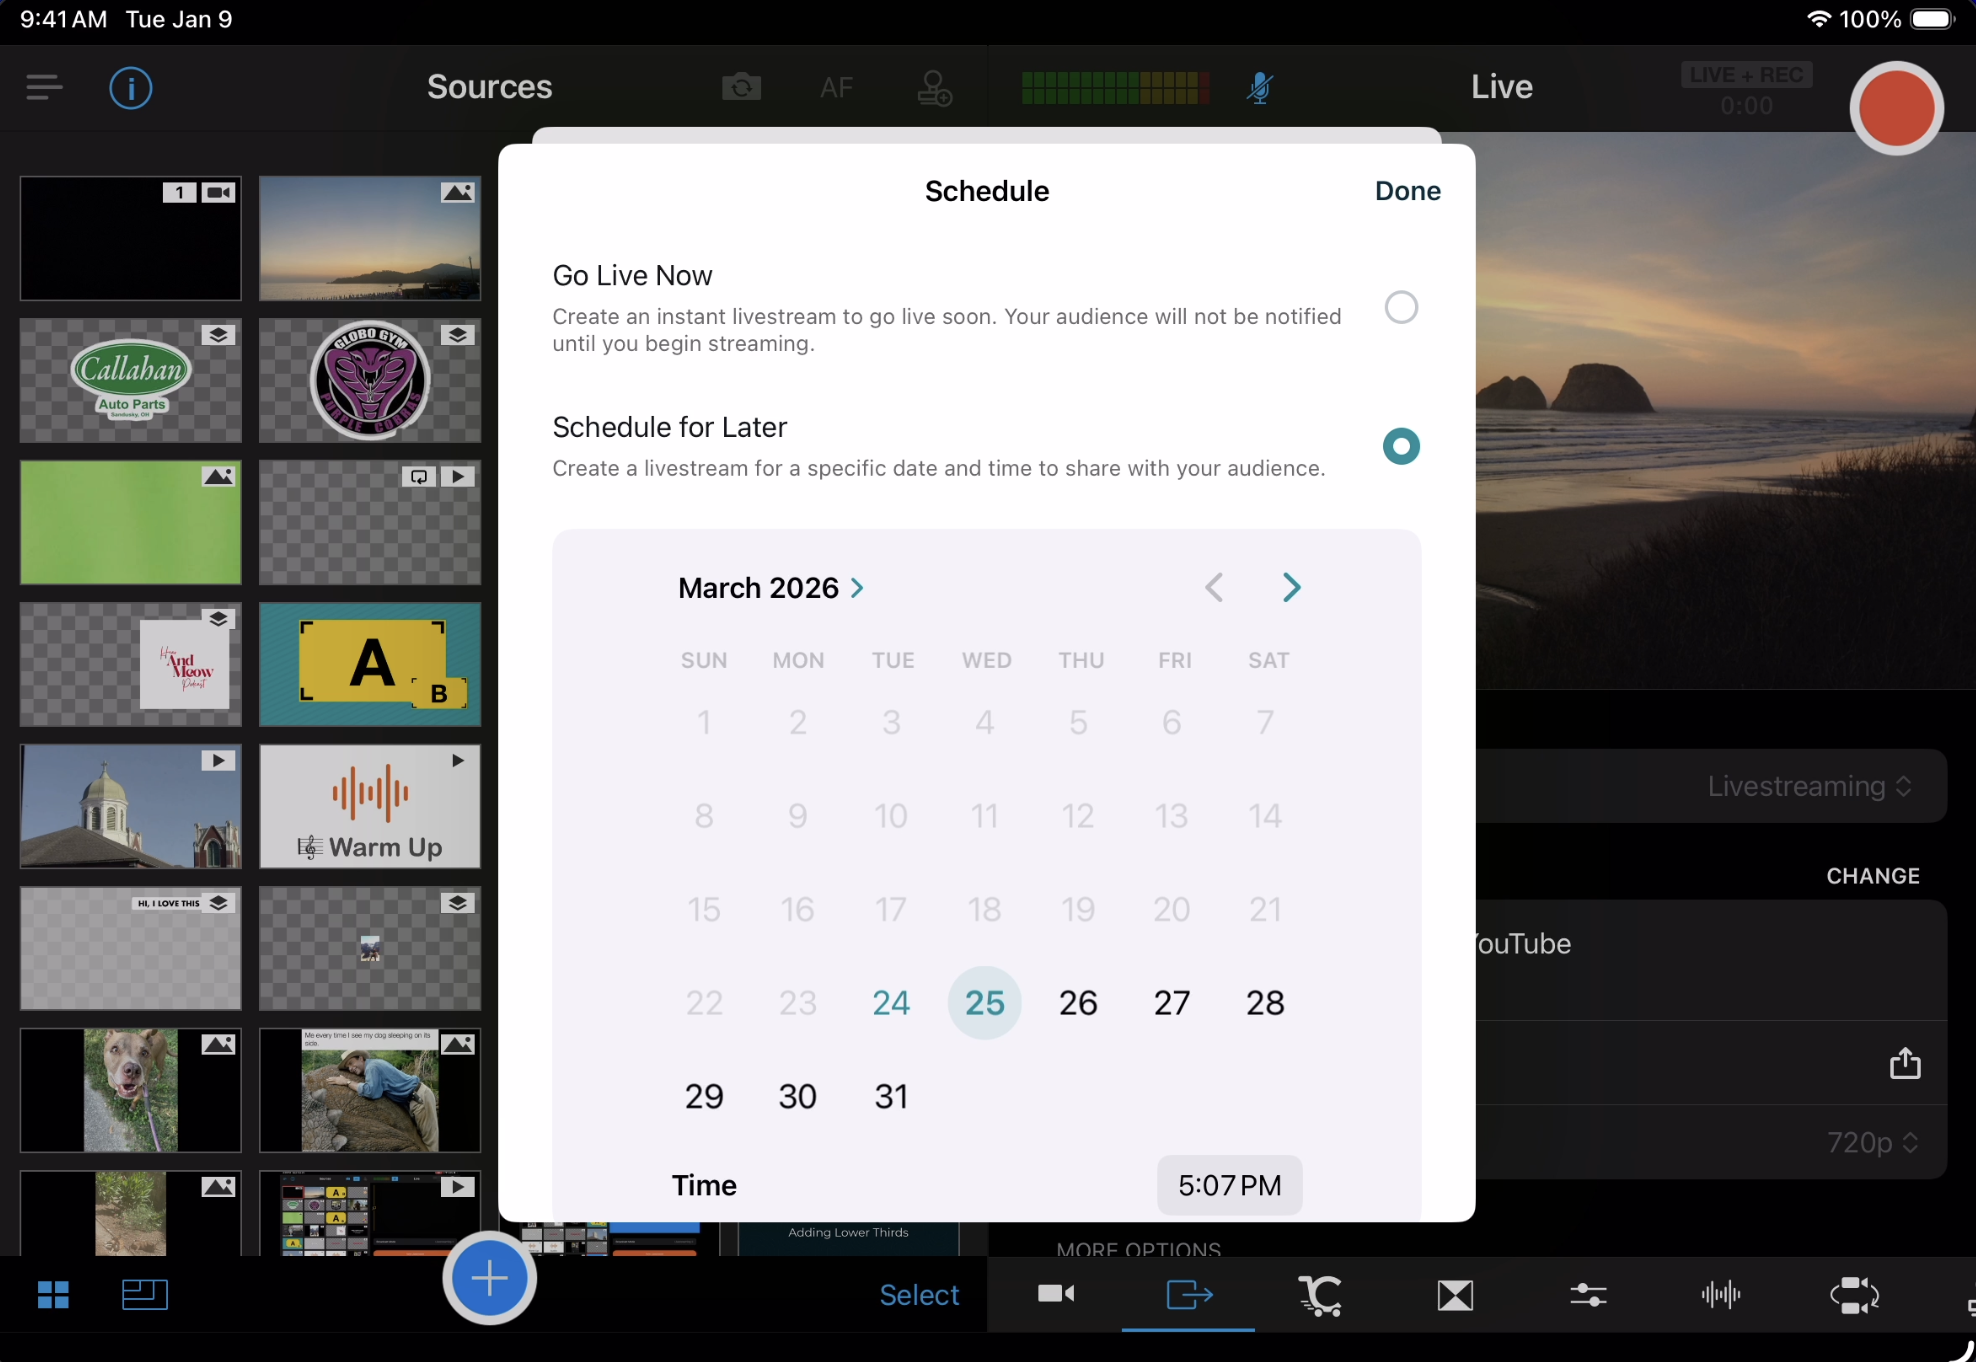
- Tap the drop-down menu next to "Schedule" and choose Schedule for Later.
- Select the date and time for your stream.
- When you’re done, tap the orange Create Livestream button.
- You’ll now see your event listed in the Outputs tab, and the destinations it’ll stream to show below it.
- To go live, tap on the big red button at the time of your scheduled event! If you try to go live before your event’s time begins OR more than 10 minutes after the scheduled start time, your stream will not appear for your viewers, and you will have to create a brand new stream.

Editing Your Scheduled Stream
In the Outputs tab, tap on the grey "Change" button beside the currently selected event.
Tap on the icon with the three horizontal dots to the right of the event's name, and choose "Edit Details" from the dropdown menu.

The information you previously input for this event will appear. Tap on the dropdown boxes to change the date and/or the time of the event, and then tap the orange "Save" button at the bottom of the window.

Streaming To An Existing YouTube Stream
If you've already scheduled your livestream on youtube.com itself, you can still stream to it with Switcher's in-app integration!
- Go to the Outputs tab in the Switcher App.
- Make sure the Broadcast Mode is set to Livestreaming.
- Tap New Livestream.
- Tap Use Existing Scheduled Post.
- Select the scheduled stream.
- Tap Next.
- Edit Livestream Details if necessary.
- Tap Schedule Livestream.
- You'll receive a notification that says "Your Livesteram is Scheduled".
- Tap Done.
- You should now see the Livestream queued up in the Outputs Tab.


Important Information If Creating Streams Directly on YouTube.com
We recommend using the instructions above to create the livestream and go live using Switcher Studio's YouTube integration. However, if you decide to create the stream directly on YouTube.com instead, and then use Switcher Studio to stream, there are a few key settings to change:
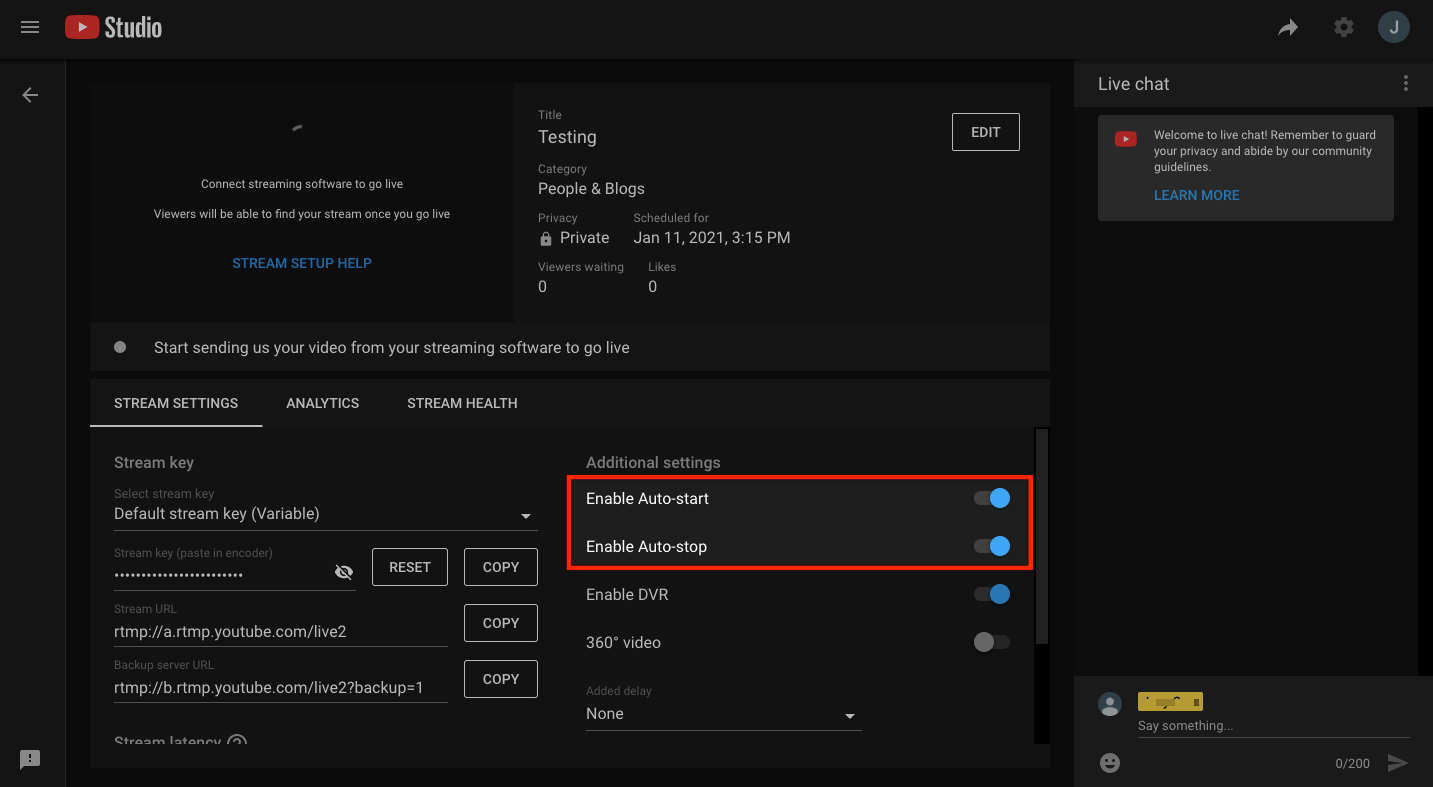
Enable Auto-start & Enable Auto-stop
If you schedule a stream on YouTube.com, you'll need to turn on the Enable Auto-start and Enable Auto-stop options. If these options are not enabled, your stream will not start/stop on YouTube unless you manually initiate/end it on YouTube.com.
You can find these options under Stream Settings, which you can access as follows:
-
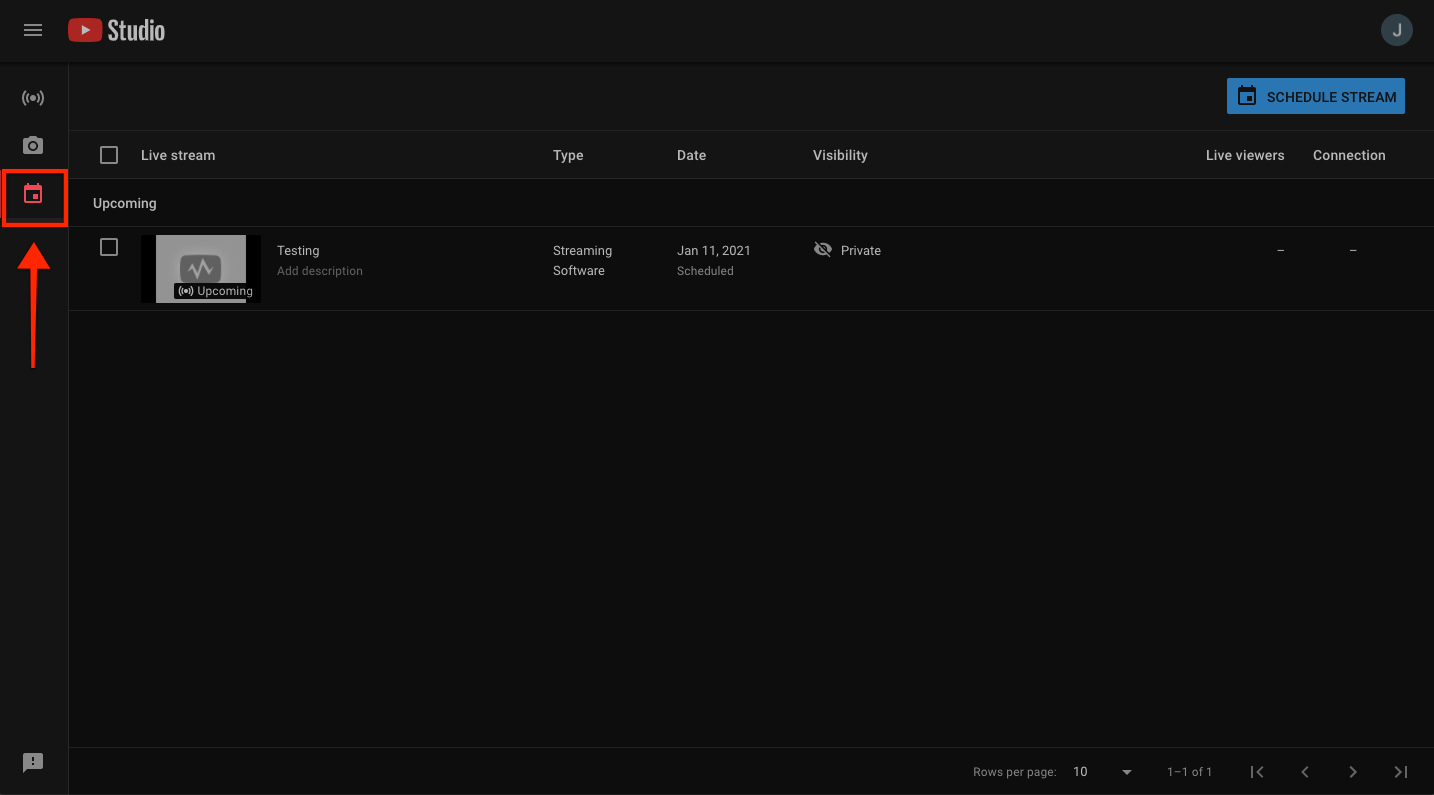
Go to the Live Control Room for your YouTube channel.
-
Click the calendar icon in the left-hand menu to manage your streams.
-
Click the title of the stream you want to edit.
-
Click the toggles next to Enable Auto-start and Enable Auto-stop. When they are enabled, the buttons are blue and to the right, as shown below.
Sharing A Link To Your Upcoming Stream
Once you've scheduled a stream, it'll automatically show in the Subscriptions tab of your YouTube subscribers as an upcoming event. However, you can also manually grab the link and send it out to people via social media post, an email, a newsletter, or directly in comments and messages!
- Go to studio.youtube.com
- Select "Content" from the menu on the left-hand side
- Choose "Live" from the horizontal menu at the top
- Find your desired upcoming stream, and tap the "Options" icon that looks like 3 horizontal dots beside the thumbnail
- Click "Get Sharable Link"
- You'll see a popup at the bottom of the screen that the link to the stream has been successfully copied