Removing Dark Backgrounds when Screensharing Lyrics, Subtitles, and More
The Switcher Studio 5.6 update introduced new functionality called Dark Background Transparency, which can be used to improve screensharing into Switcher Studio. This functionality removes dark backgrounds when screensharing, which is especially helpful if you are sharing lyrics or subtitles through SeeMo, ProPresenter, EasyWorship, Google Slides, PowerPoint, and other programs.
Dark Background Transparency is available if you are screensharing with Video Chat or screensharing with Switcher Cast for Mac or PC.

Note: Dark Background Transparency is not equivalent to a green screen or chroma keying. It applies to dark backgrounds only and is limited to screensharing sources.
There are three main steps to using Dark Background Transparency:
-
Share a screen into Switcher Studio.
-
Select the Overlay option for the shared screen.
-
Adjust the transparency of the background.
Jump to:
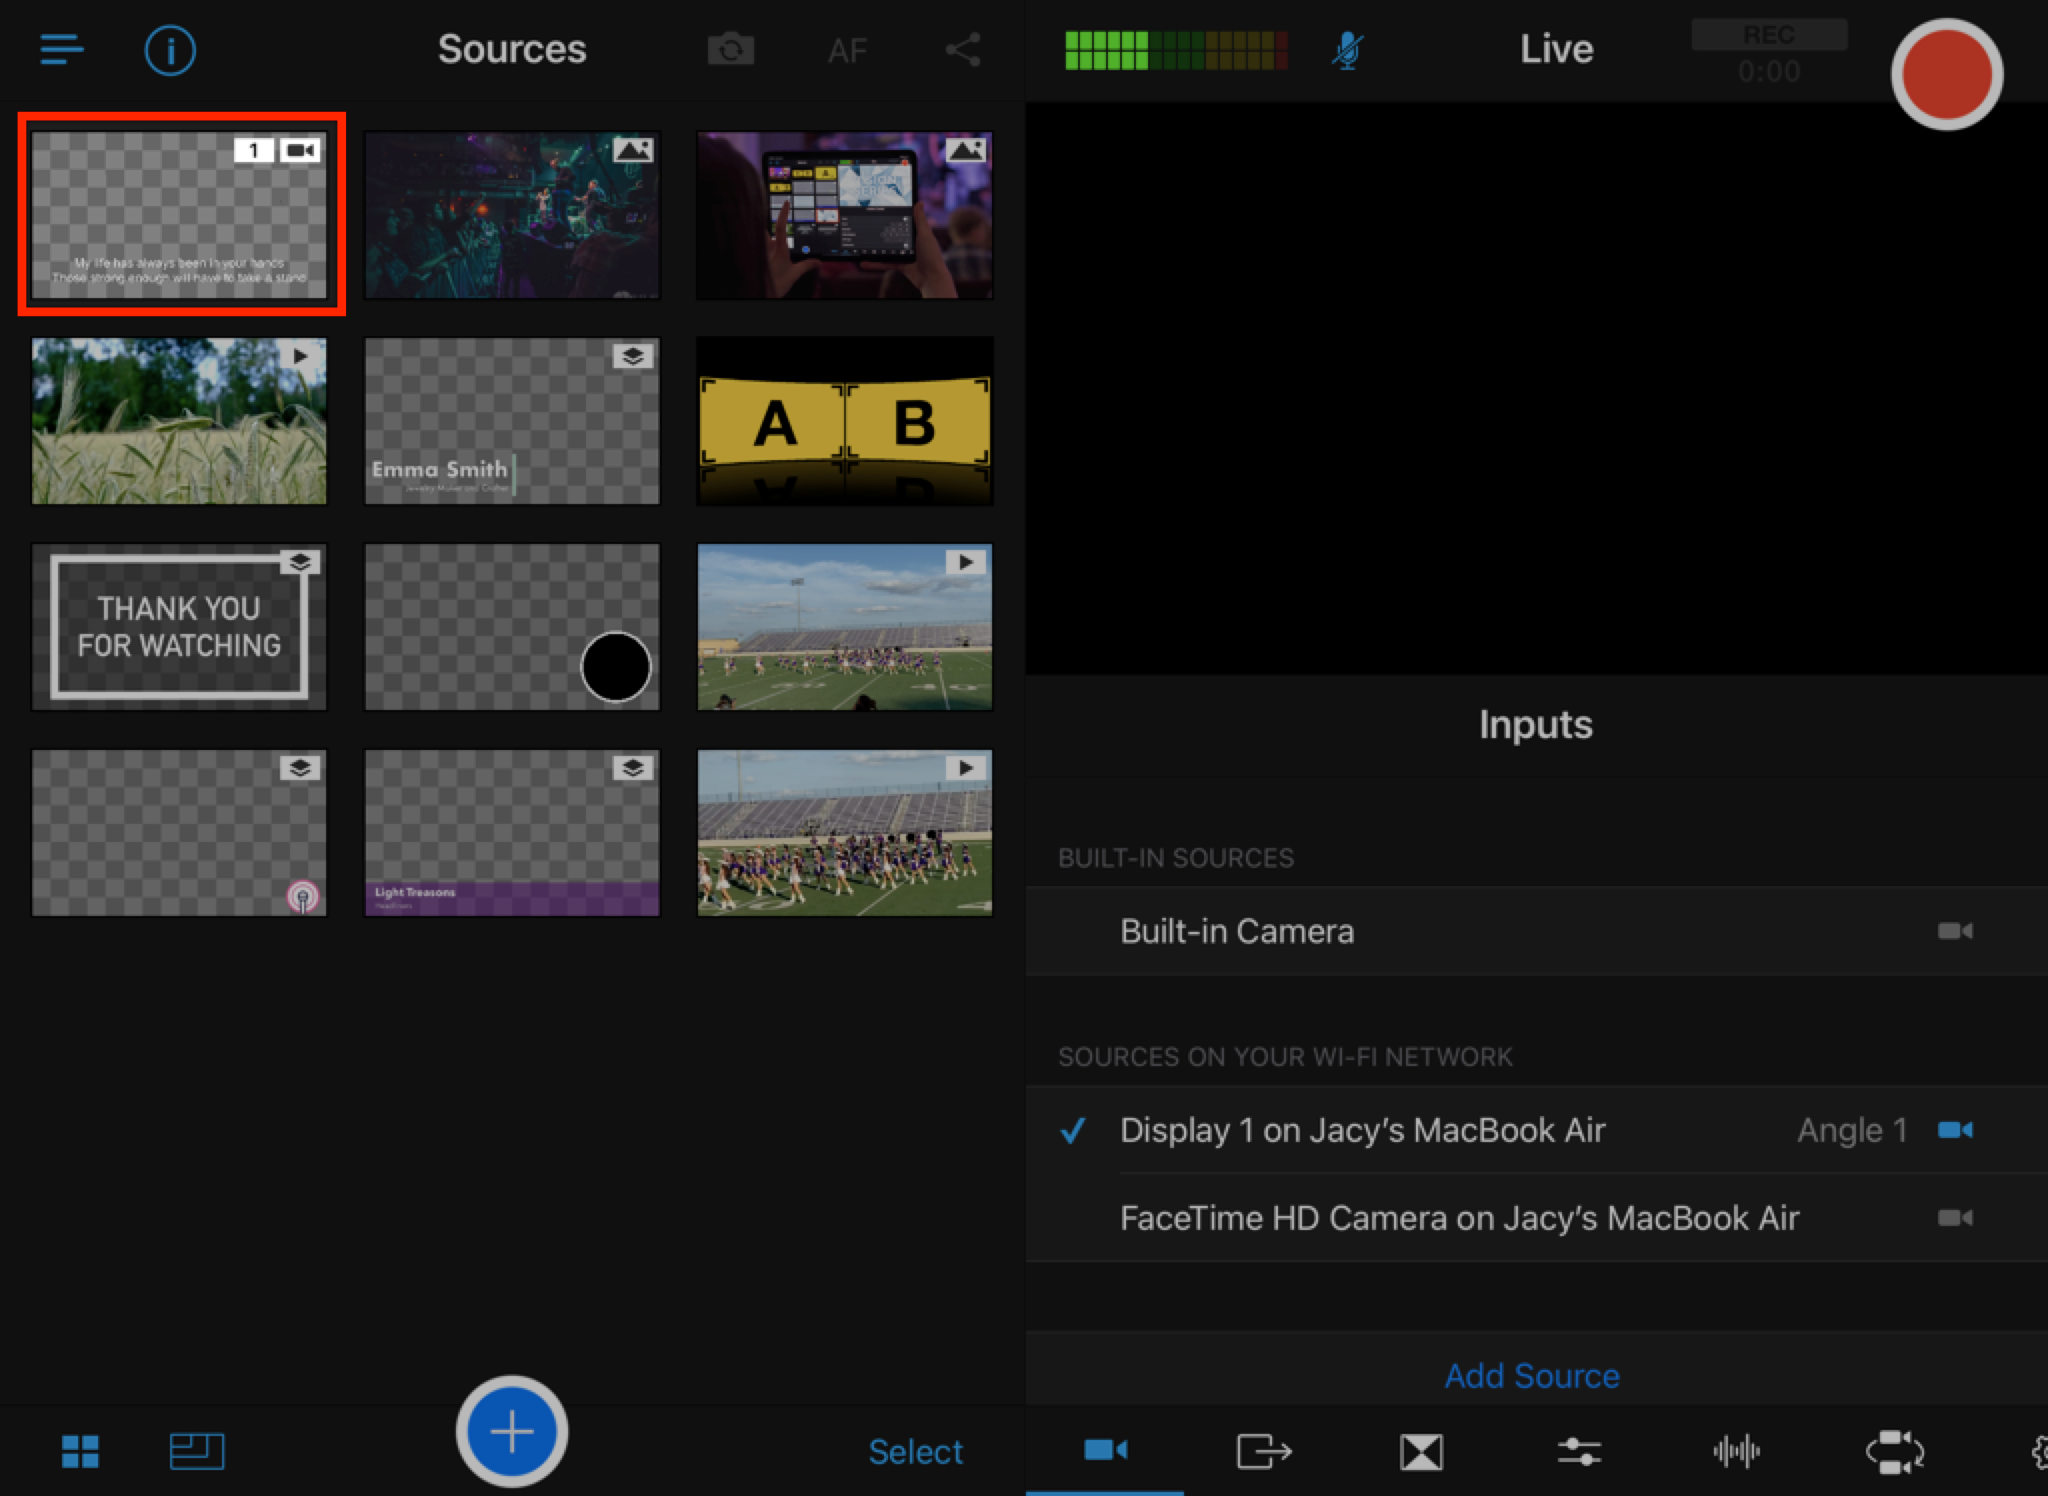
Sharing a Screen into Switcher Studio
Start screensharing using one of the following options:
Note: If you are using Switcher Cast, be sure you are running the most recent version. If you are using an older version, the Dark Background Transparency will not be an available option in Switcher Studio. To install the most recent version, follow this link and choose "View in App Store", or go directly to the App Store and search "Switcher Cast."
Once you have successfully started screensharing, the shared screen will appear under the Sources/Production Panel in Switcher Studio.

Editing the Shared Screen Options
Selecting the Overlay option for the shared screen
To begin editing the shared screen:
-
Tap and hold the thumbnail under the Sources/Production panel.
-
Tap Edit.
-
The Screen Properties menu will appear.

-
In the Properties menu, next to Layering, tap Overlay.
-
When you choose Overlay, the screen preview will become smaller, and additional options will appear.

Choosing the Overlay option allows the shared screen to appear on top of other camera sources or full screen assets during the production. You may need to adjust the size and position of the screen based on where you want it to appear on screen.
-
Resize the screen by pinching in (to make smaller) and out (to make bigger).
-
Tap and drag the screen to move it to the desired location. You can also use the Vertical and Horizontal alignment options for easier positioning.

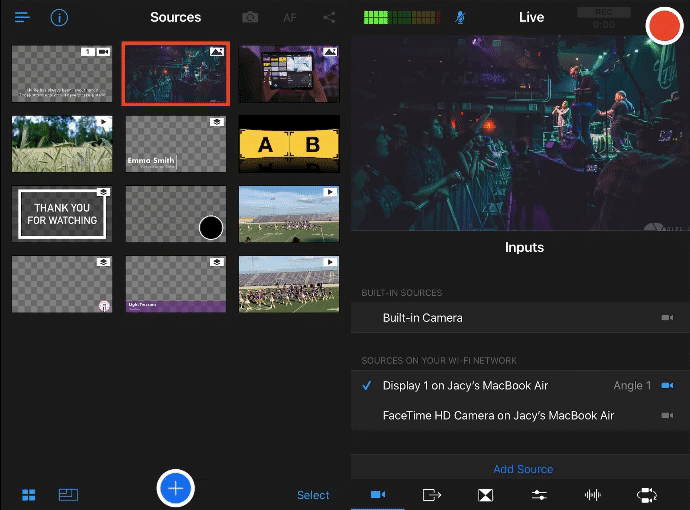
Adjusting the transparency level
-
In the Properties menu, scroll down the list of options to Fade Black to Transparent.
-
Move the slider to the right to increase the transparency.

-
Adjust any of the other settings as desired.
-
Tap Done in the top right corner when you are happy with the appearance.
The screen with transparency will appear in the Sources/Production panel.
To use it during the production, simply tap the screen thumbnail. It will appear on top of the live source or full-screen asset. As you make move through the slides or the program you are using to display the text, they will appear in Switcher Studio.
Best Practices when Using Dark Background Transparency
To make the most of this option, we recommend using light text against a black background.
Use Light-Colored Text
If you use a dark color for the text, it will become transparent when you adjust the transparency. You can use a variety of colors, but be sure to select a color that is light with high luminosity.
Use a Black Background
It is possible to remove dark backgrounds that are not black, but based on the color and darkness, full transparency may not be possible. Here is an example of a really dark purple.
Original Background

Maximum Transparency

Sharing Text with a Transparent Background using ProPresenter
ProPresenter provides several options that allow you to adjust the size, position, background color, and fill of the text. Utilizing these options can make it easier to share ProPresenter into Switcher Studio and then make the background transparent. Here are some of our recommendations:
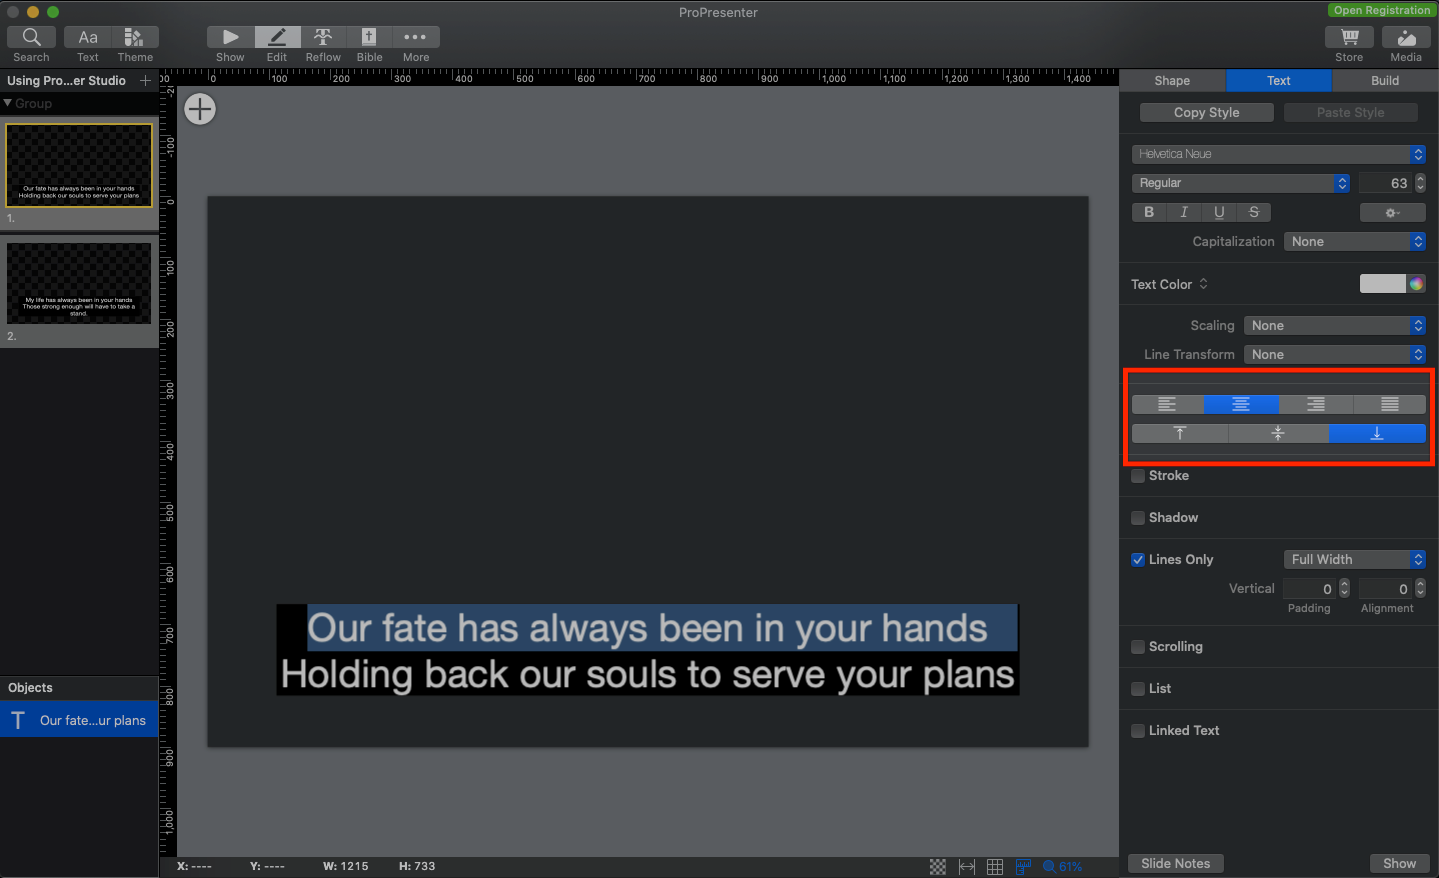
Alignment
Using the Alignment options can make it easier to position the screen once it is shared in Switcher Studio.
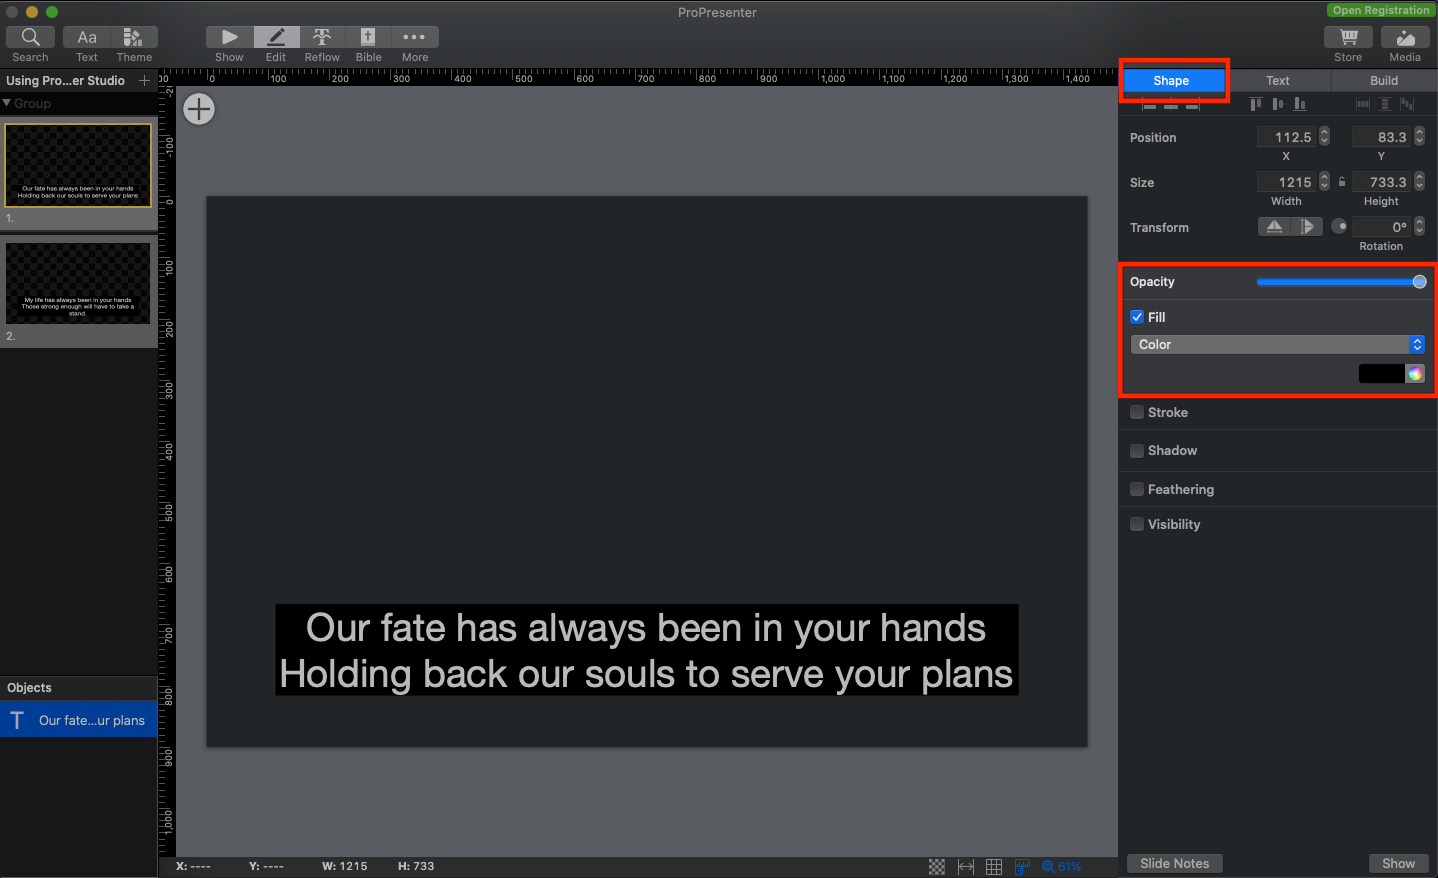
Shape Opacity & Fill
For the shape behind the text, we recommend sliding the Opacity all the way to the right and making the Fill color black.
Lines Only
If you are using ProPresenter to only bring in text, you may consider using the Lines Only option. This option is part of the Text Editor and allows you to limit the object's Fill to only show in lines behind the text.

When you are happy with the slides in ProPresenter, follow the steps at the top of this article to begin screensharing into Switcher Studio and remove the background.