Custom RTMP Setup in the Switcher App
When creating a Custom RTMP channel in the app, Switcher will automatically adjust your quality settings based on a speed test. You can stream immediately after creating a channel, or you can save the channel to use later.
Note: For general information about what Custom RTMP is and why it's used, check out the Help Center article Streaming to Platforms Without a Direct Integration (Custom RTMP).
To set up Custom RTMP in the Switcher App:
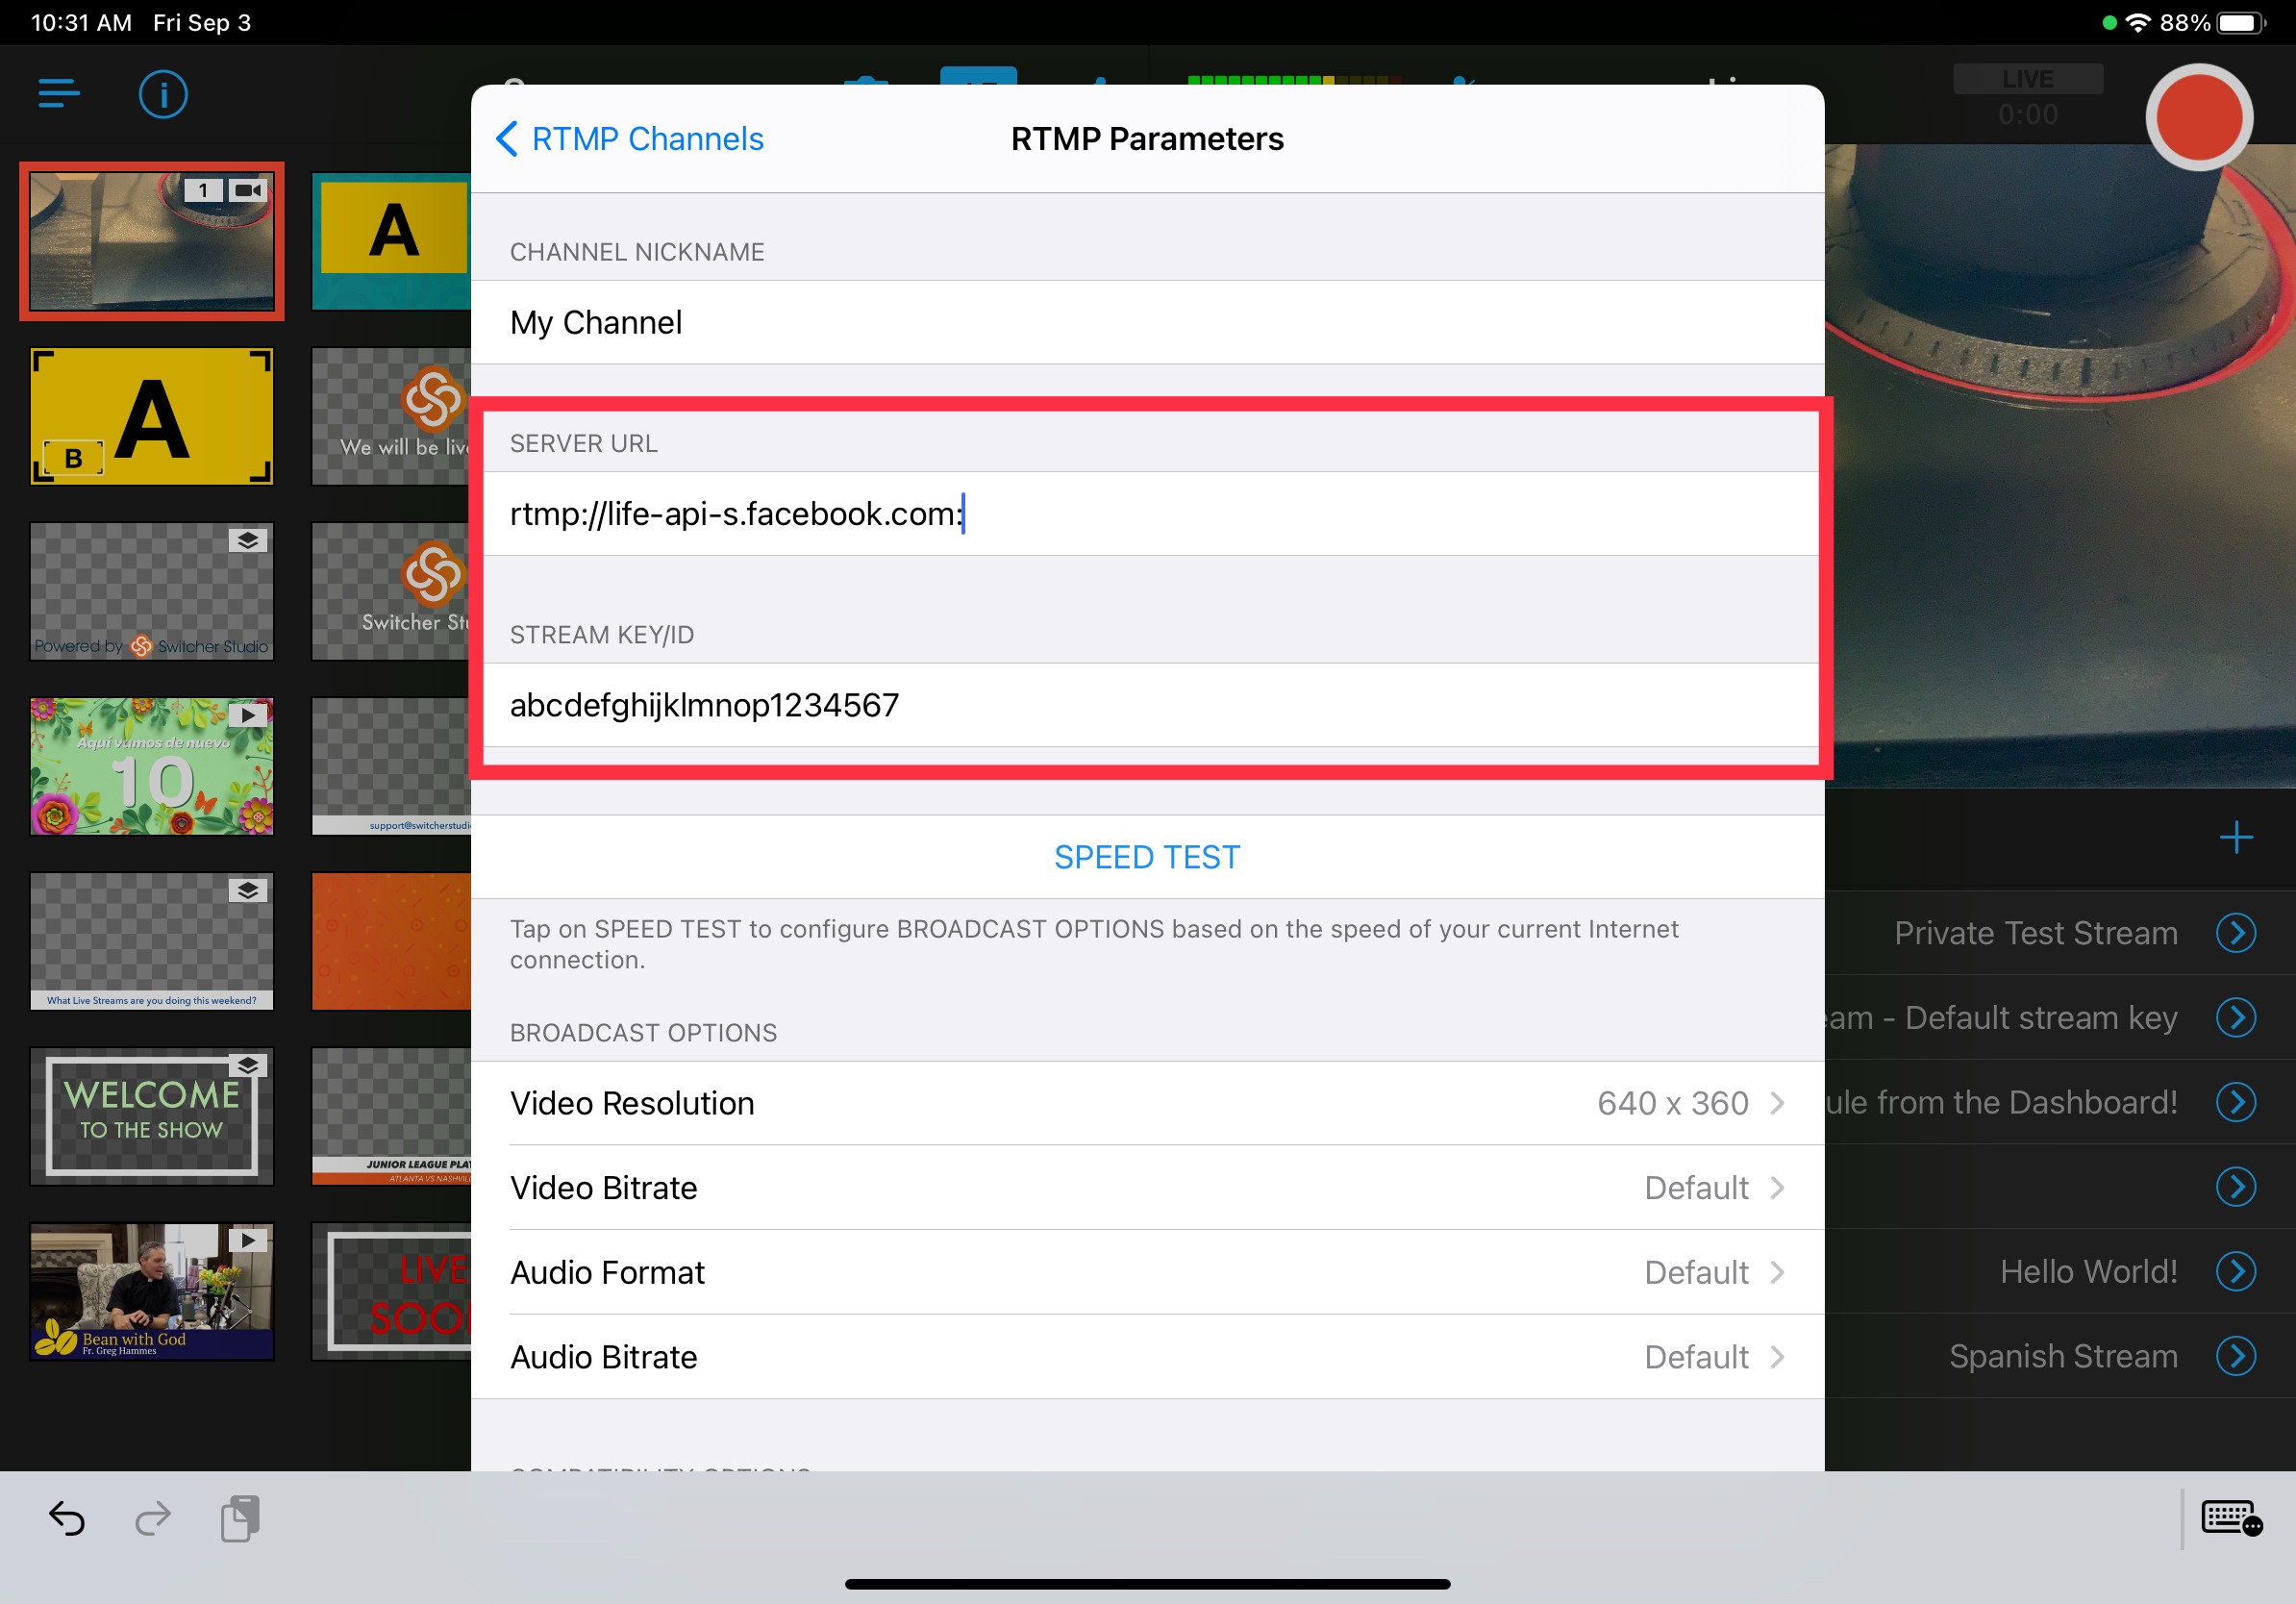
- Gather the Stream Key and Server URL from the platform you would like to stream to.
- Open Switcher and enter the Studio.
- In the Outputs tab, change the Broadcast Mode to Custom RTMP.
- Tap Create>New Channel (if there are already created channels to select from, you'll see a Change button which will pull up your full channel list).

- Enter the Server URL and Stream Key.
- Enter a Channel Name.
-
Next, run a speed test so that Switcher can identify the best settings for your broadcast and Wi-Fi. To do this, tap RUN SPEED TEST under the Broadcast Options.

-
Give the test time to run. Once it's complete, tap Save to go back.

-
You'll see that Switcher has updated your Broadcast Options based on the speed test results. Making any other necessary adjustments and tap Done in the top-right corner to save your newly created Custom RTMP channel.

- To edit an existing RTMP Channel, Tap the ellipsis (...) to the right of the channel and then Edit. You can also delete a channel in this location.

- If you were setting up a Custom RTMP channel for later use, you are finished for now.
- When you are ready to begin your Custom RTMP broadcast, change the Broadcast Mode to Custom RTMP and select your channel from the RTMP Channel list so that it appears in the Outputs tab.

- If you need to include your RTMP Channel in a Multistream, set the Broadcast Mode to Livestreaming>Create the Livestream>Add the RTMP Channel as a destination.

-
When you are ready to go live, tap the red Go Live icon in the upper right.
