Sharing a Clip to Facebook Stories or Reels
The Clips feature in Switcher Studio makes it easy to trim your video recording and share the clip directly to Facebook Stories or Reels. Sharing to Facebook Reels from Switcher Studio is limited to vertical (9:16) videos (it's not required for Stories, but it's highly recommended), and sharing to Facebook Reels is limited to iPhones.
There are two steps to share a clip to Facebook Stories or Reels:
-
Create a Clip in Switcher Studio
-
Share to Facebook Stories or Reels
Jump to:
Step 1: Creating a Clip in Switcher Studio
Accessing the Clip Editor
- Open the Local Recordings folder.
- From the Home Screen, tap Video Library and use the dropdown arrow to change to Local Recordings.
- From within the Studio, tap Menu (icon showing three stacked lines) > Local Recordings.
- Tap the live recording you want to use to create a clip.
- Scroll down and tap Start Clipping.


-
The Editor window will include a preview window and editing options. As you make adjustments, you can tap play in the video preview to watch the clip.
Trimming a Video
The Clips Editor has several options, but the most commonly used tool is Adjust, which allows you to shorten/trim the video. From the Clip Editor:

-
To change where the clip starts, swipe across the timeline to the desired starting location.
-
Then tap the Start button below the timeline. The timestamp in the Start button will show where the clip will begin.
-
-
To change where the clip ends, swipe across the timeline to the desired ending location.
-
Then tap the End button below the timeline. The timestamp in the End button will show where the clip will end.
-
-
At any time, you can tap the Play button in the center of the clip preview window to watch the clip.
-
Make adjustments to the start and end locations as needed.
-
Tap Save at the bottom of the Editor window when you are finished.
-
If you do not want to make any other changes to the clip, tap Create in the top right corner. Otherwise, tap through any of the other Editor options (e.g. Format, Layers, Captions) to continue customizing the clip.
For step-by-step instructions on using any of the other Clip Editor options, check out the article Creating a Video Clip.
Step 2: Sharing a Clip to Facebook Reels or Stories
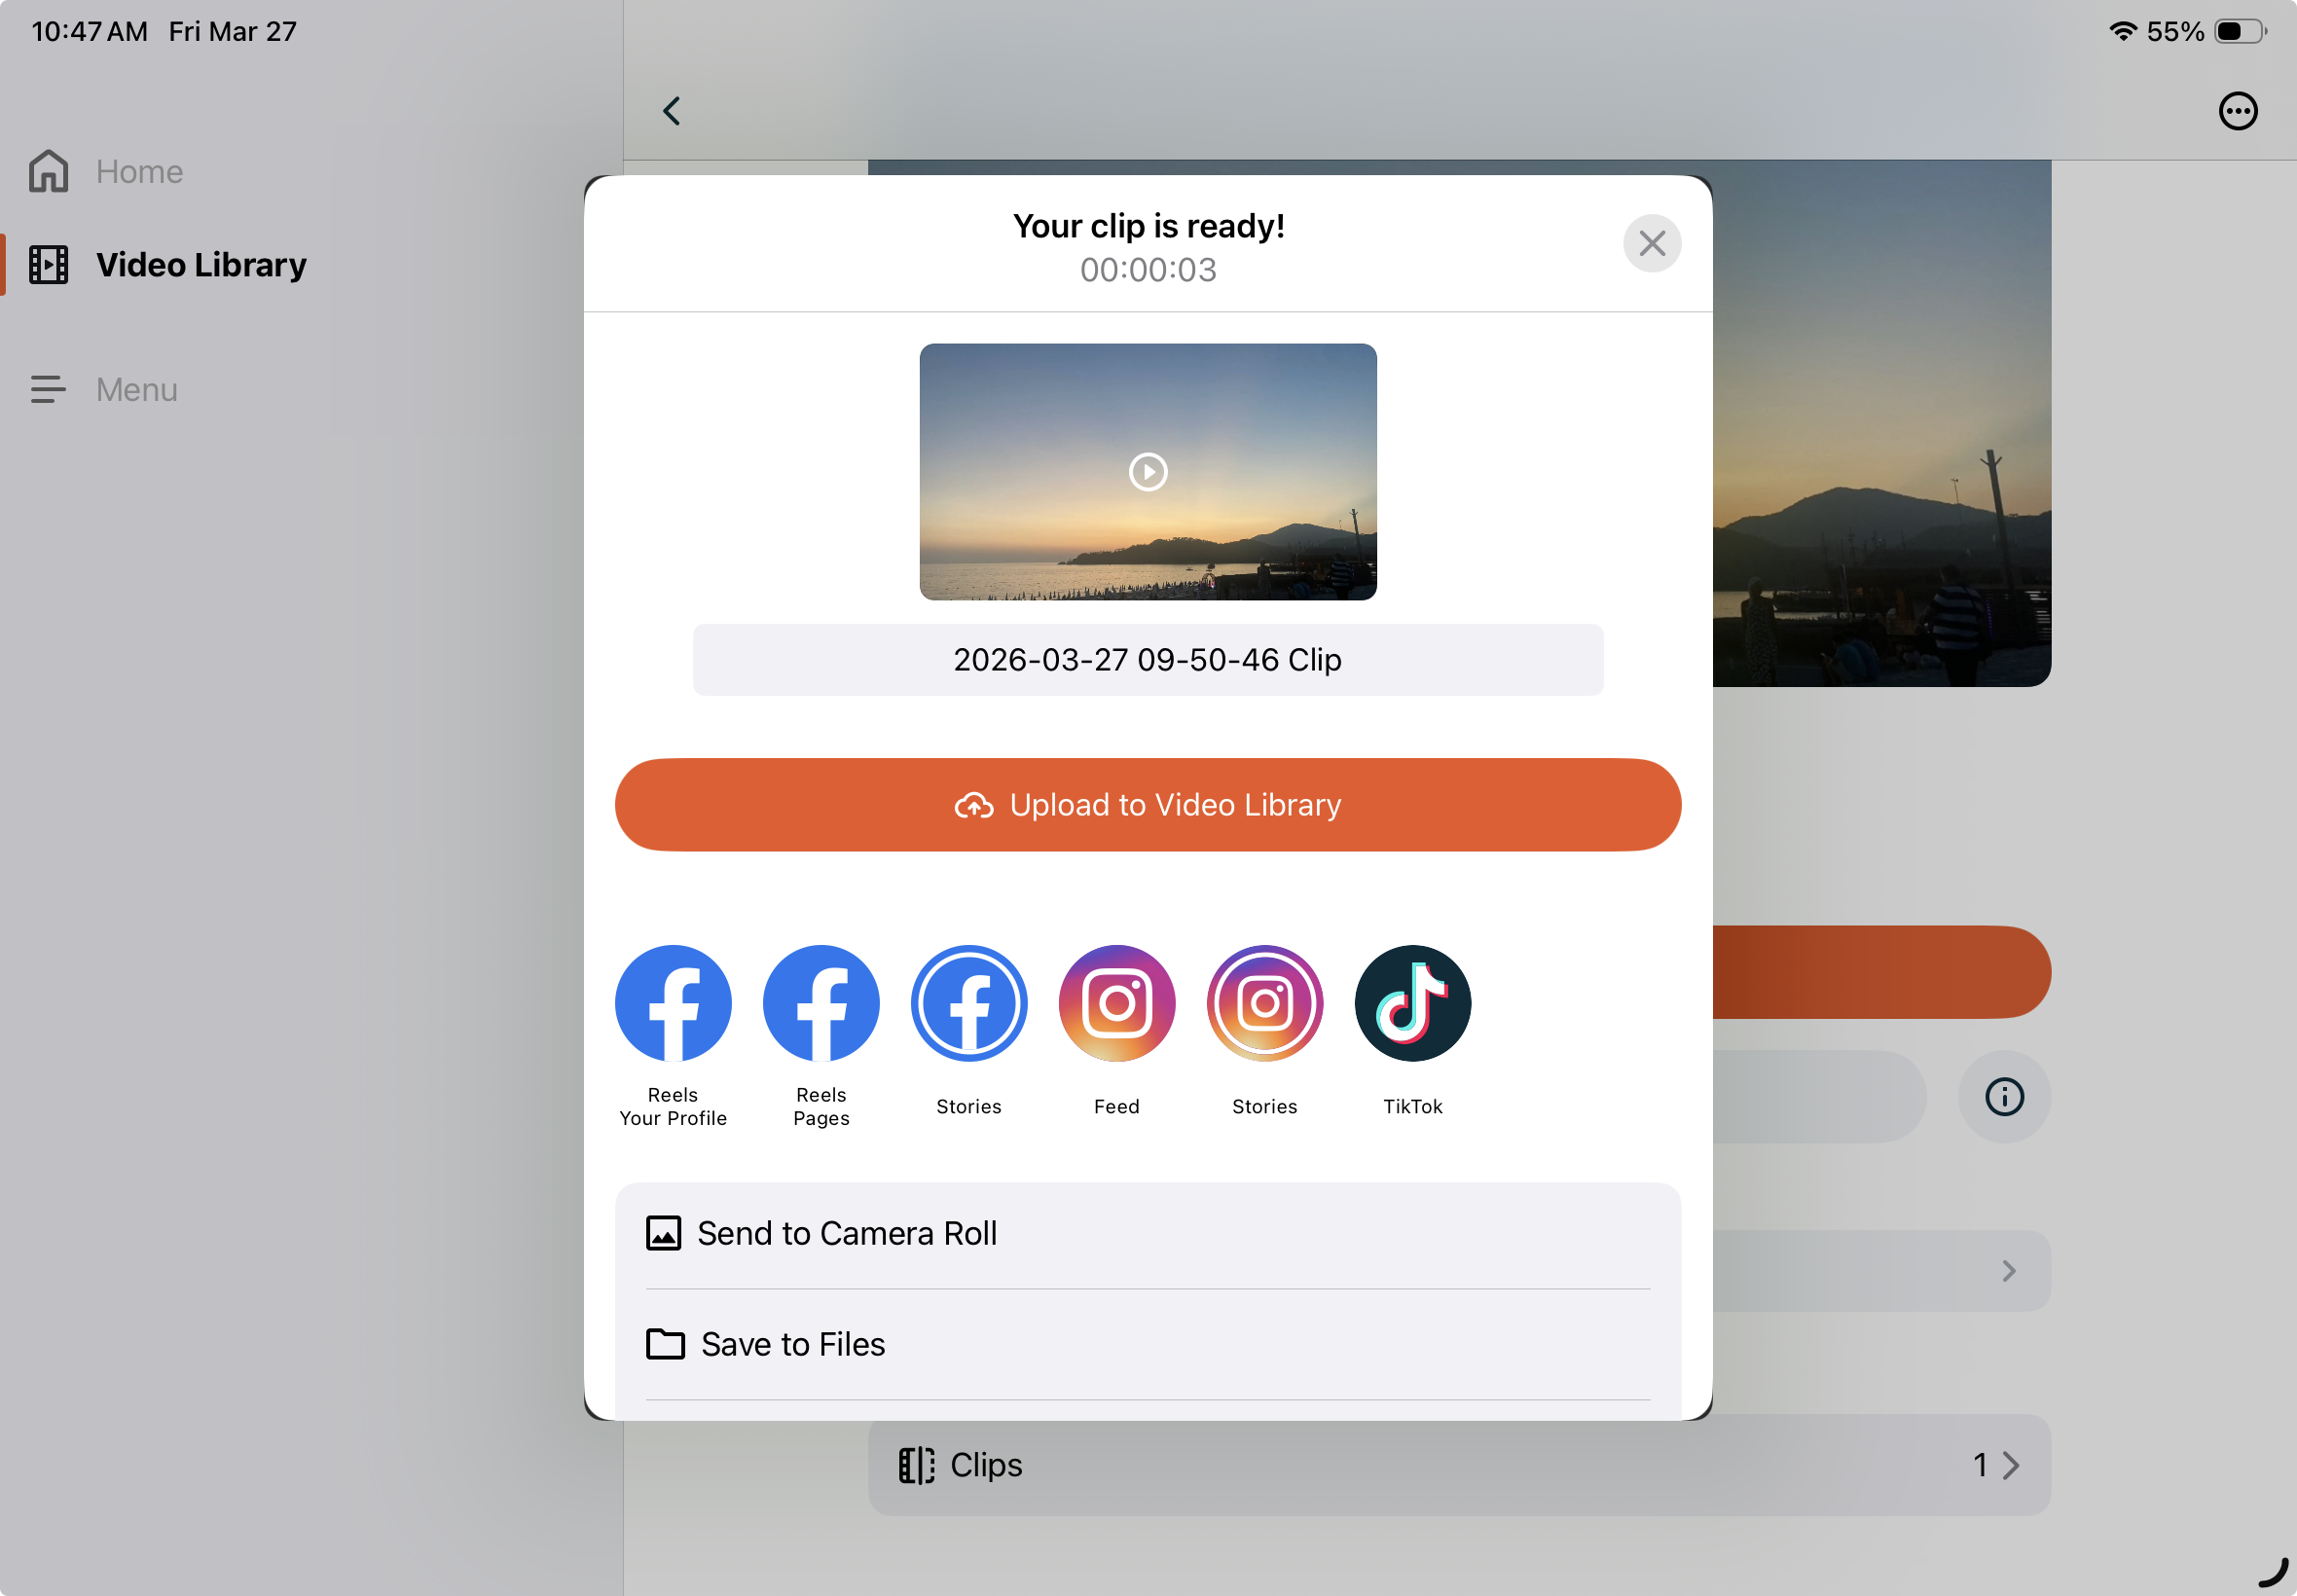
If you just went through the steps above to create a clip, sharing is only a couple of taps away. After you tap Create to save the clip, you will be taken back to a screen that shows details for the clip you just created.
From this Clip screen:
-
A menu will appear with options to share.
-
Select the Destination
-
Reels - Your Profile
-
Reels - Pages
-
Select Page
-
-
Stories
-
Publishing to Facebook Reels
-
After tapping Share to Facebook Reels, make the necessary specifications and tap Upload.


Publishing to Facebook Stories
-
After tapping Share to Facebook Stories, Facebook will open, with a preview of the clip.
-
Tap any of the edit options on the top or lower-left to further customize the clip using Facebook's tools.
-
Tap Privacy in the lower-left to confirm or change who can see your story.
-
When you are ready to publish the video, tap Share to Story in the lower right.

Important Notes about Facebook Stories and Reels
Facebook Reels
-
For users 18 and older, by default the audience visibility for Reels is set to public, but you can change the audience prior to publishing any individual Reel.
-
Reels must be between 3 seconds and 60 seconds.
-
Reels will be available for playback in your Reels profile.
-
Your Friends may see your Reels in their Facebook Feed.
-
You can see the full list of technical and content requirements on Facebook's support page here: https://www.facebook.com/business/help/1197310377458196?id=376980407544978
Facebook Stories
-
Stories disappear after 24 hours (unless they're saved).
