How to Create a Video Clip With the Switcher App
The Clips feature allows you to trim your Switcher Studio recordings into shorter videos, so that you can repurpose them for ads, teaser videos, time lapse videos, social posts, and more. In addition to trimming the video, Clips has several customization options, including:
-
Adjusting the playback speed
-
Removing the audio
-
Adjusting the aspect ratio
-
Adding a progress bar
-
Adding an image
-
Adding a title
-
Automatically adding captions based on the audio

Jump to:
-
Reformatting the Aspect Ratio (16:9, 1:1, or 9:16) and Adjusting the Framing
-
Adding a Progress Bar, Adding an Image, and Adding a Title to a Clip
Video Tutorial: Creating a Video Clip in Switcher Studio
Creating a New Clip
Step 1: Open the Clip Editor
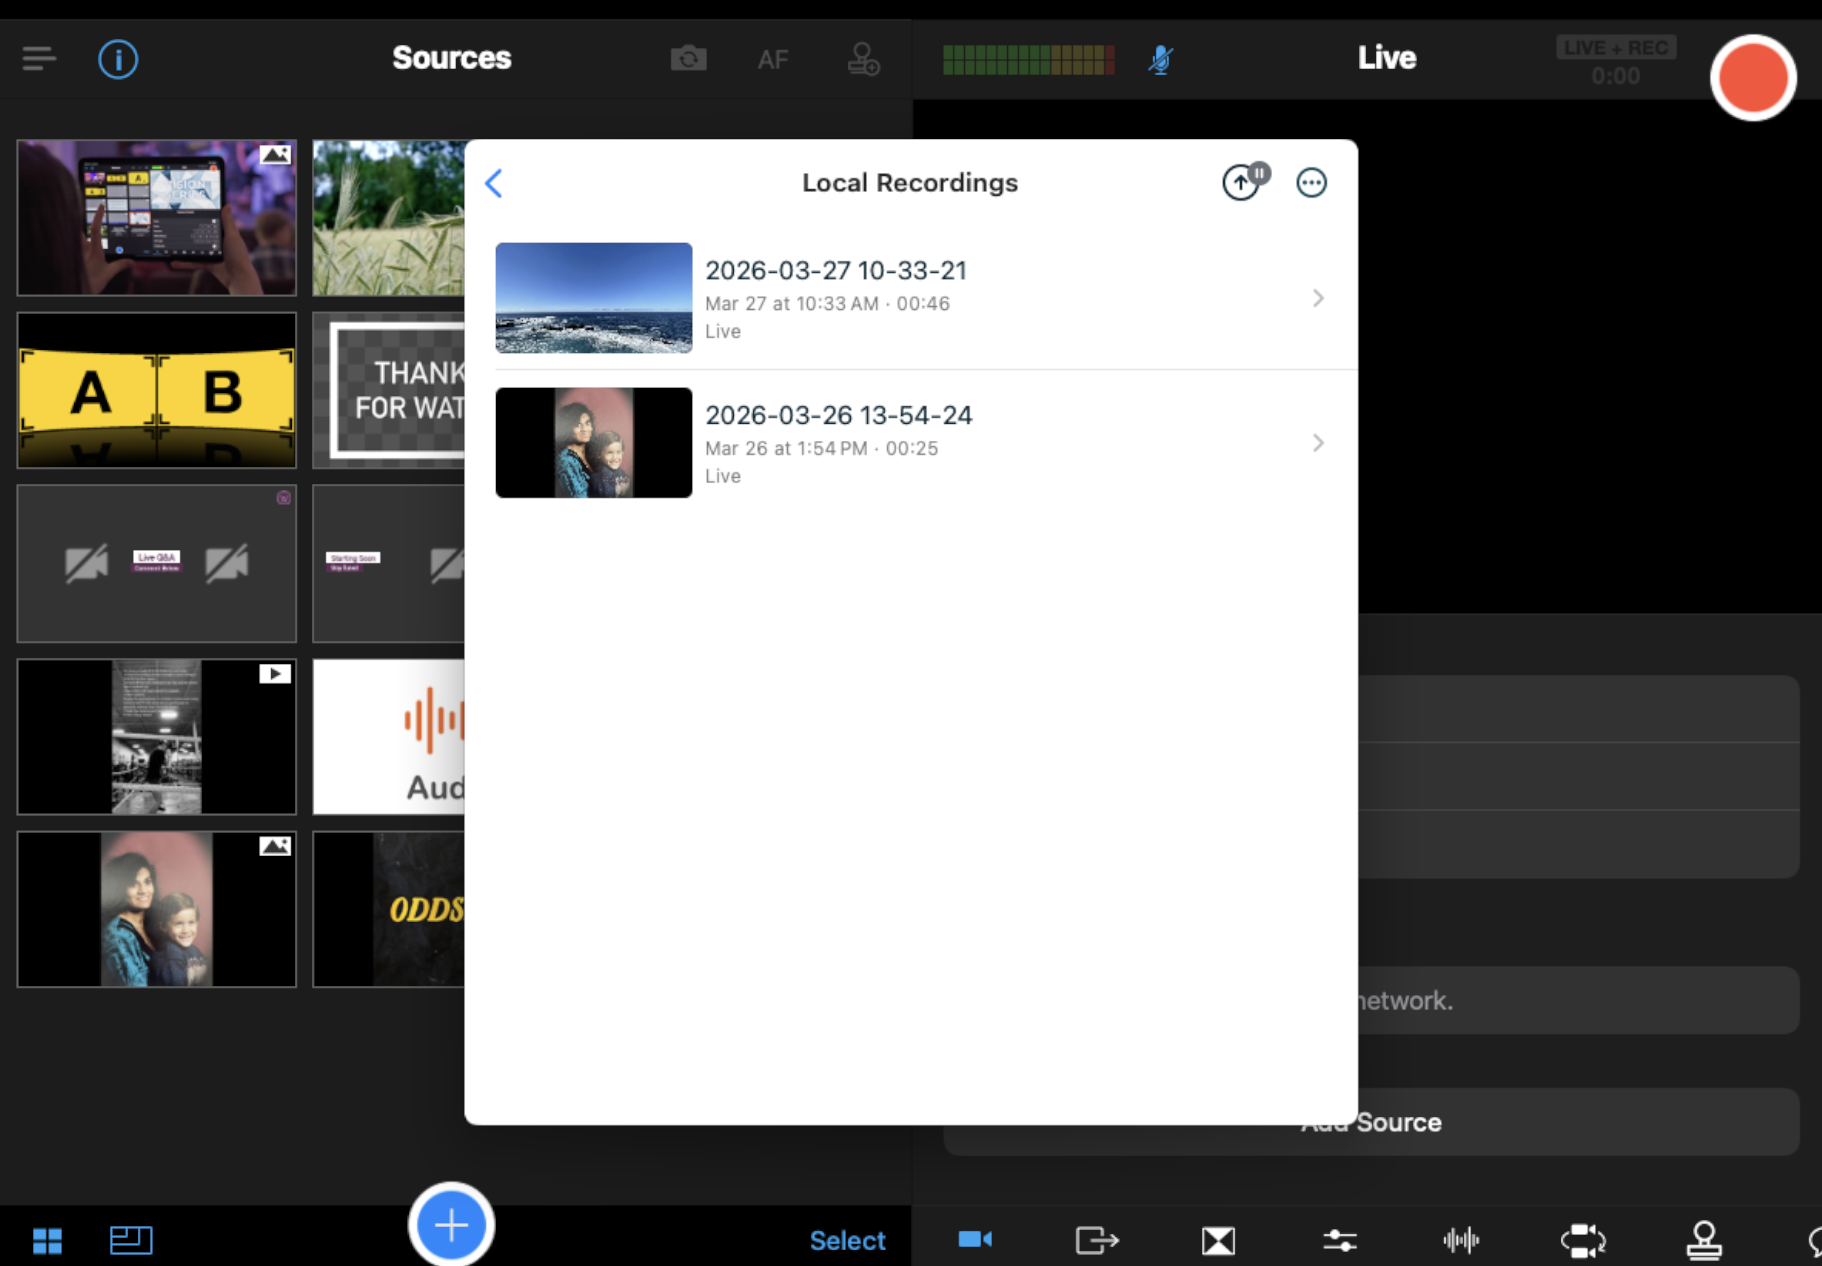
How you access the Clip Editor will vary depending on whether you are creating the clip from within the Studio or from the Home Screen. Either way, you first need to access the original recording in "Local Recordings"
To access the Clip Editor from Local Recordings in the Home Screen:
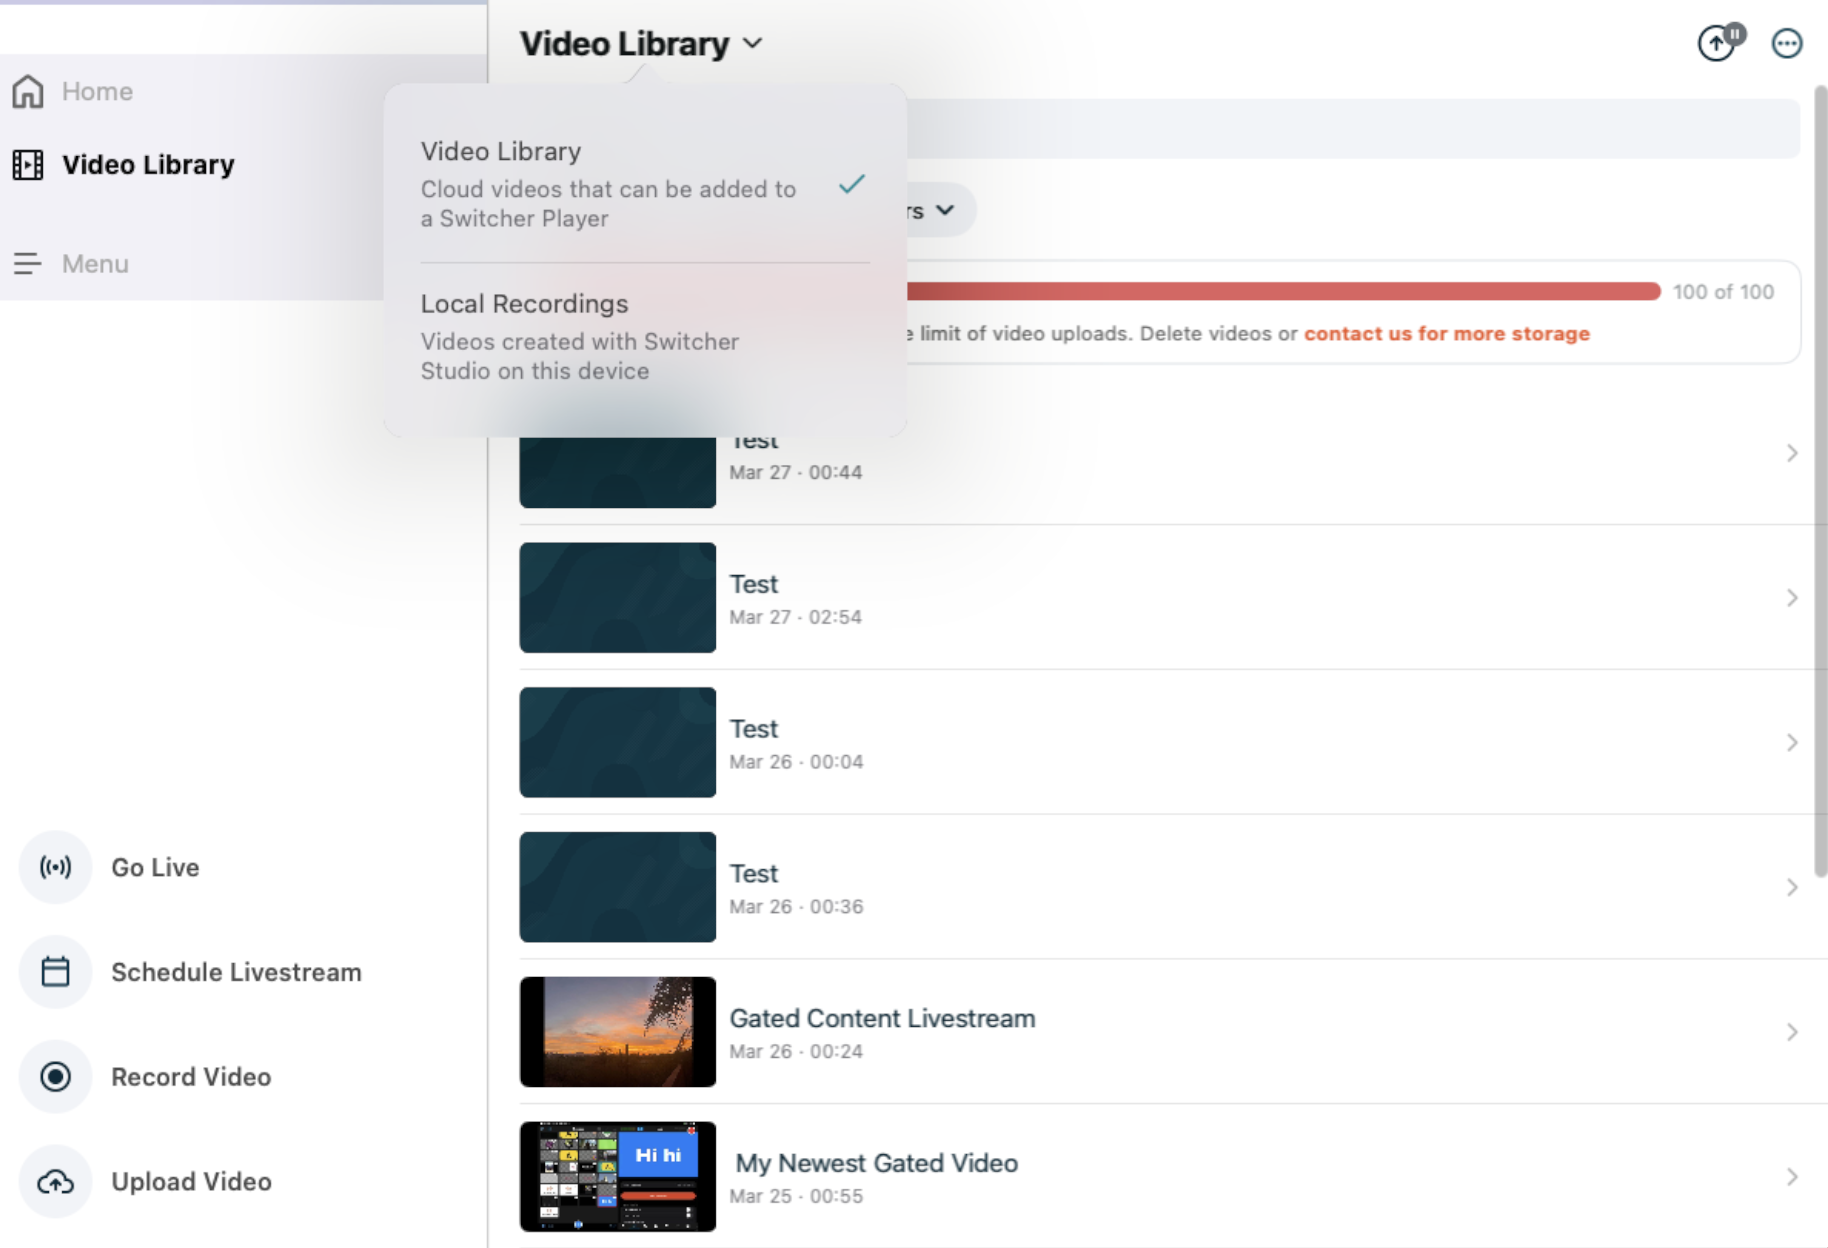
- Open the Local Recordings folder.
- From the Home Screen, tap Video Library and use the dropdown arrow to change to Local Recordings.
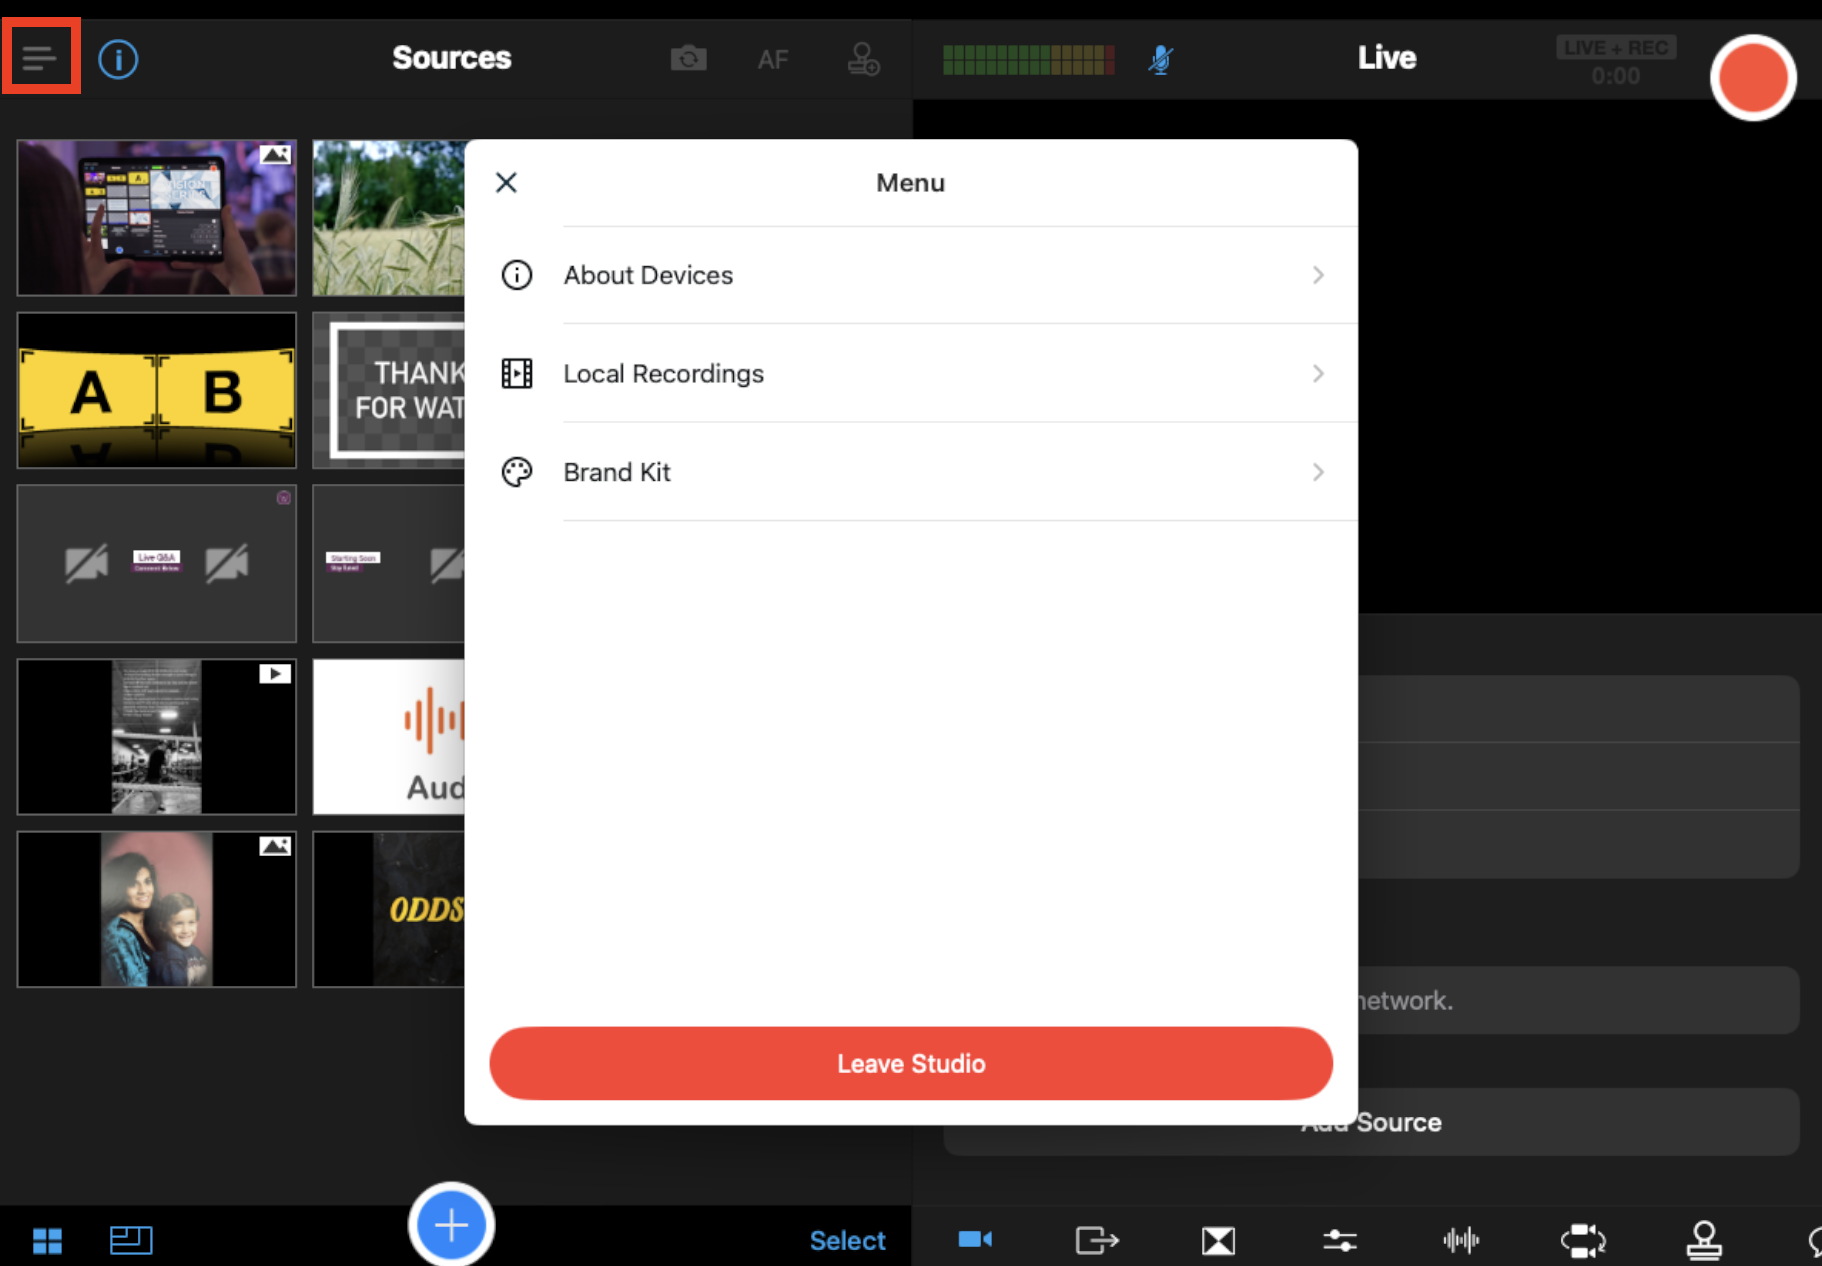
- From within the Studio, tap Menu (icon showing three stacked lines) > Local Recordings.
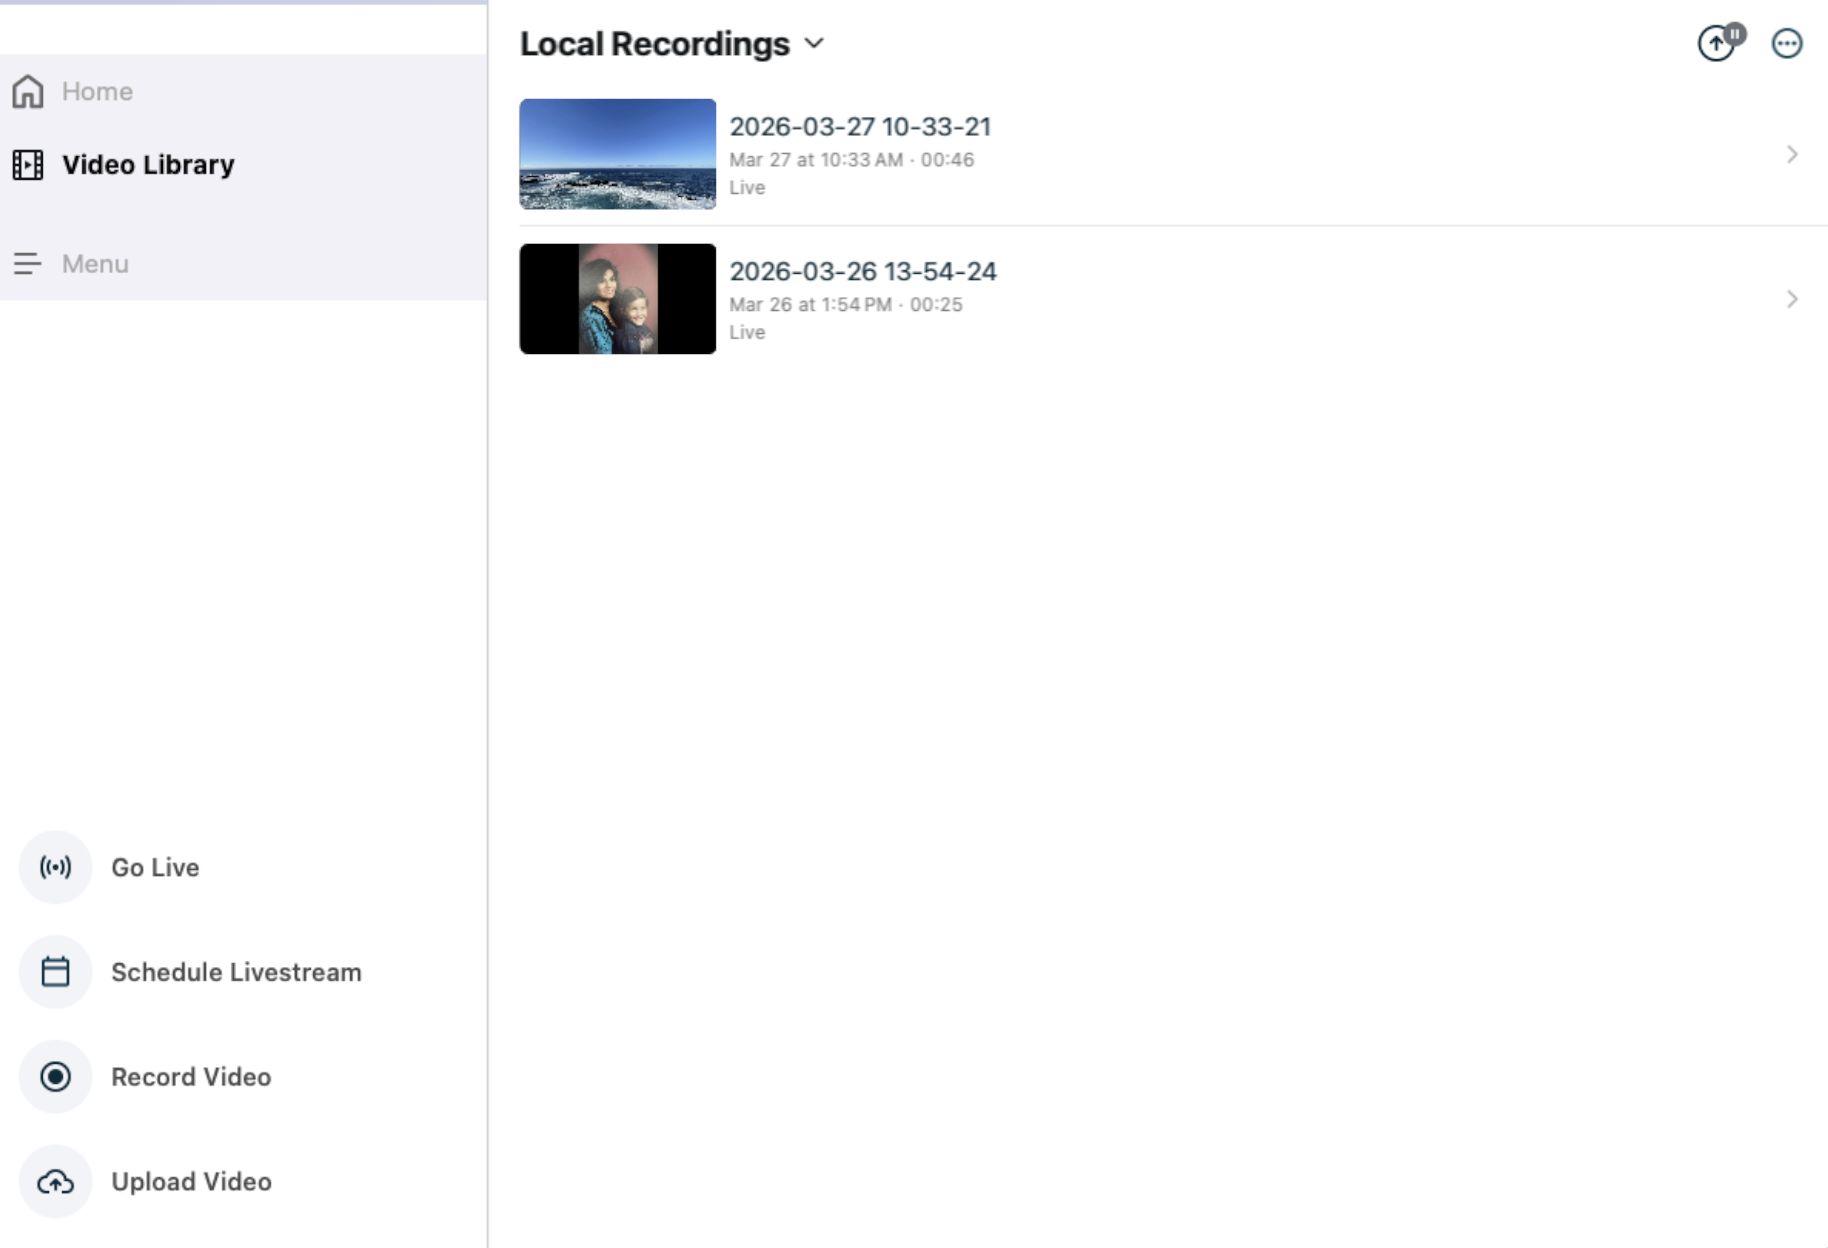
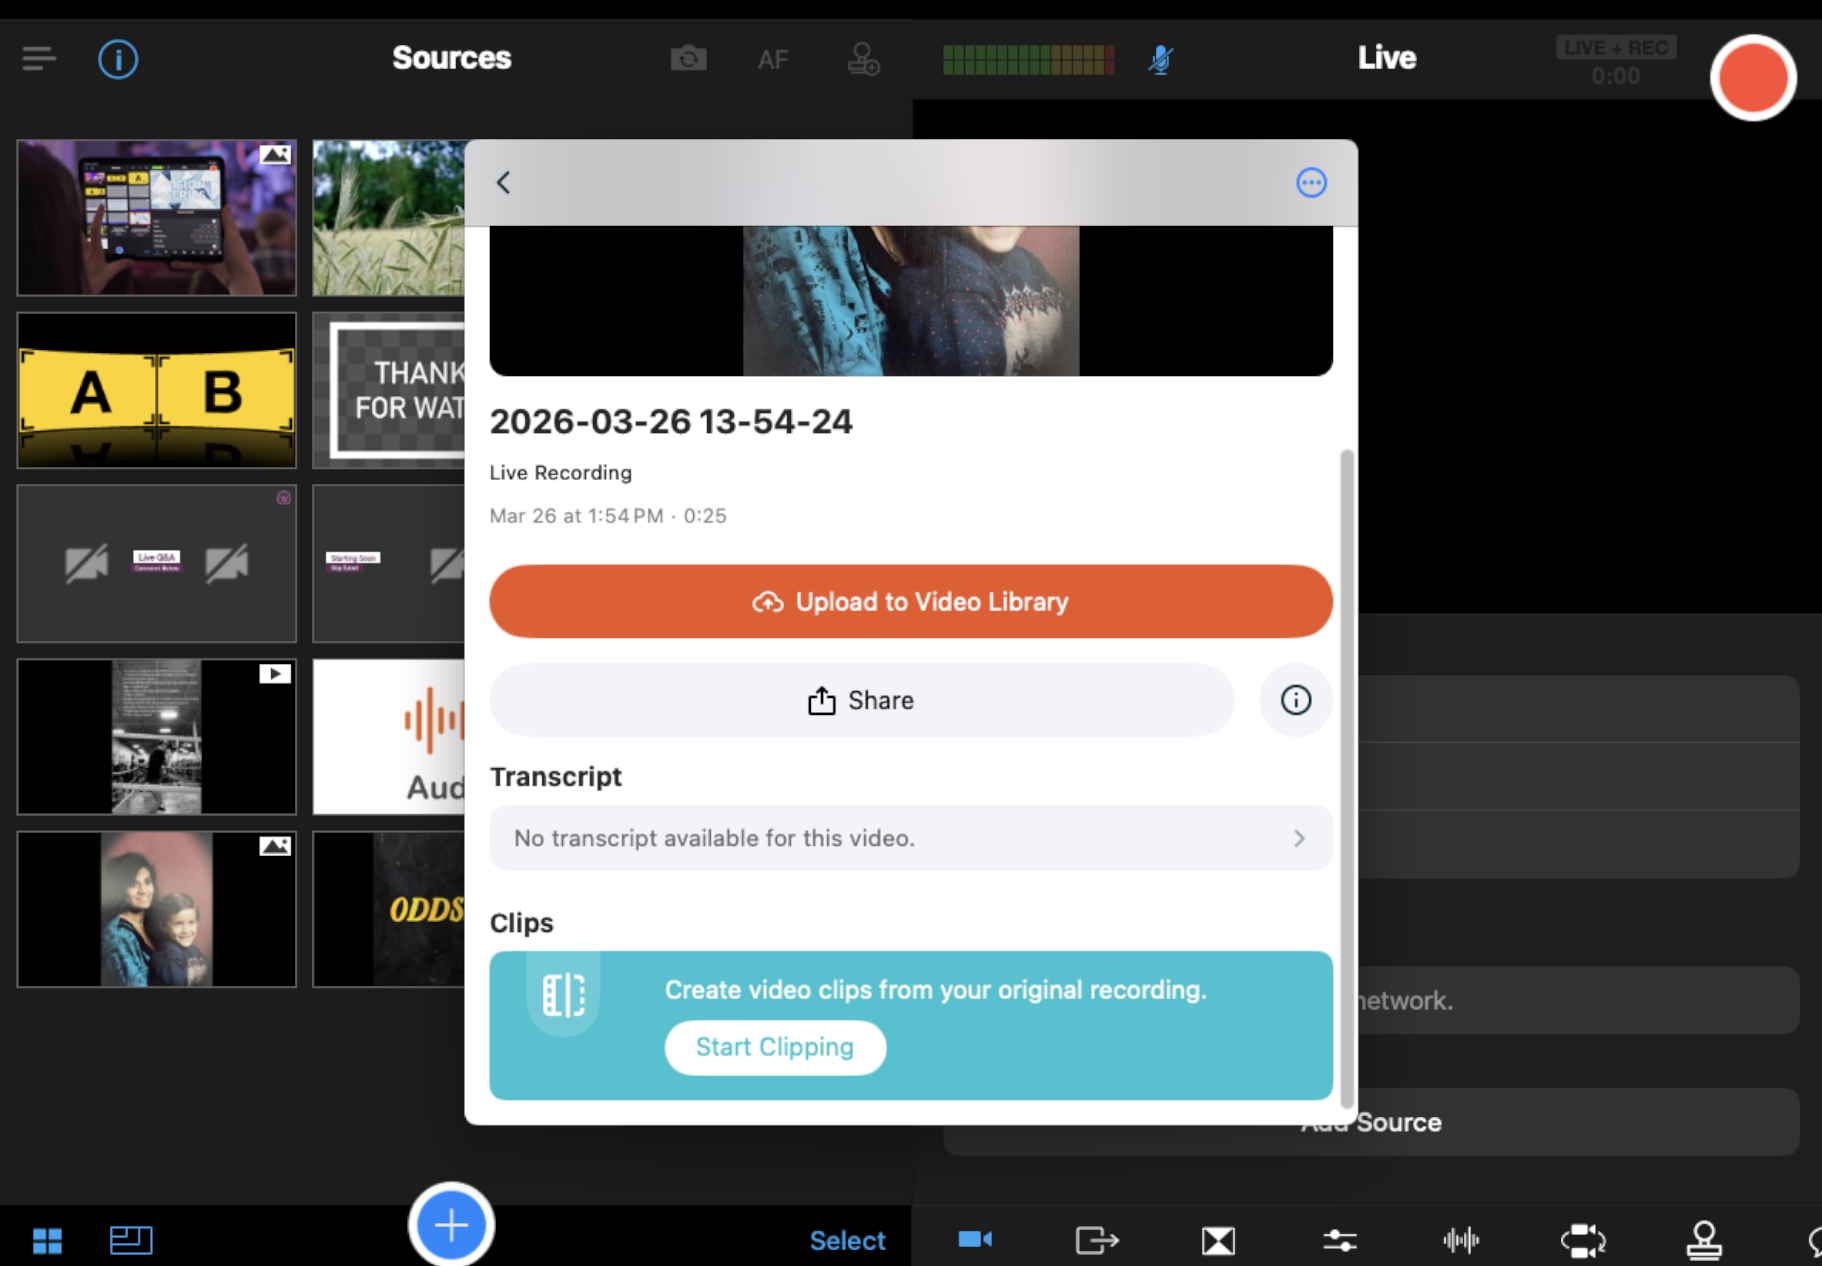
- Tap the live recording you want to use to create a clip.
- Scroll down and tap Start Clipping.

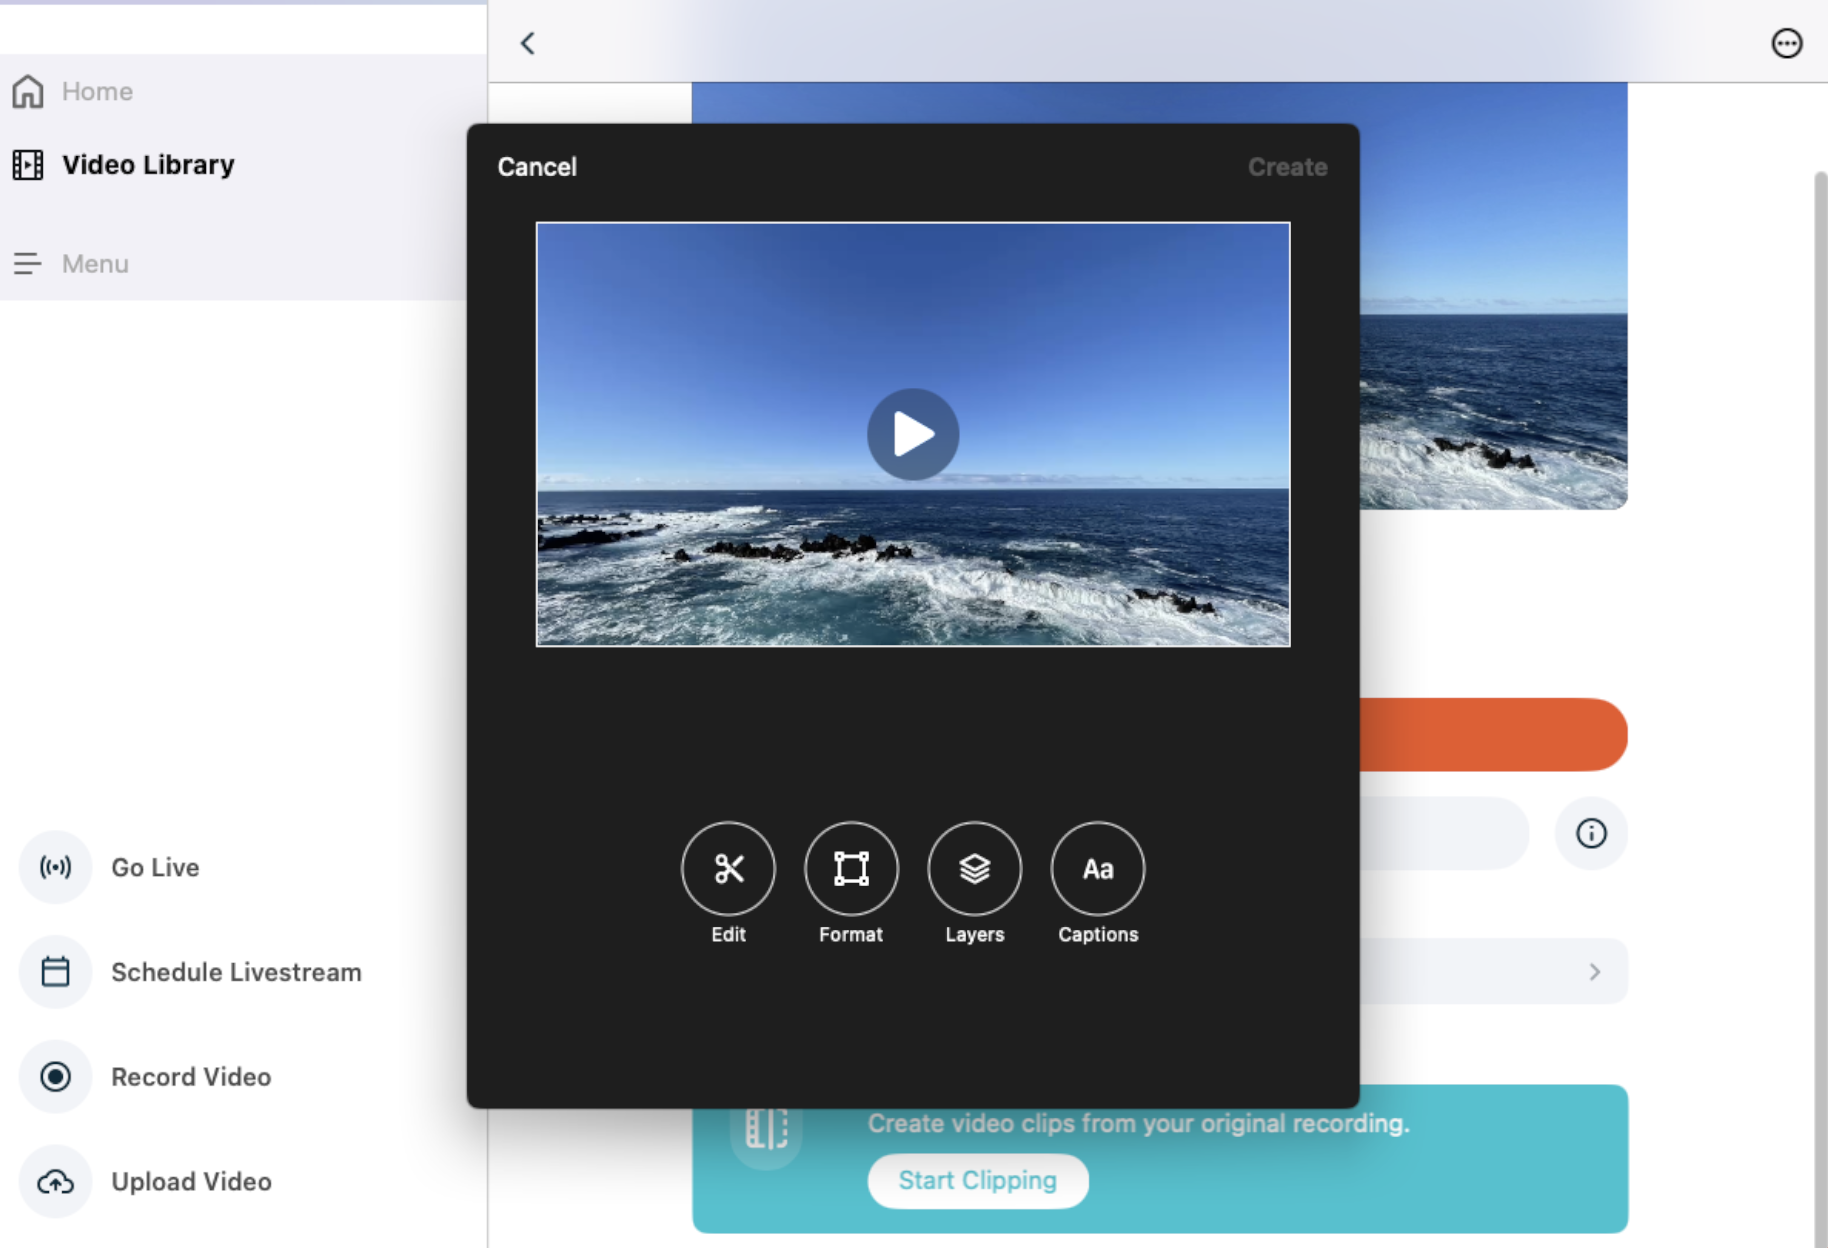
-
The Editor window will include a preview window and editing options. As you make adjustments, you can tap play in the video preview to watch the clip.
To access the Clip Editor from Local Recordings in the Studio:
- Tap Menu (icon showing three stacked lines)
- Tap Local Recordings.
- Tap the Live Recording you want to edit.
- Scroll down and tap Start Clipping.
Step 2: Trim the video to the desired clip length.
-
Tap Edit (scissors icon).
-
The video timeline will appear in the Editor.

-
To change where the clip starts, swipe across the timeline to the desired starting location.
-
Then tap the Start button below the timeline. The timestamp in the Start button will show where the clip will begin.
-
-
To change where the clip ends, swipe across the timeline to the desired ending location.
-
Then tap the End button below the timeline. The timestamp in the End button will show where the clip will end.
-
-
Tap the Play button in the center of the clip preview to watch the clip.
-
Make adjustments to the start and end locations as needed.
-
Tap Save at the bottom of the Editor window when you are finished.
-
If you do not want to make any other changes to the clip, tap Create in the top right corner. Otherwise, follow the steps below to make additional changes.
Adjusting the Speed and Removing the Audio
Adjusting the Playback Speed of a Clip
You can change the playback speed in the Adjust screen:
-
From the main Clips Editor, tap Edit.
-
Tap the icon in the top left corner that looks like a timer.
-
A Speed menu will appear.
-
Drag the slider to the desired speed.

-
Tap the X in the top right corner of the Speed window to close the slider.
-
Tap the play button in the preview section to view the clip with the adjusted speed. To make adjustments, tap the Speed icon again.
-
Tap Save at the bottom of the Editor window when you are finished.
If you do not want to make any other changes to the clip, tap Create in the top right corner of the Clip Editor. Otherwise, continue editing the clip using the customization steps outlined throughout this article.
Removing the Audio from a Clip
You can remove the audio from the original recording in your clip. This mute option is in the Adjust screen.
-
From the main Clips Editor, tap Adjust.
-
Tap the icon in the top right corner that looks like a speaker to remove the audio.

-
When the audio has been removed, the icon will dim to grey and have a strikethrough line across it (shown in the screenshot below).

-
To restore the audio, tap the speaker icon again, so that it’s white.
-
Tap Save at the bottom of the Editor window when you are finished.
-
If you do not want to make any other changes to the clip, tap Create in the top right corner of the Clip Editor. Otherwise, continue editing the clip using the customization steps outlined throughout this article.
Reformatting the Aspect Ratio (16:9, 1:1, or 9:16) and Adjusting the Framing
The Clip Editor allows you to change the aspect ratio of the video, so that you can more easily repurpose and share the clip in different formats. For example, if you recorded a horizontal video but you want to share the clip on a platform like TikTok that uses vertical video, you can reformat the clip to 9:16. You can also adjust the frame to remove black padding, zoom in, and reposition the video within the frame.
Changing the aspect ratio
-
From the main Clips Editor, tap Format.

-
Tap the desired aspect ratio.
-
When you make a selection, the preview will adjust to show you the clip in the new format.

Removing black padding
If changing the aspect ratio results in black padding, you can adjust the framing to fill the screen. Adjusting the frame will cut off parts of the video, so it might not be ideal for all scenarios . There are two ways to fill the screen and remove the black padding:
-
Tap the Fill icon next to Framing (middle icon that looks like a box) to automatically scale up the video to fill the entire screen.
-
If you want more control over which part of the video fills the screen, tap the Custom Position icon (right icon that looks like a pointing finger). Use the Zoom, Horizontal, and Vertical sliders to position the video in the frame.
Changing the color of the padding/background
If you do not want to remove the padding, you can change the color, so that the background looks more deliberate. To change the color:
-
Tap the round color wheel next to Background Color.
-
The Background Color window will appear.
-
Toggle through the options at the top for different color selector tools.
-
Select your desired color.
-
As you make a selection, the background color will adjust in the clip preview.
-
Tap back on the main Format window to close the Background Color window.

Note: It is only possible to change the background color, if there is padding around the video.
Zooming In and Adjusting the Position of the Video
The Custom Position Framing option allows you to zoom in/out on the video and change the position of the video within the frame. To adjust these settings:
-
Tap the Custom Position icon (far right icon that looks like a pointing finger).
-
Sliders will appear for Zoom, Horizontal, and Vertical. Note: You may need to scroll down to see all the sliders.

-
Drag the Zoom slider to the right to zoom in and to the left to zoom out.
-
Drag the Horizontal slider to the right to move the clip position that direction and to the left to move the position in that direction.
-
Drag the Vertical slider to the right to move the clip position down and to the left to move the position up.
-
Tap Save at the bottom of the Format window to save your changes.
Adding a Progress Bar, Adding an Image, and Adding a Title to a Clip
The Layers tool lets you add a progress bar, an image, or a title to the clip.
-
From the main Clips Editor screen, tap Layers.

-
Tap Add Layer.
-
A window will appear with the layer options.

-
Tap the type of item you want to add.

Adding a Progress Bar
After tapping Add Progress Bar from the Layer menu, the Progress Bar window will appear with customization options.

To change the Progress Bar color:
-
Tap the round color wheel next to Color.
-
The Color window will appear.

-
Toggle through the options at the top for different color selector tools.
-
Select your desired color.
-
As you make a selection, the progress bar color will adjust in the clip preview.
-
Tap back on the main Progress Bar window to close the Color window.
To change the background color of the Progress bar (the part of the bar that shows how much time is left):
-
Tap the round color wheel next to Background Color.
-
The Background Color window will appear.

-
Toggle through the options at the top for different color selector tools.
-
Select your desired color.
-
As you make a selection, the progress bar color will adjust in the clip preview.
-
Tap back on the main Progress Bar window to close the Background Color window.
To change the height of the Progress bar:
-
Drag the Height slider to the right to make the progress bar taller.
-
Drag the Height slider to the left to make the progress bar shorter.

Adding an Image
After tapping Add Image from the Layer menu, the Image window will appear with customization options.

To add an image overlay to the clip:
-
Tap Choose… next to Image.
-
Tap the location of the image.

-
Tap the image you want to import.
-
The image will appear in the center of the clip.

To customize the image overlay:
-
Drag the Size slider to make the image bigger or smaller. Alternatively, you can resize the image by pinching in (to make smaller) and out (to make bigger).
-
To reposition the image, tap and drag the image in the preview window to the desired location.
-
You can also use the Horizontal and Vertical and alignment options for easier positioning.

-
Adjust any of the other settings as desired.
-
Tap Add in the top right corner to save the image overlay.
Adding a Title
After tapping Add Title from the Layer menu, the Title window will appear with customization options.

To add a title:
-
Tap Edit Title.
-
The keyboard will become visible and a cursor will appear in the clip preview window.
-
Enter the title.

-
Tap back on the Title window to continue editing.
To customize the appearance of the text:
-
Tap Family to change the font. Available fonts are limited to the fonts on the iOS device.
-
To change the color of the text, tap the round color wheel next to Color.
-
The Color window will appear.
-
Toggle through the options at the top for different color selector tools.
-
Select your desired color.
-
As you make a selection, the title color will adjust in the clip preview.
-
Tap back on the main Title window to close the Color window.
-
-
To resize the text, drag the Size slider to make the title bigger or smaller. Alternatively, you can resize the text by pinching in (to make smaller) and out (to make bigger) in the preview window.
To add a background to the title:
-
Under Background, tap the round color wheel next to Color.
-
The Background Color window will appear.
-
Toggle through the options at the top for different color selector tools.
-
Select your desired color.
-
As you make a selection, the background color will adjust in the clip preview.
-
Tap back on the main Title window to close the Color window.
To change the location of the title within the clip frame:
-
To reposition the title, tap and drag the text in the preview window to the desired location.
-
You can also use the Position - Horizontal and Vertical options for easier positioning within the frame.

When you are happy with all the settings, tap Add in the top right corner to save the title.
Adding Captions to a Clip with Speech Recognition
Beginning with version 8.0 of Switcher Studio, Clips has speech recognition functionality that makes it easy to automatically add captions to your clip. You can also edit the captions and manually import your own captions. We recommend using the Captions feature after you have created a clip and made all other customizations.
Step 1: Enable Voice Control on the Device
Prior to using speech recognition, you'll need to enable Voice Control and add your default language in your iPhone/iPad Settings:
-
Go to the Settings app.
-
Tap Accessibility in the main menu.
-
Under Physical and Motor, tap Voice Control.
-
Tap Set Up Voice Control.
-
Tap Continue.
-
Tap Done.
-
-
If the default language is incorrect, tap Language and select the correct language.
Once enabled, the toggle for Voice Control is green.

Note: Enabling Voice Control is a one-time requirement, so if you have already enabled Voice Control on the device, it's not necessary to do it again.
Step 2: Apply Speech Recognition to the Clip
To automatically add captions to a clip using speech recognition:
-
Go to the main Clips Editor for the clip.
-
Tap Video Library
-
Tap the recording that has the Clip.
-
Tap Clips in the lower left-hand corner.
-
Tap the name of the clip you want to add captions to.
-
Tap Edit to open the Clips Editor.
-
-
From the Clips Editor, tap Captions.

-
The Captions window will appear with customization options.
-
Tap Start Recognition.

-
The first time you use this feature, you will be prompted to give Switcher Studio permission.
-
Select the correct language. If there are no languages available, you will need to enable Voice Control and select a language (outlined in Step 1 above).
-
Tap Start Recognition.

Speech recognition will begin. How long it takes depends on the length of the clip. A 30-second clip will take approximately 10 seconds.
Once the captions have been generated, you will be taken to a Captions Editor. You will see the auto-captions below the video timeline (you may have to drag the timeline to see where audio/captions begin), and they will appear on the video preview.

Manually Adding and Editing Captions
You can manually add and edit captions directly on the video timeline in the Captions Editor.
-
Drag the timeline to the location where you want to add or edit a caption.
-
To add a caption:
-
Tap the white + button. Note: The + button is greyed out if captions already exist.
-
Tap in the text box that appears below the video.
-
A keyboard will appear. Type in the caption.
-

-
When you are finished adding the caption, tap OK in the top right corner.
-
Tap Save in the top right corner.
-
To edit a caption:
-
Tap and hold the caption text.
-
A menu will appear.

-
Tap Delete to remove the caption entirely.
-
Tap Edit to make changes to the text.
-
Make changes to the captions as needed.
-
Tap OK in the top right corner.
-
Tap Save in the top right corner.
-
-

Customizing the Appearance of Captions
You can change the caption font, color, size, position and other style options. To customize the appearance:
-
From the Captions Editor, tap the icon in the top right that looks like the letter A with a gear icon.

-
The Style Editor will appear.
-
Make adjustments as needed.
-
Tap Apply in the top right corner.
-
Tap Save when you are finished with all edits.
Creating & Editing Captions using SRT
If you prefer to create or edit captions using SRT, Switcher Studio offers that option.
-
From the Captions Editor, tap the "..." icon in the top right.
-
Tap Edit SRT.
-
An SRT editor will appear.

-
You can import an SRT file using the Import option.
-
Or, you can manually make changes by tapping on the text.
-
Tap Save in the top right corner when you're finished.
Renaming the New Clip
By default the name of the clip will be based on the date of the recording with a suffix. To make it easier to identify the clip, you can rename it. These instructions are for renaming a clip immediately after creating it. For instructions on editing a previously created clip, go to Viewing & Editing a Clip.
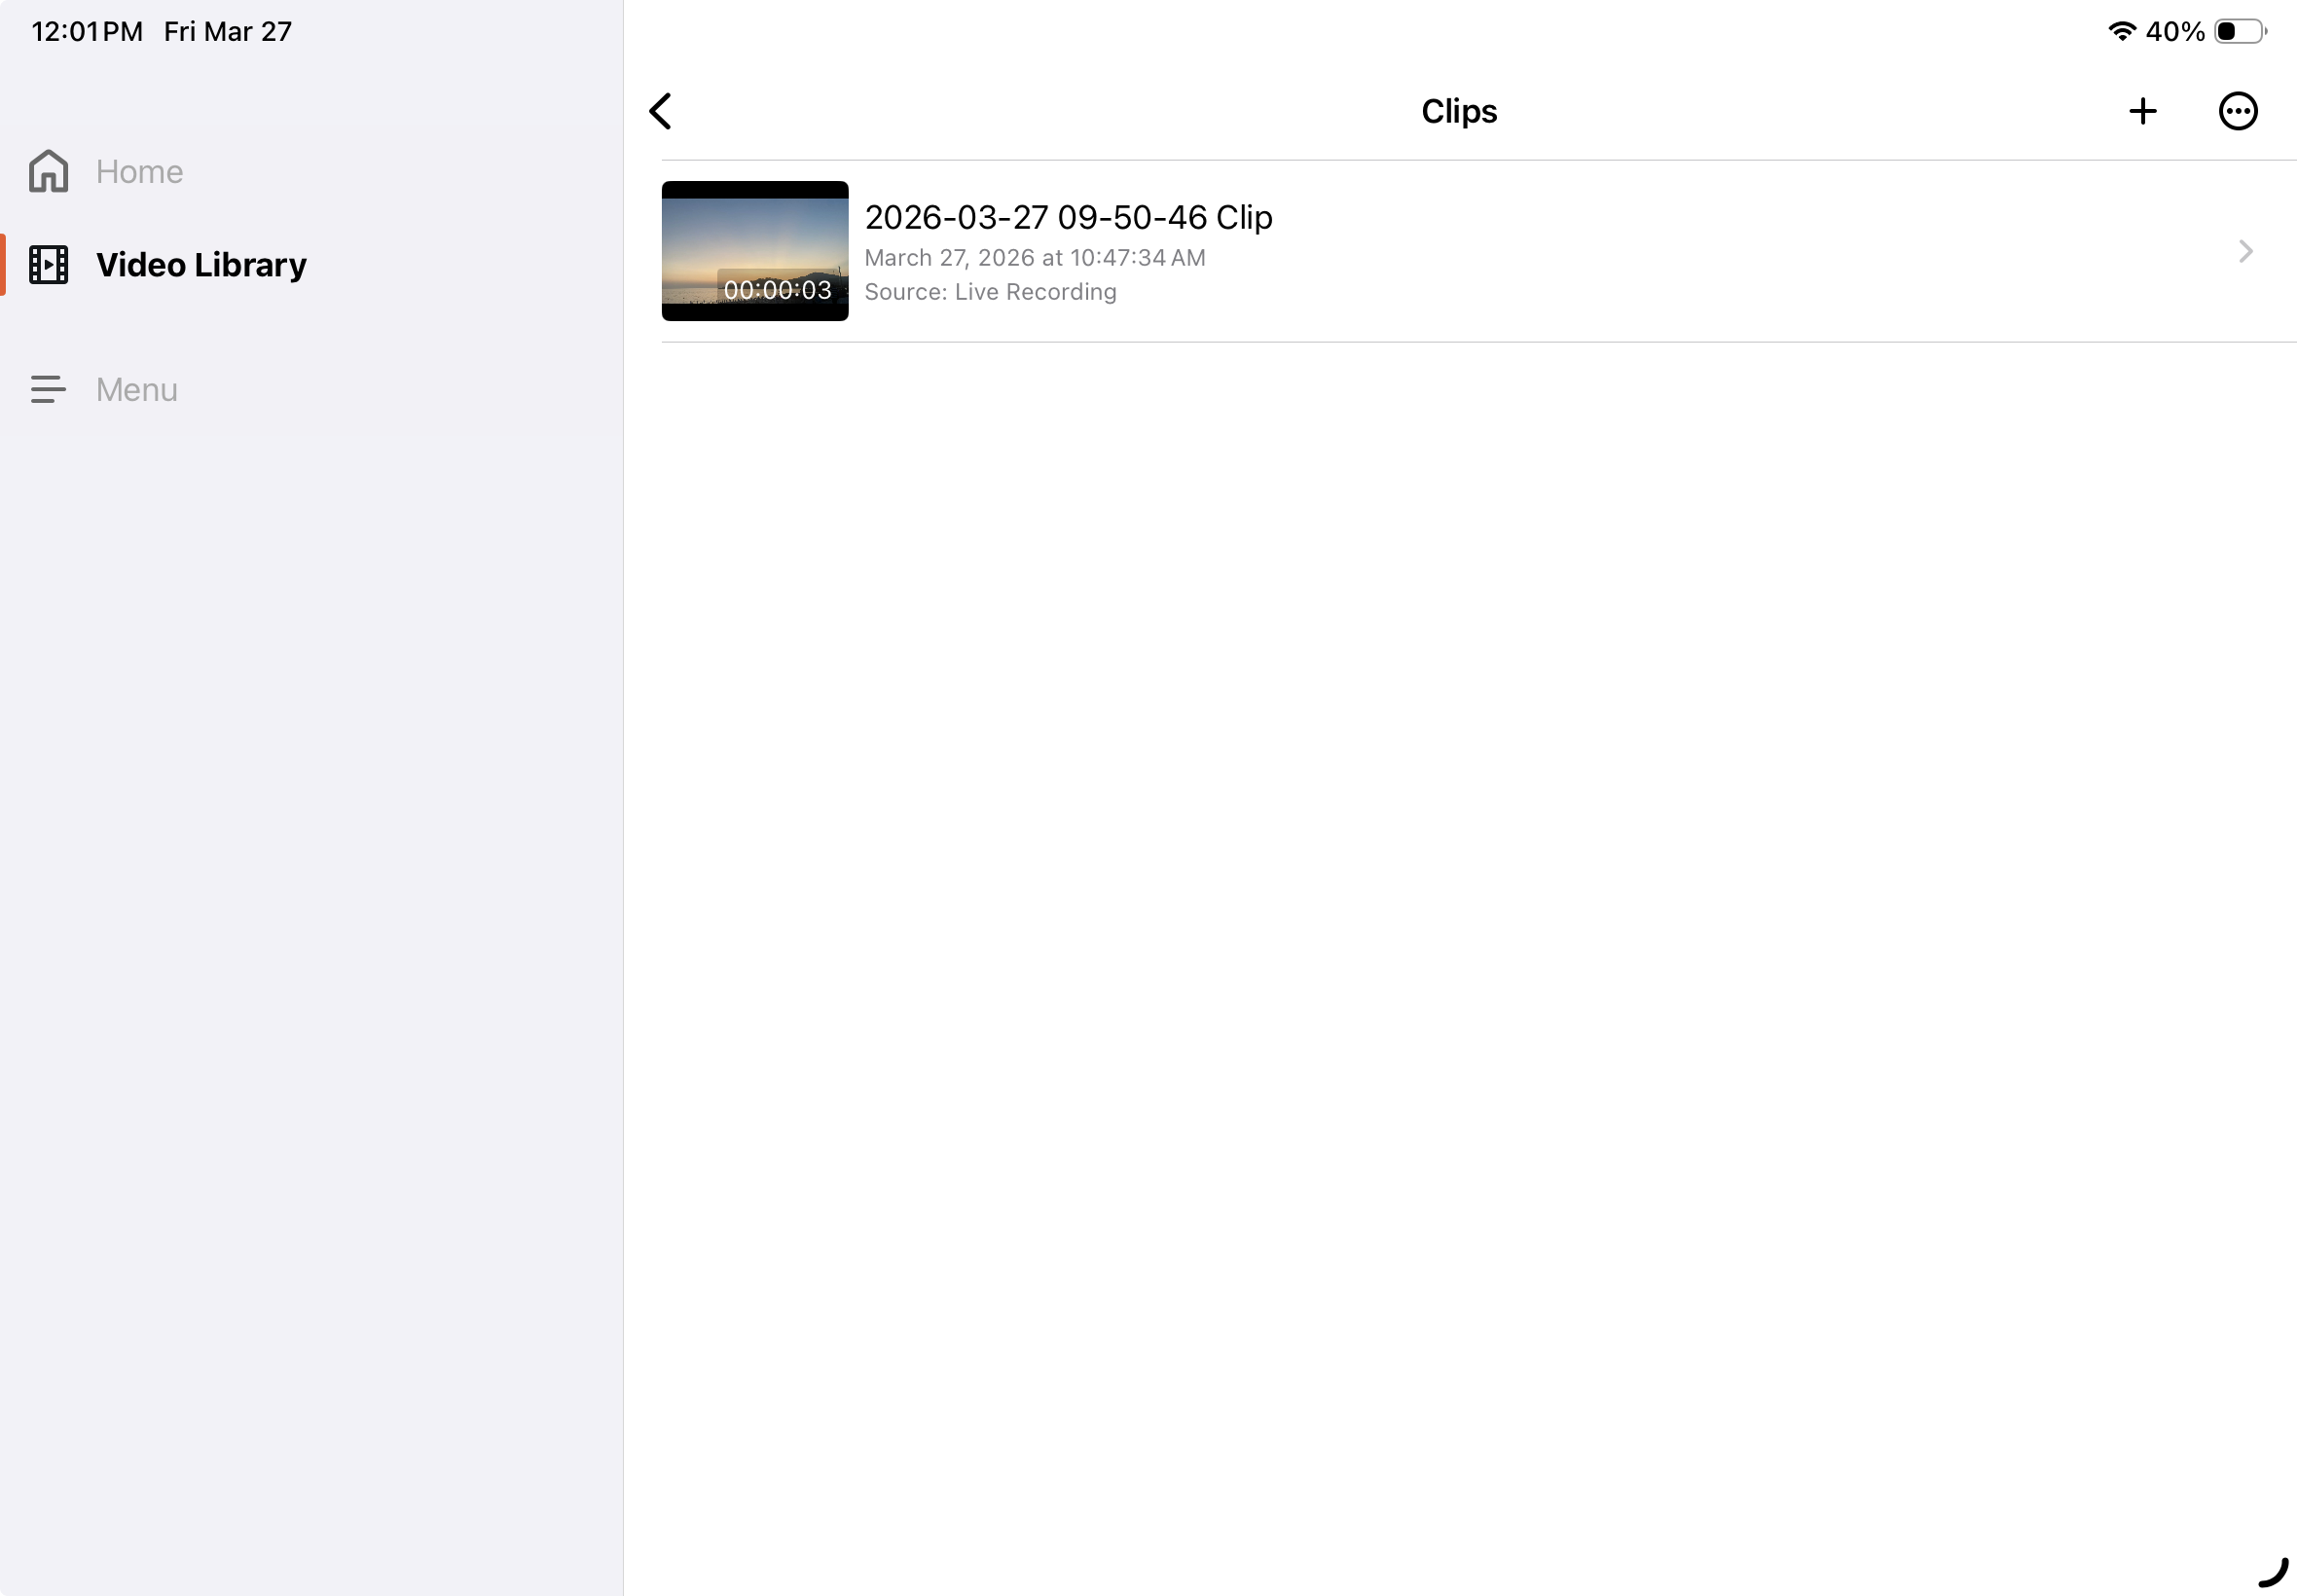
After you create a new clip, you will be taken back to the List of Clips.
-
Tap clip you want to edit under Clips.
-
Tap the Ellipses (...) in the top-right corner.
-
Tap Rename.
-
Type the new name.
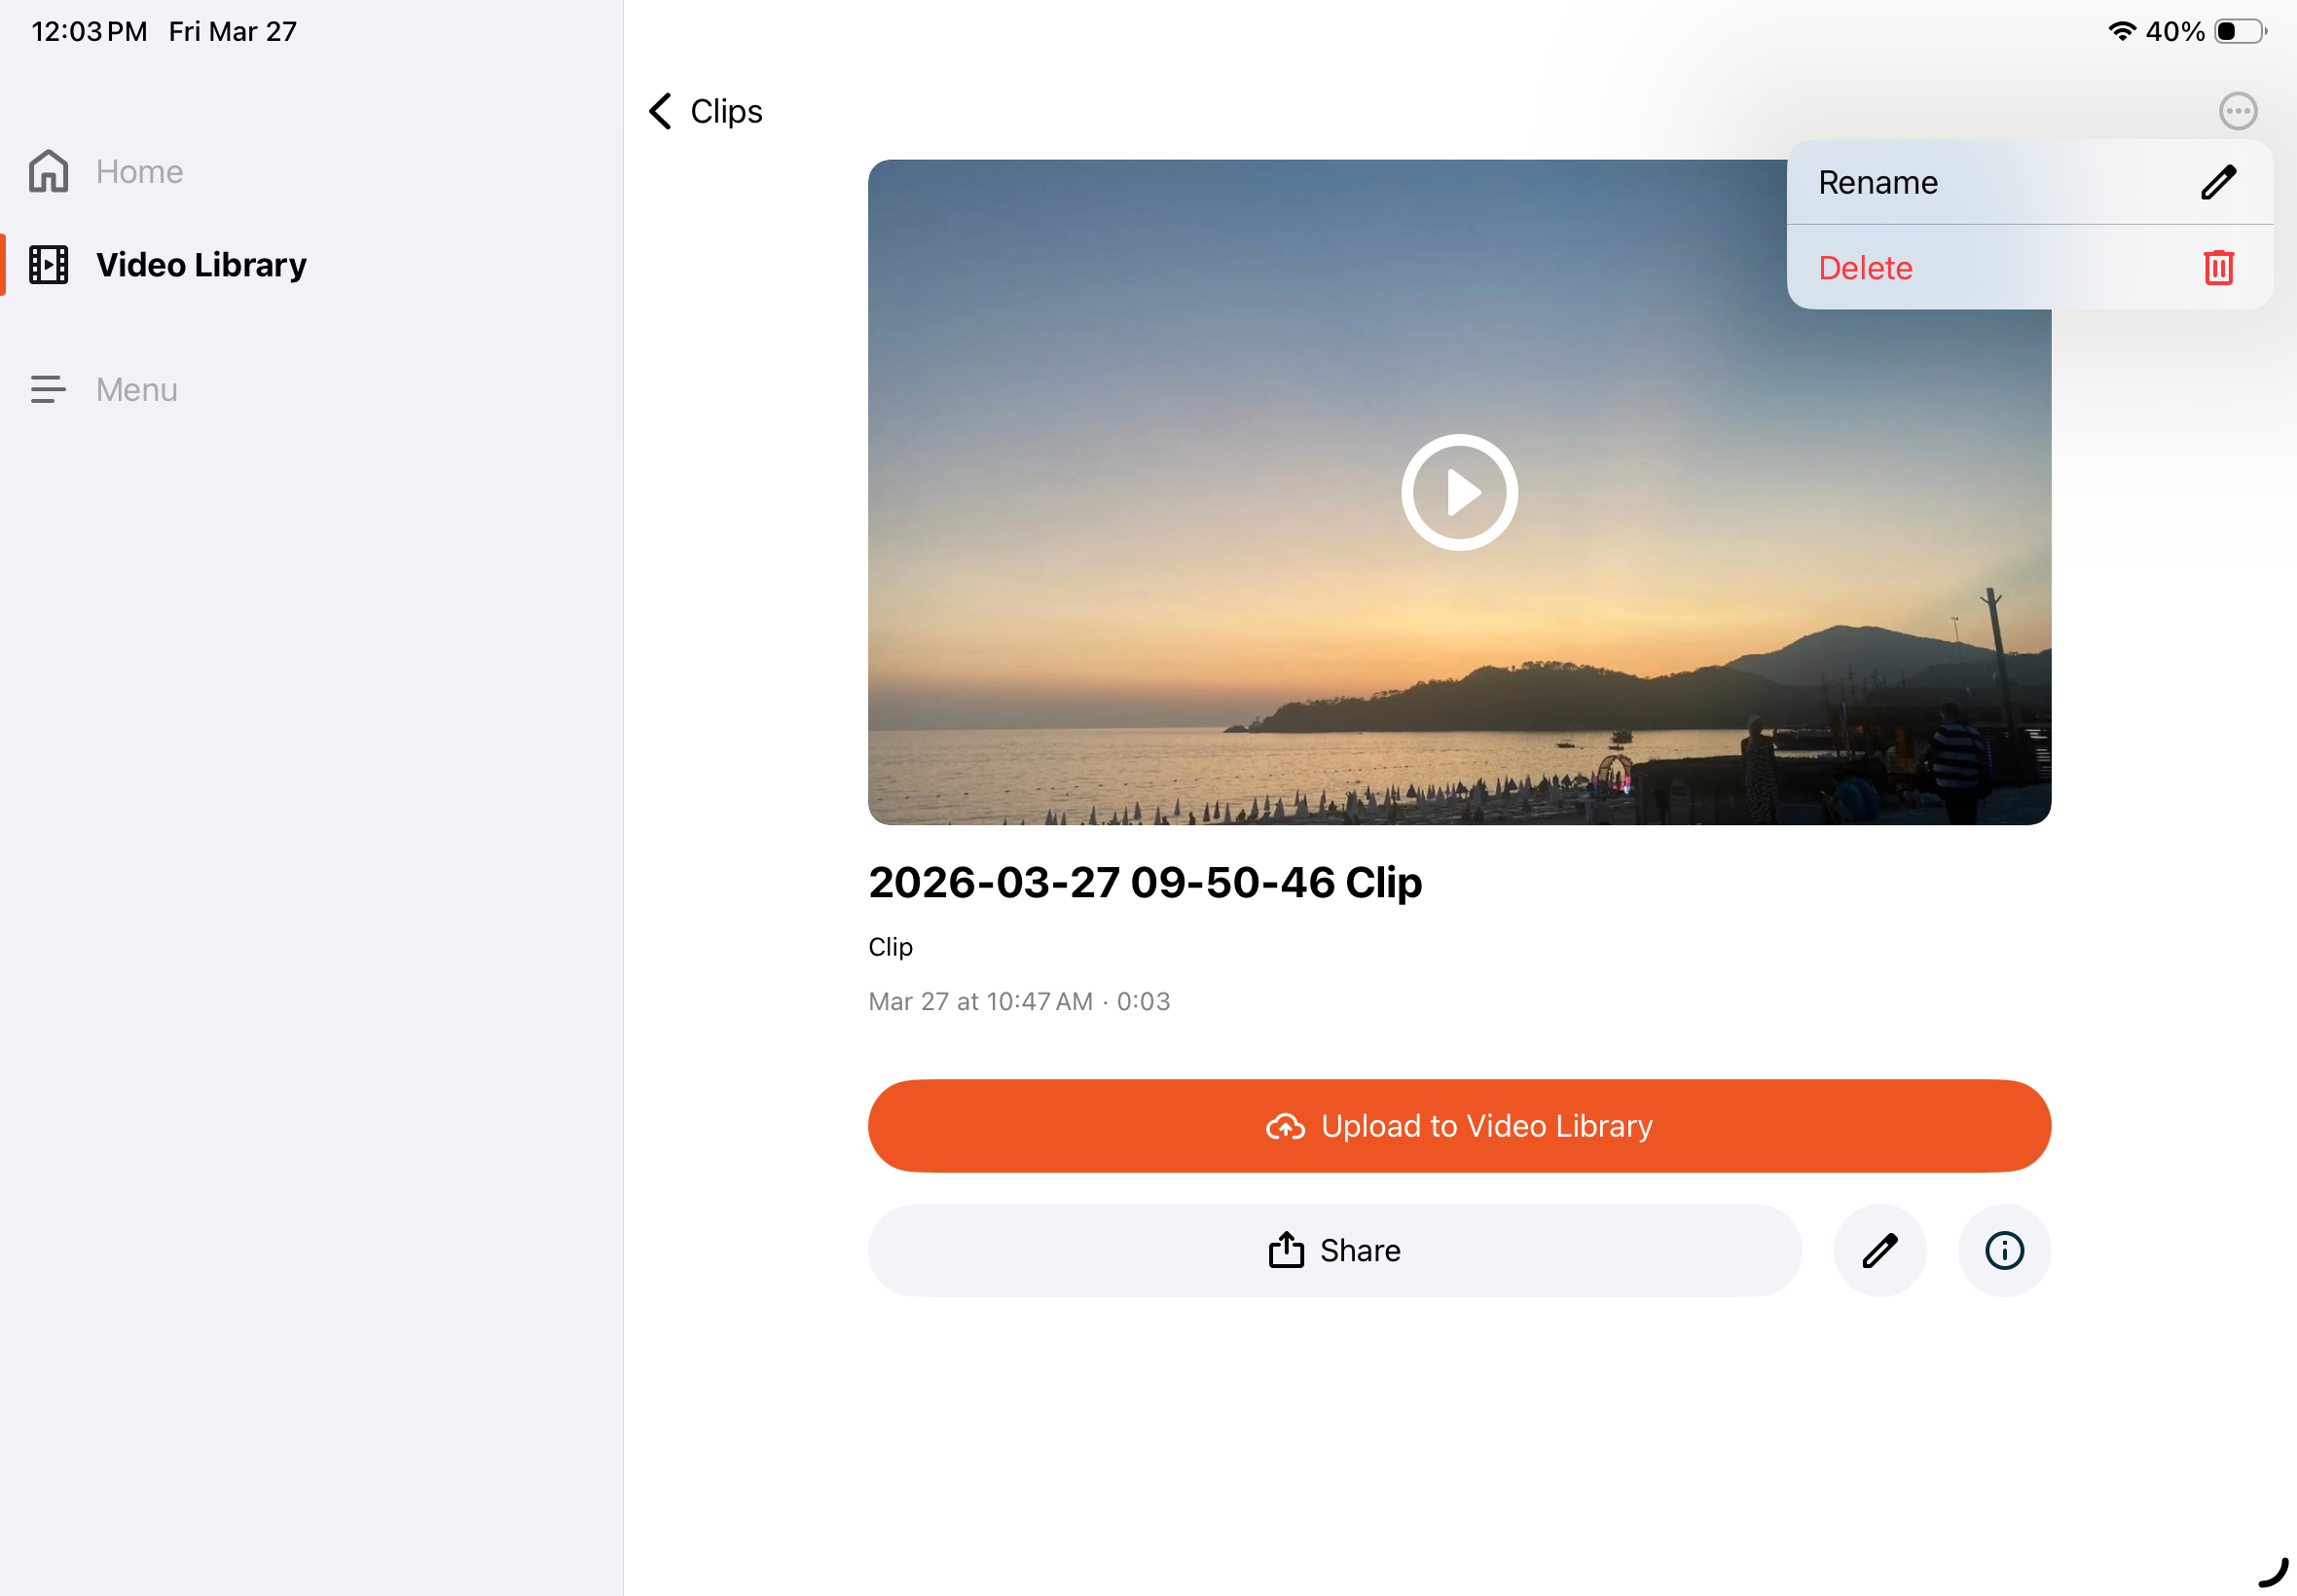
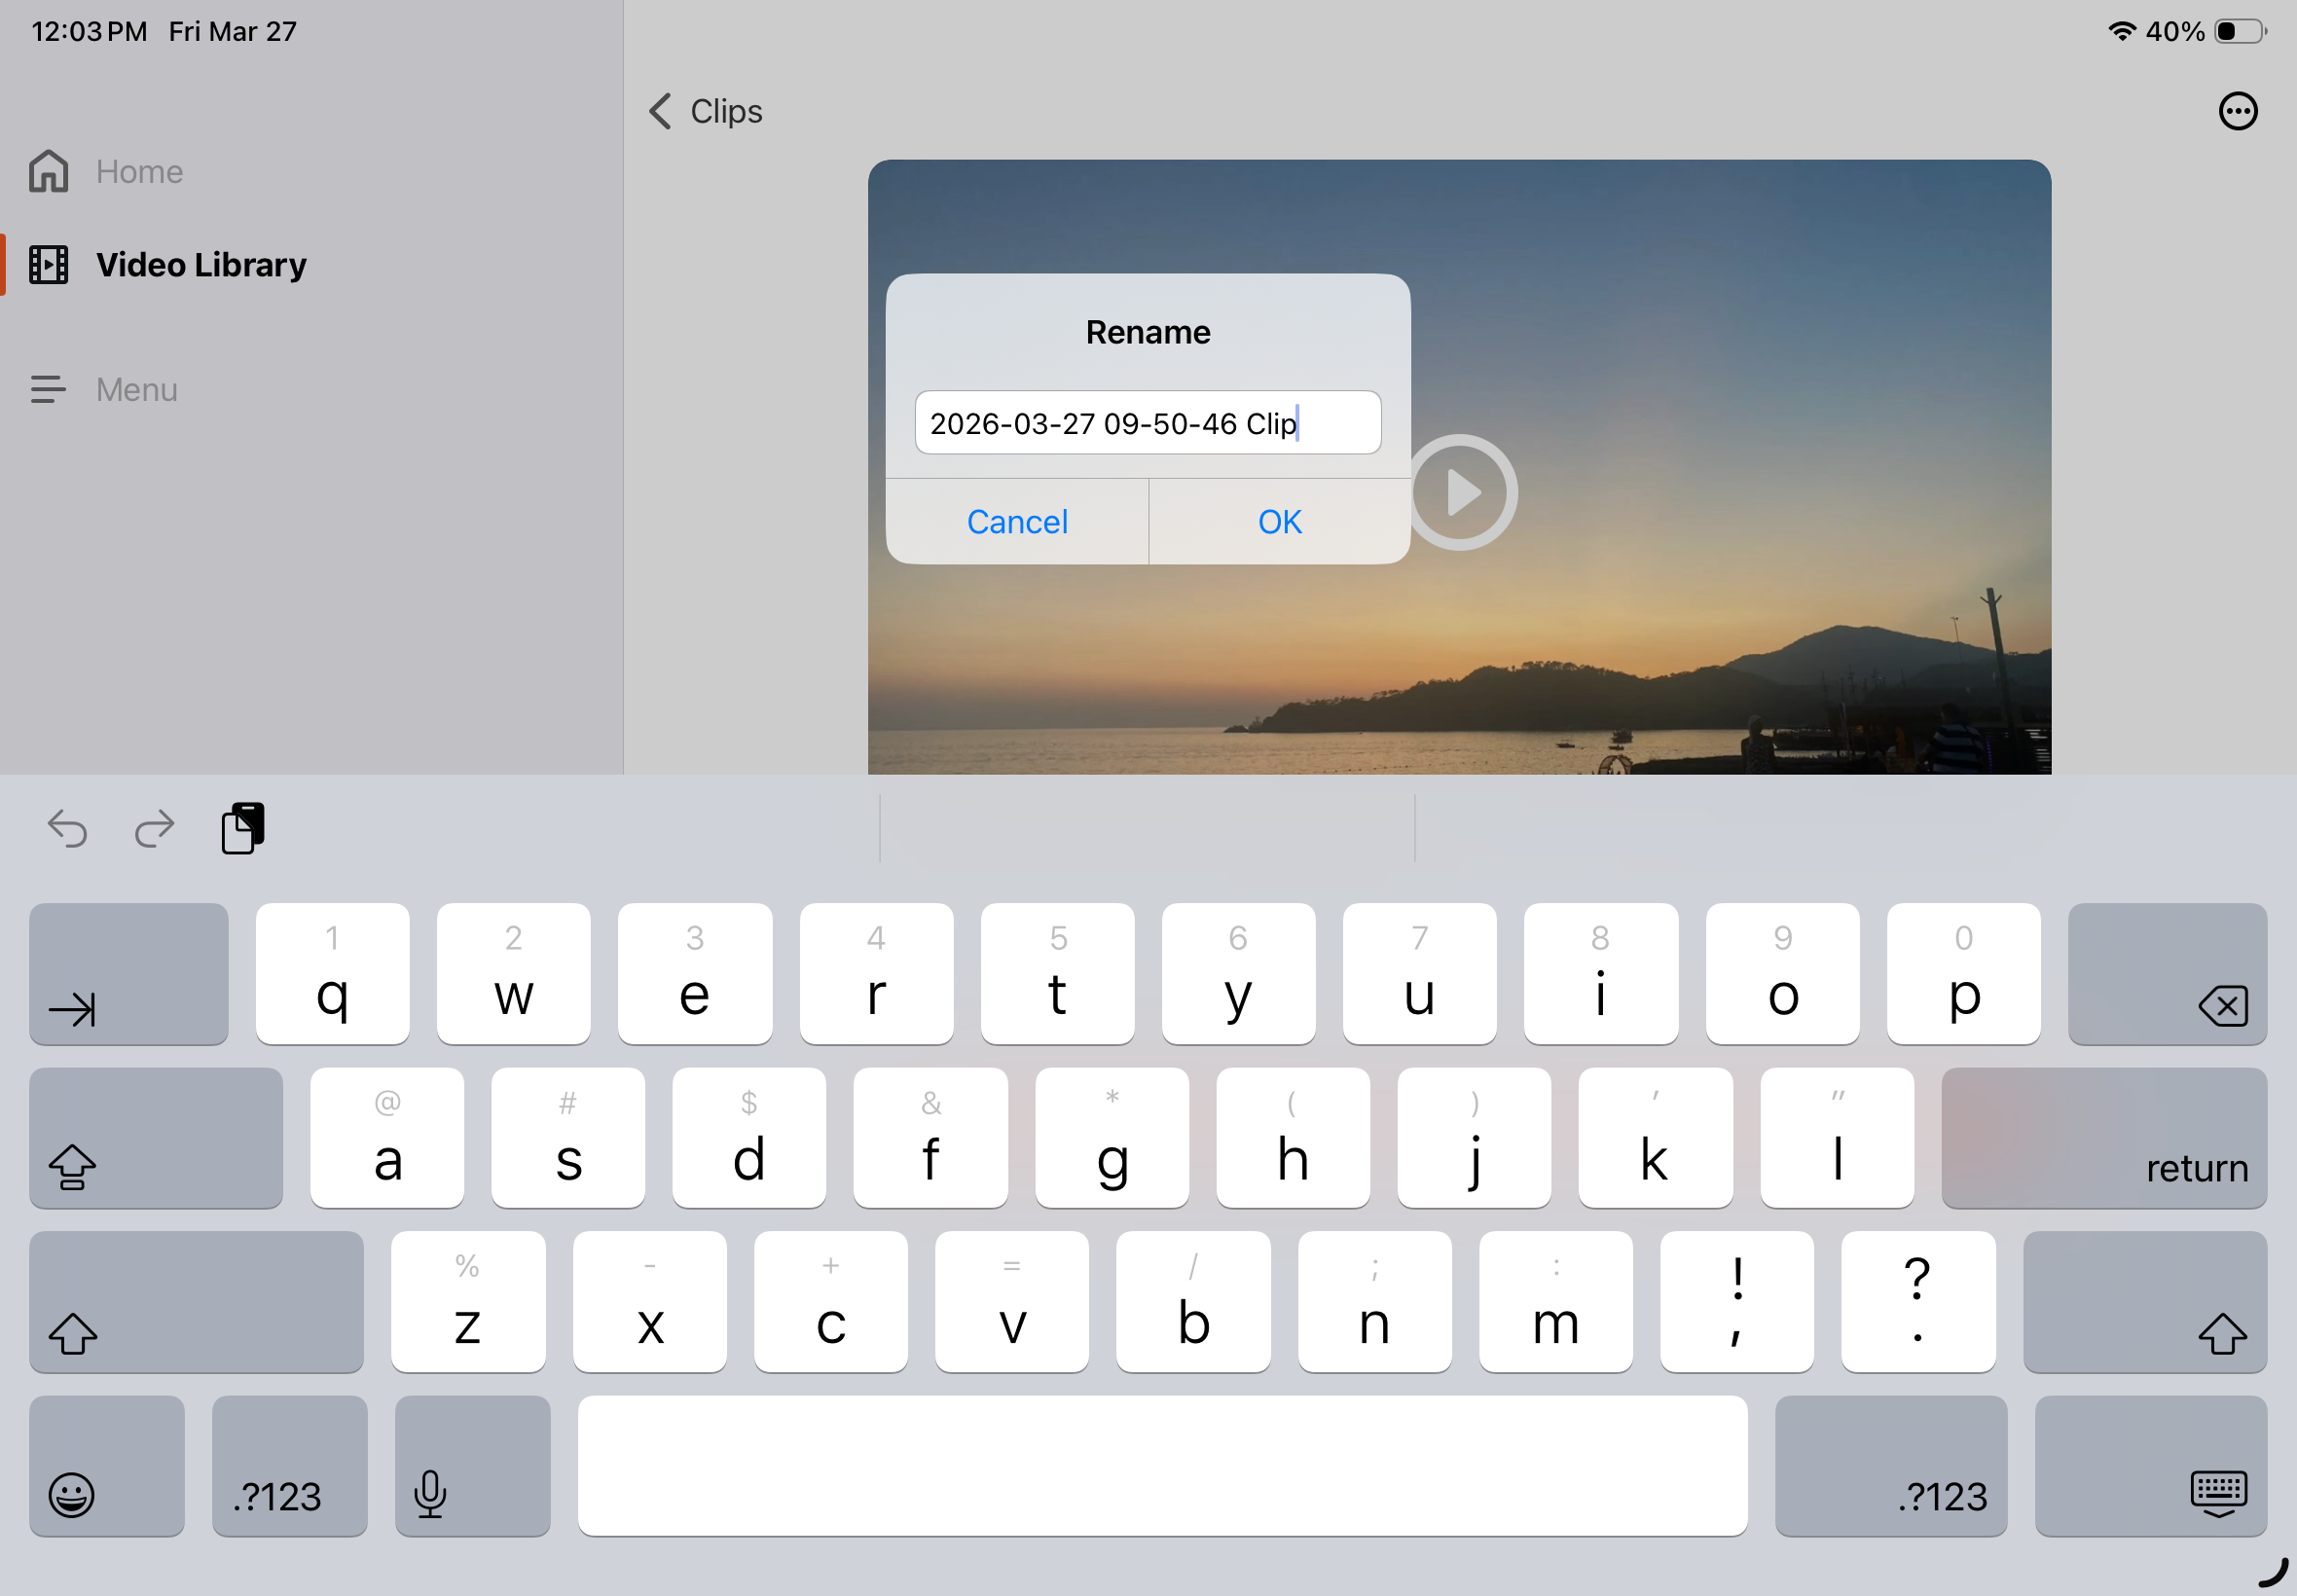
Tap Ok to save.
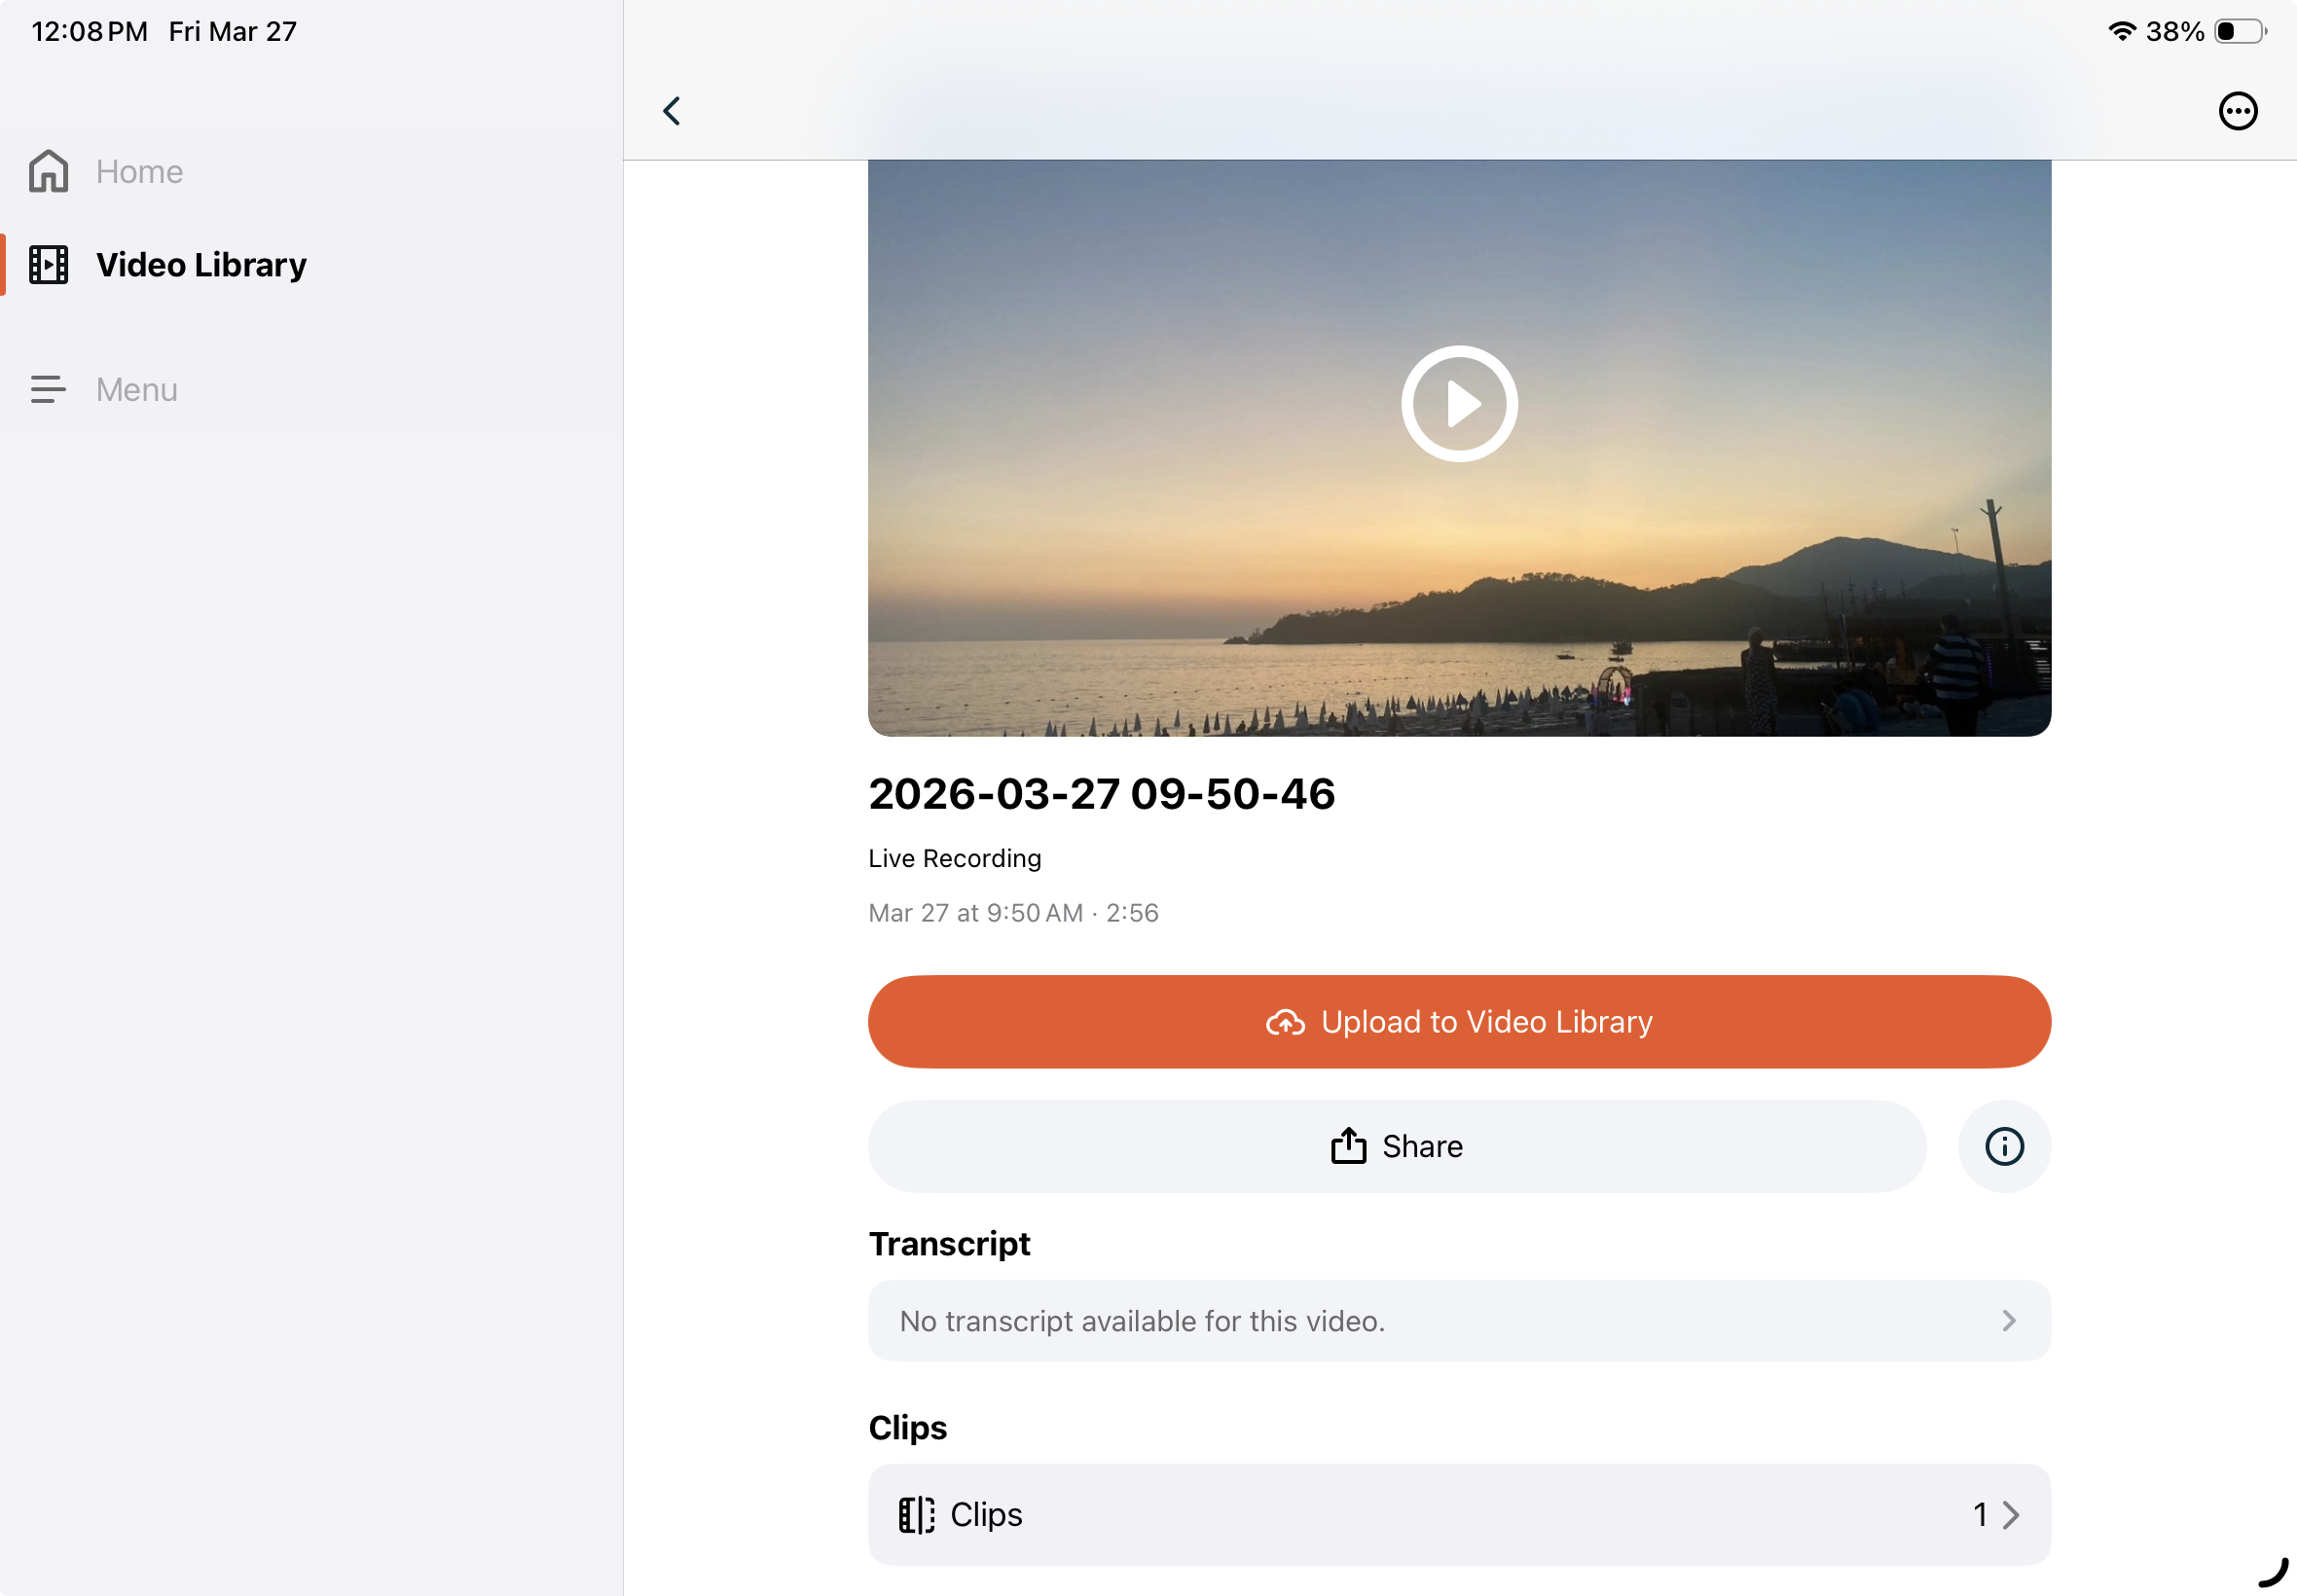
If you go back to Local Recordings and tap on the original video, it will show there is one clip.
Exporting or Saving a Clip
-
Open Local Recordings
-
Tap the recording with the clip you want to view.
-
Tap Clips at the bottom.
-
Tap the name of the clip you want to view.
-
Tap the Share button (box with an arrow pointing up).
-
Choose how you would like to share or save the video clip.
-
Follow the prompts based on your selection.
Related articles: